Welcome the Pot Prof’s complete guide to growing weed!
Stage 1, Part 2: How to setup a grow room and grow tent (low & high budget)
We are currently living in the golden age of indoor cannabis grow rooms. Never before has it been so easy and cheap to set up an effective grow tent in your home. Today, there is a vast range of grow tent kits, grow lights, and all other imaginable growing equipment available on the market. Many of them are affordable, and most of them are easier to assemble than IKEA furniture.
Do you need to buy expensive equipment to get started? Good question. I once heard a grower say that “a grower is only as good as their equipment.” There is a lot of truth in that statement. Like a painter with a fraying brush or a chef with a dull knife, a cannabis cultivator with a low wattage grow light can only do so much with their growing skills no matter how much experience they have.
But do not worry! Even without a fancy paint brush or an expensive knife, a painter can still create wonderful paintings and a chef can still create fabulous feasts. Similarly, as a grower, you do not need a high end grow light or an expensive carbon filter to grow marijuana. While it does help to have better equipment, you can still grow a lot of weed with low budget equipment.
Links to check out other stages of this guide:
- The Beginning: The 3 Stages Of Growing Cannabis
- Stage 1: Grow Room, Nutrients, Seeds And Germination (<– You are in this section!)
- Stage 2: Vegetative And Flowering Growth
- Stage 3: When And How To Harvest Marijuana
WHAT DO I NEED TO KNOW?
Buying seeds requires a bit of research as well as being savvy with various payment methods and international shipping.
- This section covers:
- Grow set-up overview
- How grow systems work
- Overview of required equipment
- Temperature, humidity, lighting, construction, storage, air flow, odor control and ventilation
- How to choose a grow space
- How grow systems work
- Example Grow systems
- $300 Low-budget: only the basic necessities
- $3500 full-capacity: professional grade, advanced grow system
- How to set up a grow tent
- Assembling a grow tent: step-by-step
- Grow set-up overview

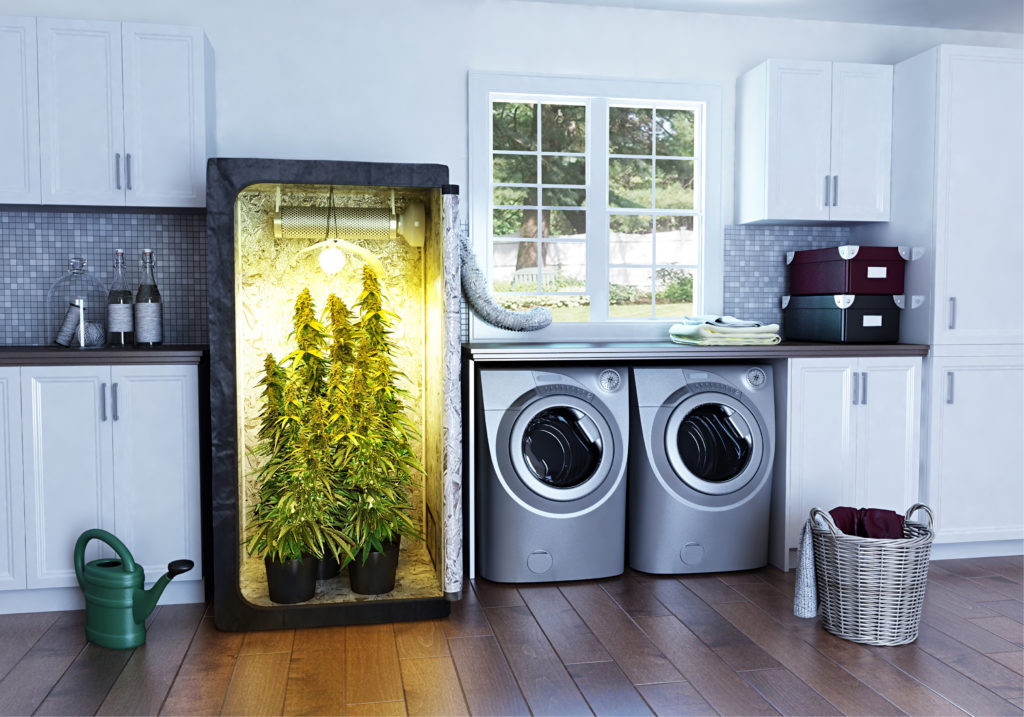
Why Do I Need A Grow Tent? Can’t I Just Grow Weed In My Closet?
Quick Answer: Sure! But there are better options available…
Growing weed in a regular closet is an age-old tradition. People have been growing weed in their closets probably since the invention of closets. After all, closets are the perfect size and they are closed off from the rest of the home. But closets have many problems: poor ventilation, dirty floors, poor temperature and humidity control, limited customizability, reduced light reflection, poor odor control, moldy walls… the list goes on.
Before the advent of contemporary low-cost grow tents (AKA back in the ’90s), growing in a closet was the standard method for home growers. Today, cheap grow tents offer vast improvements and will pay off almost immediately in saved time and reduced property damage.
Basically, why ruin your walls and make it harder to control temperature, humidity, air flow, and odors, when you could buy a simple grow tent for the cost of an ounce and save yourself a ton of hassle? It’s a no brainer: buy a tent, grow good buds, and keep your closets mold-free!

Instructions
How To Setup A Grow Room And Grow Tent
1. How Grow Tents Work

An Overview Of How Grow Rooms Work & Equipment
Modern grow rooms bring a level of convenience to indoor cannabis growing that previous generations could only dream of. As I mentioned above, growing equipment used to be much more expensive, and setting up and maintaining a grow room required far more craftsmanship, growing experience, time and effort than it does today.
The general purpose of a grow tent setup is to provide an ideal environment in which your cannabis plants can grow from seedlings into mature, flowering cannabis plants. A good grow room will reduce the amount of work it takes for you to manage your garden while ensuring that your plants are as happy as they can possibly be. It will also provide a closed, controlled space so that you can balance humidity and temperature effectively.
Grow Room Equipment: What You Need To Build A Grow Tent
Grow rooms can be built in almost any space that is big enough to hold a marijuana plant. However, no matter where grow rooms are housed, they all contain basically the same sorts of things: fans, lights, carbon filters, etc.
At the bottom of each section below, you will find a list of equipment for that section. For a more in-depth look at the various options available for grow room equipment, including options for lower budgets and more advanced grow systems, check out the equipment page.
How A Grow Tent Works
As you can see from the equipment list above, there are many styles of grow tents available, but they all generally have similar elements. I am going to focus on the most simple grow tent setup in this section and cover some of the ways in which you can customize and enhance your grow tent later on below.
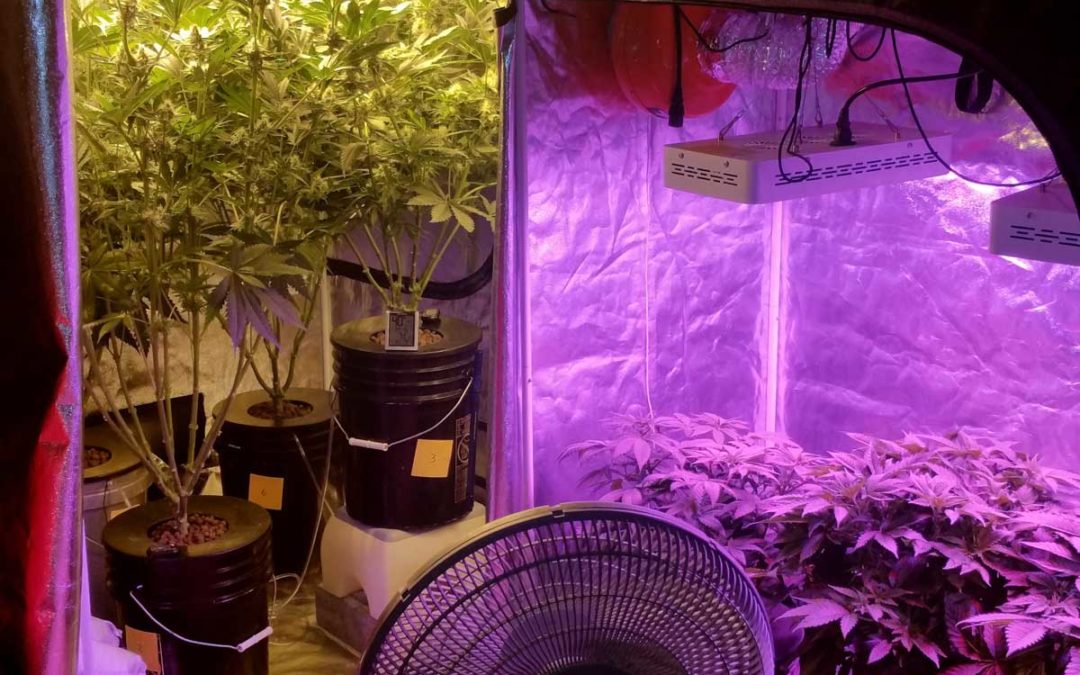
For the purposes of explanation, imagine a basic grow setup similar to this:
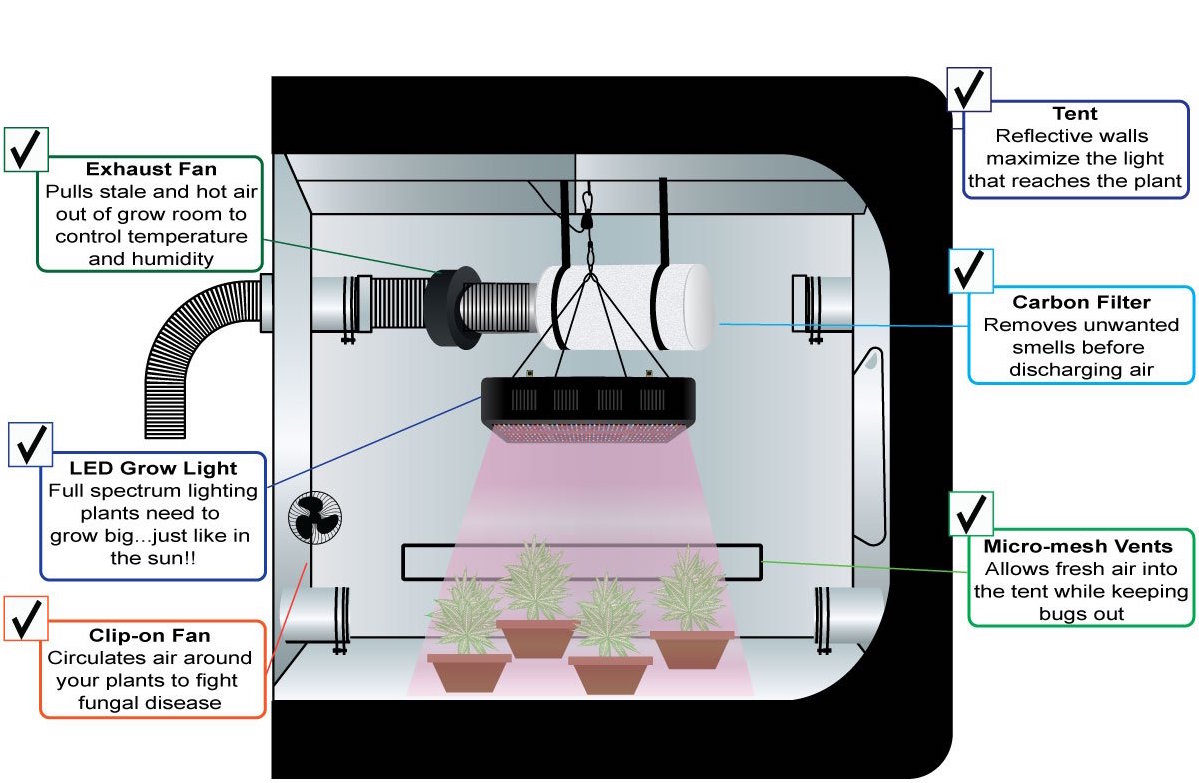
1. Grow Tents, Fans & Air Flow
First, let’s talk about air flow. The air inside of a grow tent is constantly circulating so that your plants receive the most CO2 (carbon dioxide) as possible. In general, the goal is to make sure your plants always have fresh air moving around them. Unlike other plants, cannabis responds best to a gentle breeze, so it’s important to make sure the the air is not blowing too hard on them but not standing still either.
To do this, grow tents generally have an intake fan at the bottom of the tent near the floor that pulls fresh cool air into the tent. The intake fan also pushes the air across the bottom of the tent and through the rows of marijuana plants. The movement of air through the tent creates negative pressure, and that negative pressure pulls more fresh air in through mesh side vents along the bottoms of the walls.
As the CO2 is absorbed by the plants, they undergo the dual processes of photosynthesis and respiration. The by products of these processes are O2 (oxygen) and H2O (water). The plants will “breathe” O2 and H2O out of their leaves, which adds humidity to the inside of the tent. This humid air is heated up by the grow lights and naturally rises to the top of the tent, where it is expelled by an exhaust fan. Some tents will have two exhaust fans, one on the ceiling of the tent and the other at the top of one wall.
Below is a diagram of what this looks like (ignore the measurements):
Grow Tent
Grow tents create a closed-off, controlled environment that allows growers to manipulate airflow through around the plants more intensionally. Grow tents also give growers more control over other variables such as temperature, humidity, and light. Their reflective walls deliver light to the entire plant and their purposefully built vents and openings allow only the light and air you want inside.
An often over-looked benefit to using a grow tent is their ability to create a sterile internal environment for your plants to grow in. Cannabis plants, like many other plants, attract all kinds of bugs, bacteria, and other unwanted critter. Grow tents cut down on the plant’s exposure to these pests and keep other dirt and dust away from those precious buds.
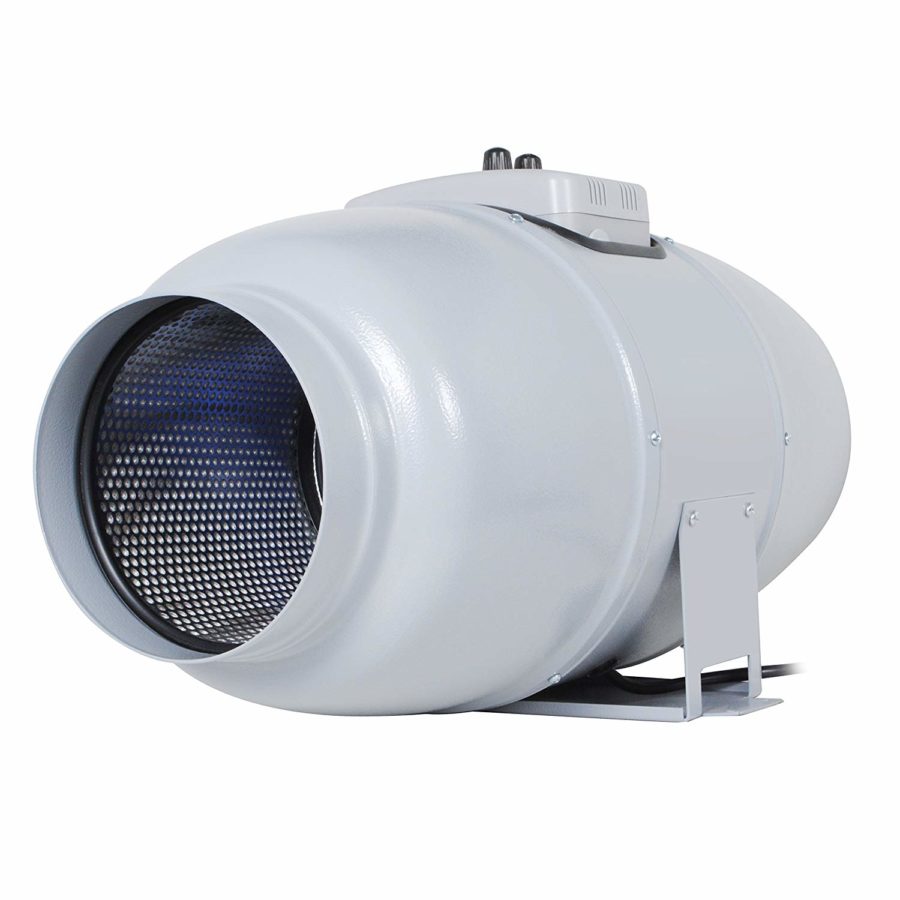
Inline Fans
Fans bring in fresh air from the outside of the tent and push our used air from the inside of the tent. These fans are often called ‘inline’ fans because they are often connected to tubing and other equipment such as carbon filters, creating a ‘line’ of equipment through which air moves.
There are two types of inline fans: intake fans and exhaust fans. Intake fans bring air into the tent while exhaust fans pull air out of the tent. Make sure you get the right fan for the right purpose, as some fans are specifically built for only one of these two use cases.
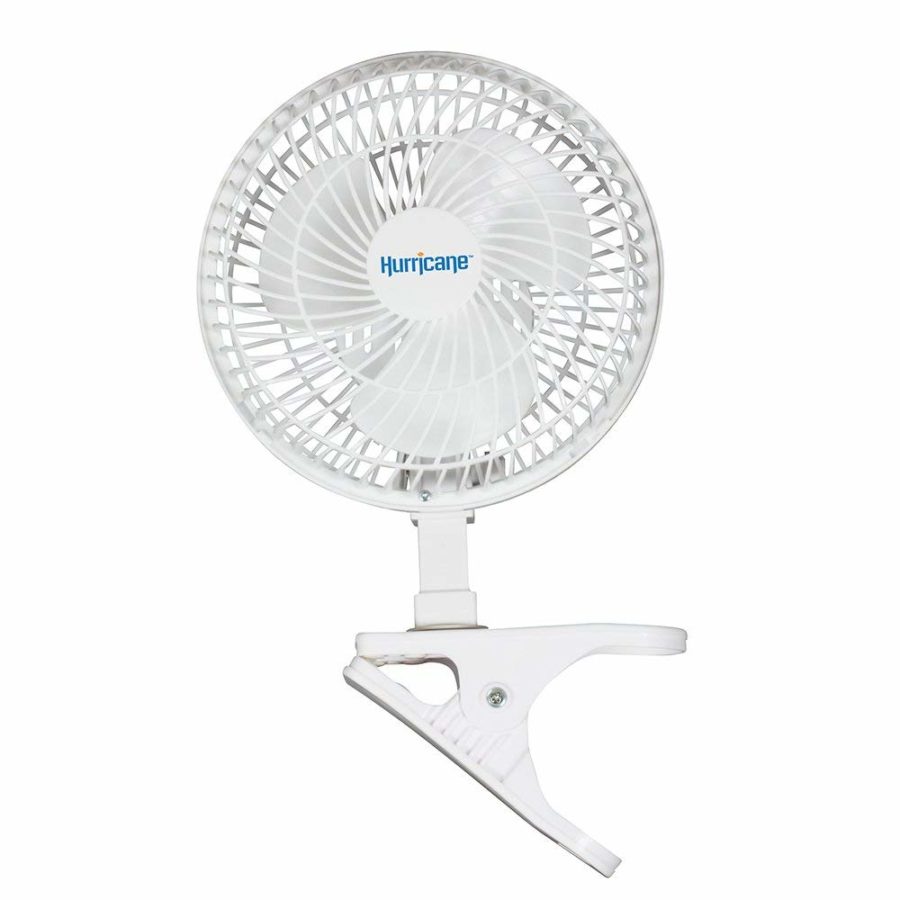
Clip Fans
Grow tents may also have a few clip-on fans placed at strategic points throughout the tent to keep air moving. It is generally a good idea to have at least one or two of these cheap clip fans, since the intake fan is often not powerful enough to keep air circulating all by itself.
(Note: these clip-on fans are super cheap, so when in doubt, pick up a few. Many grow rooms will have 4 or more of them, one on each wall or in each corner of the tent.)
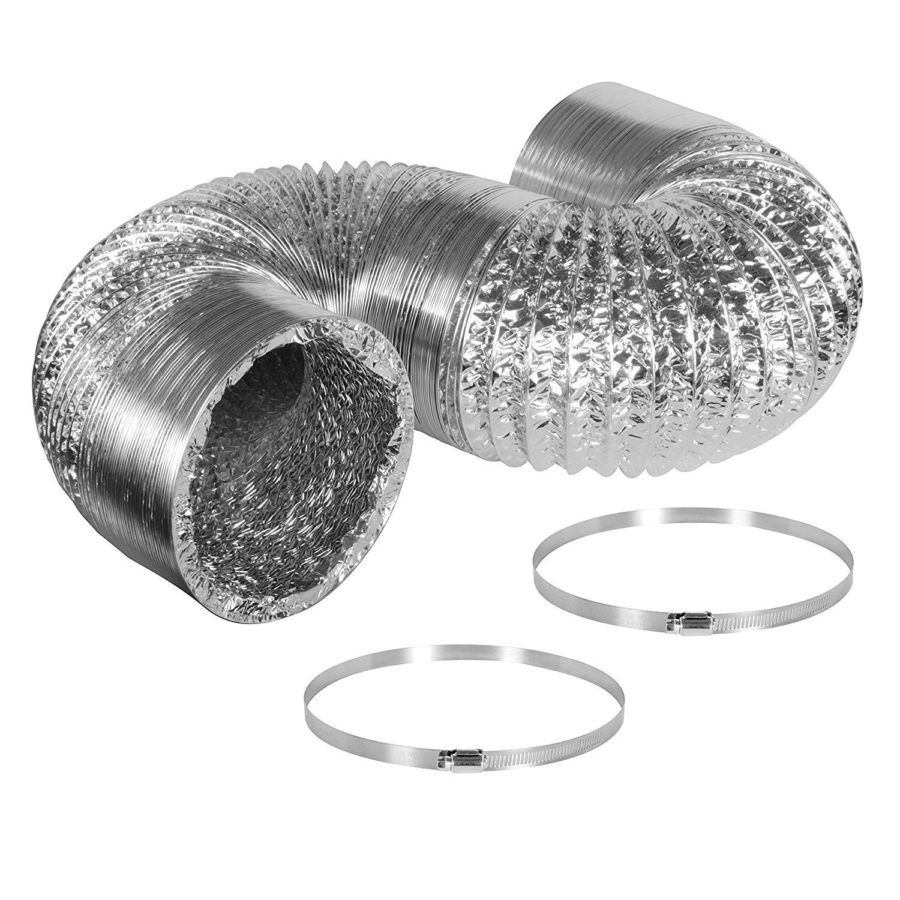
Aluminum Ducting
Aluminum ducting is used to extend the reach of fans and to connect appliances together. Many grow tents require some amount of ducting in order to assemble them, while ducting is optional for others.
Ducting insulates the air as it moves through the tent, preventing heat and humidity from escaping, while also maintaining the suction pressure generated by the fans. Make sure to explore the options since there are a wide range of aluminum ducting and some can be surprisingly fancy for what is essentially a long metal tube.
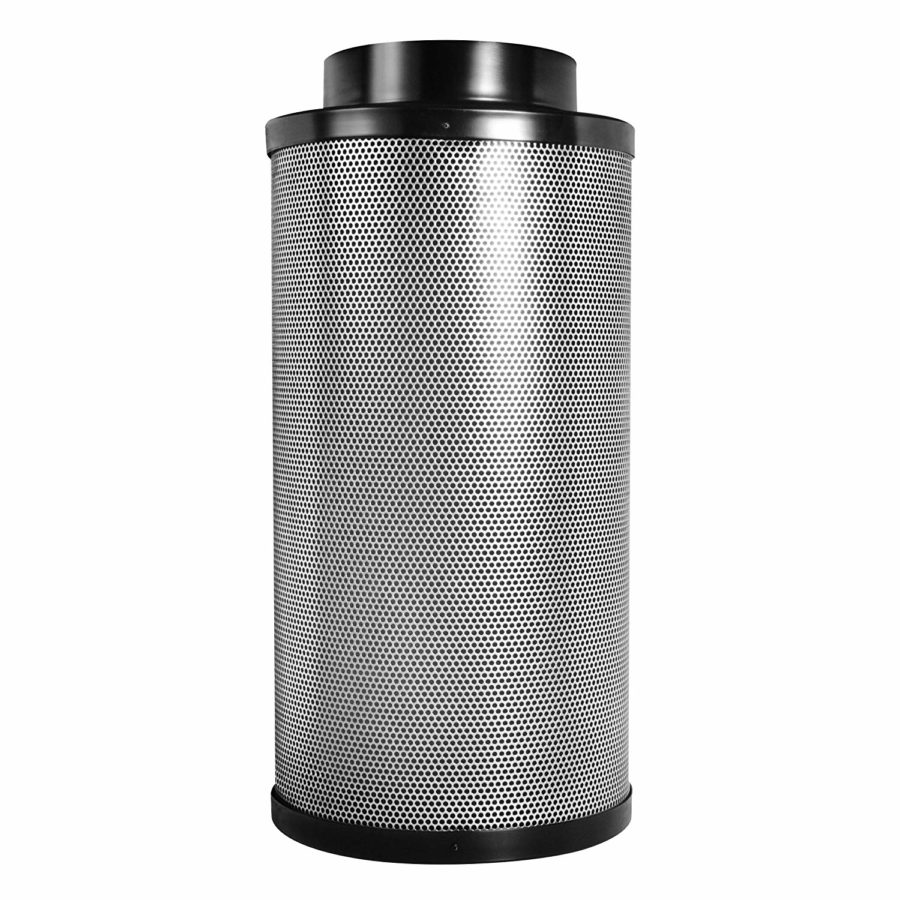
2. Carbon Filter

With air circulating evenly and constantly through the tent and then venting out through an exhaust fan, the pungent smell of skunky marijuana will likely begin to fill your home and surrounding neighborhood. That is where a carbon filter comes in.
Carbon filters are fine air filters built to remove microscopic particulate from the air. They effectively wipe the air clean of any odor before it leaves the tent, ensuring that the fragrance does not fill your home or upset the neighbors. This is a crucial piece of equipment for any grow room. Many grow operations have been shut down in the past due to the odor of marijuana upsetting cranky neighbors.
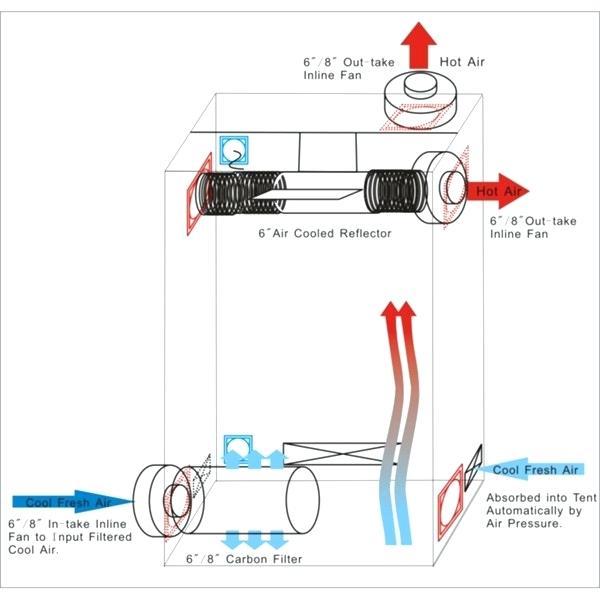
The bright red arrow below is pointing out the carbon filter in this grow setup. Note the way this person has arranged their airflow to move through the lights before venting out through the black inline exhaust fan at the top of the tent (this is a more complicated way of managing the heat of the lights, and is not needed if using LEDs. See the first diagram above for an example with LED lights):
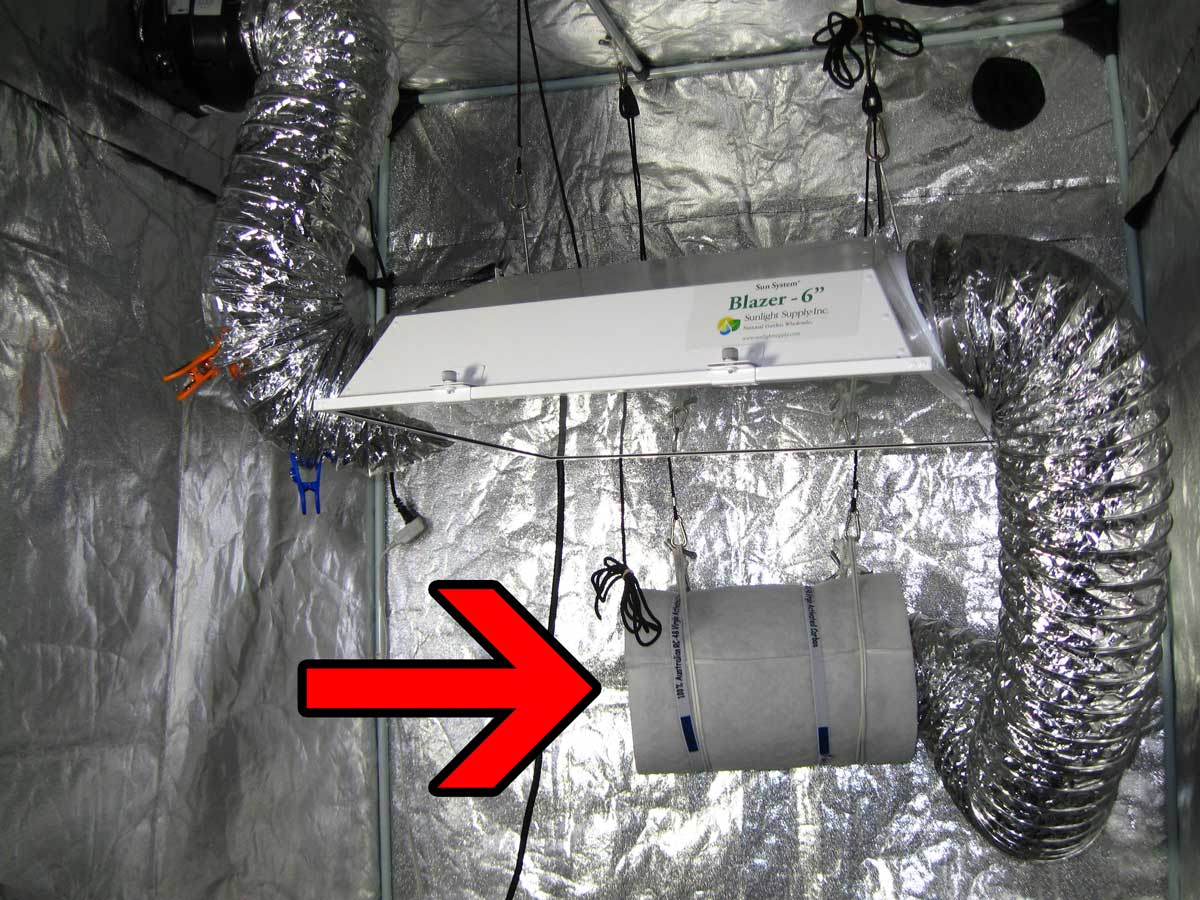
Carbon Filter
There are many different types of carbon filters, but they all do essentially the same thing: they filter out particles from the air and remove the smell of marijuana from the exhaust coming out of your grow tent.
Carbon filters are an absolutely necessary piece of equipment if you would like your grow operation to remain discreet.
Aluminum Foil Tape
There are many different types of carbon filters, but they all do essentially the same thing: they filter out particles from the air and remove the smell of marijuana from the exhaust coming out of your grow tent.
Carbon filters are an absolutely necessary piece of equipment if you would like your grow operation to remain discreet.
3. Grow lights
The grow light is the heart of any grow tent. Accordingly, grow lights are often the most expensive part of any grow setup. After all, without powerful lights, none of this would be possible.
The role of the grow light is to bathe the cannabis plants in UV and red light. Plants absorb red light and UV light, and reflect green and blue light, which is why plants look green to the human eye. That means that the most efficient grow lights produce only the spectrum of light that plants absorb and no other colors. Any energy that a light puts into green or blue light will be wasted, and the cost of the electricity that went into producing that wasted light can add up to a significant loss over time.
The most efficient type of grow light available are LED grow lights. The other popular type of grow light are called HPS lights, or high pressure sodium lights (see example above). In contrast with HPS Lights, LED lights are super energy efficient and only emit the wave lengths that cannabis plants absorb. They are also generally a bit more versatile than HPS lights, and the wavelengths can be adjusted to meet the needs of the plants as they grow. LED grow lights also emit less heat, meaning that they require less temperature control overall.
Grow lights are suspended above the plants in the grow tent via adjustable ropes with pulleys, hooks or clips. At first, when the seedlings are just starting to put on their first few inches of growth, the light is hung lower, close to the seedlings. As the plant grows, the lights are steadily raised up using the adjustable rope system. This ensures that the plants are always receive the correct amount of light at all times.
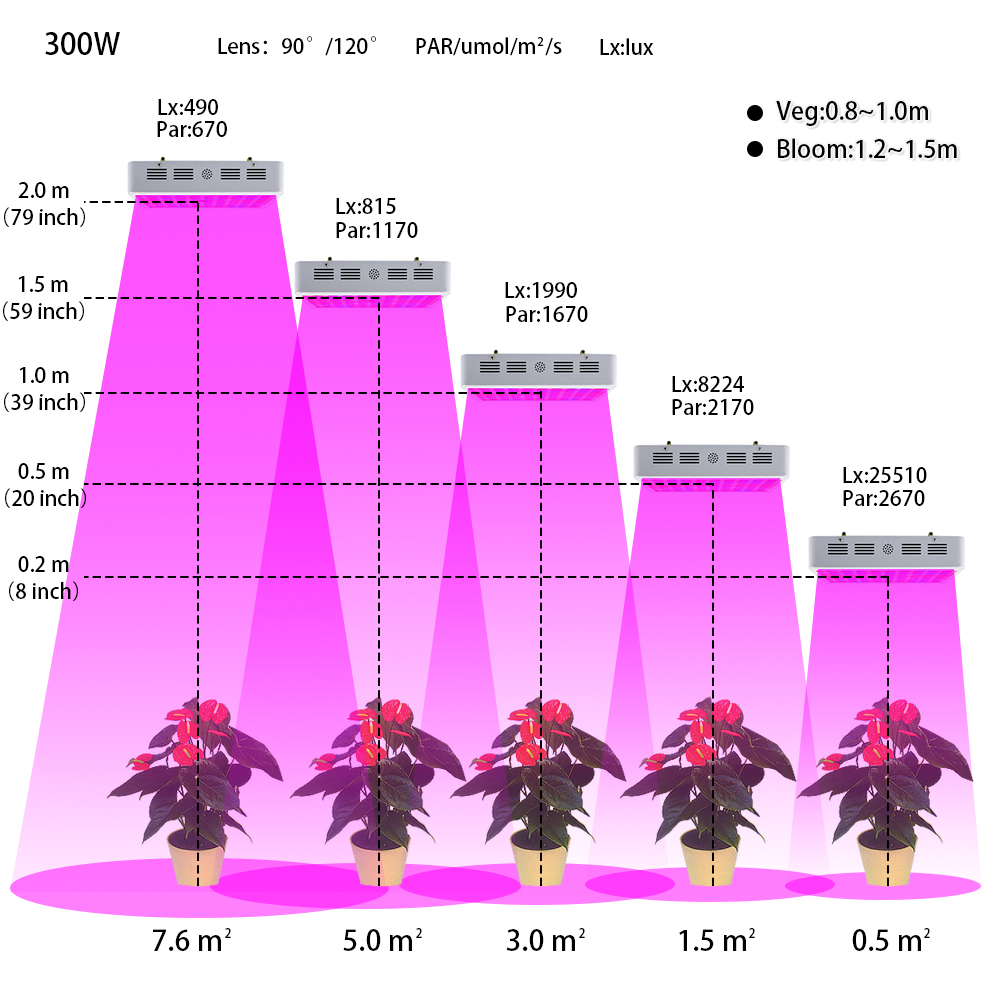
In the diagram above, you will notice that there are several different units of measurement involved in the calculations:
- W (watts)
- Lx (lux)
- Par (Photosynthetic active radiation)
- m (meters)
- inches (you guessed it, inches!)
- s (seconds)
- umol (micromol)
You don’t have to worry about these units too much at the moment (they will come into play later during the growth stage), but just understand that they allow you to quantify the amount of light that is hitting the surface of the leaves of the cannabis plants. Cannabis plants grow best when the amount of light provided to them is adjusted to the phase of growth they are in. During the vegetative phases, cannabis plants require more light than in the flowering phase. Therefore, a good grow light setup will allow you to easily adjust both the height of the light above the plants and the amount of light emitted from the grow light.
LED Grow lights
The grow light is the most important piece of equipment in your grow operation. Therefore, it is important to get a good one.
LED grow lights offer many advantages over their HPS counterparts. While they might be more expensive upfront, they will be cheaper in the long run.
That being said, there are dirt cheap LED grow lights for sale online. The cheaper LED grow lights may not last as long or offer the as many settings as the higher end LED grow lights, but they will absolutely be good enough to get you started on your growing journey.
Protective glasses
LED grow lights are extremely bright, and it is never a good idea to look directly at them. They also create a lot of glare in the grow tent. Light reflects off of the walls and any shiny surface, which can damage your eyes over time. Protective glasses are a must for any grower who would like to protect their eyes from damage.

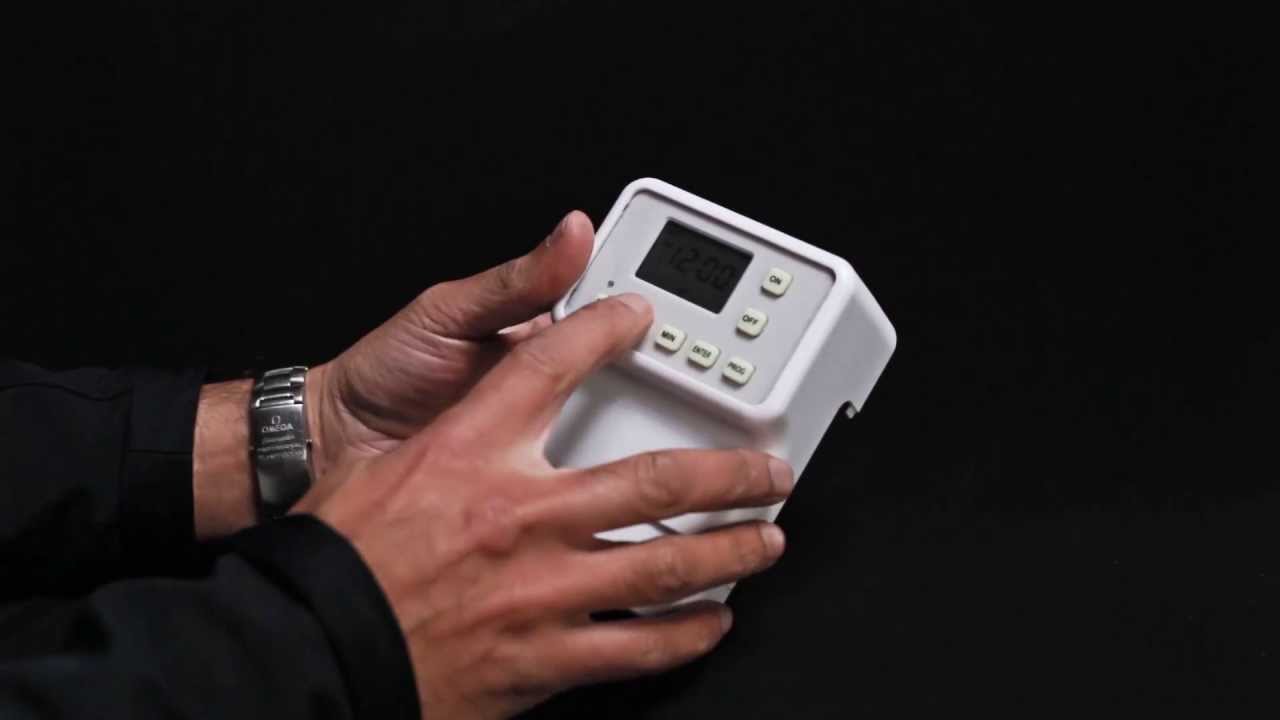
Light timer
Different types of cannabis plants grow best with different light schedules. Photoperiods are especially responsive to day & night schedules, such as 12 / 12 and 8 / 16 (night hours / day hours). A light timer is an effective way to modulate light patterns for maximum yields. Timers are not needed if your lights will be on all of the time, such as when growing autoflowers.
4. Temperature & Humidity

Temperature and humidity are intimately connected. The general rule of thumb is: humid air is warmer, while arid air is colder. So if you want to adjust one of these properties in your grow tent, you can often do so by adjusting the other property.
Why are these two properties so closely linked to each other? The basic answer is two-fold. First, water holds heat very well. This is why a cup of tea will stay warm for many minutes after you put it in the microwave, while that same cup with nothing it will cool off almost immediately. So if there is a lot of water in the air (aka humidity), then you can safely bet that the air will be warmer.
Second, when humid air cools off, the water particles condense into larger drops and fall out of the air. In nature, this is what causes rain, but in our grow tents you will mostly notice this affect as condensation on the walls of the grow tent. When the air is cold, the surfaces of the grow tent might be a bit wet.
Cannabis plants require different humidity and temperature levels at each stage of growth. Here is a quick overview of each stage, but we will go into this with more detail later on during Stage 2 of this guide:
- Seedling: Humidity = 65-70%, Day Temp (lights on) = 20-25° C, Night Temp (lights off) 4-5° C
- Vegetative: Humidity = 40-70%, Day Temp (lights on) = 22-28° C, Night Temp (lights off) 4-5° C
- Flowering: Humidity = 40-50%, Day Temp (lights on) = 20-26° C, Night Temp (lights off) 4-5° C
- 1-2 weeks before harvest: Humidity = 30-40%, Day Temp (lights on) = 18-24° C, Night Temp (lights off) 18-24° C
Heater
A heater is especially useful during winter months, but no matter the season, it will help you regulate both the temperature and humidity levels in your grow tent. At night, when the grow light is off, it is important to keep the temperature inside the grow tent from falling below about 4° C, otherwise your plants may begin to freeze and wilt. You can set the heater to automatically turn on when the temperature falls below a certain limit, and turn off when it rises high enough.
(Note: make sure not to set the heater and the air conditioner to automatically turn on at overlapping temperatures. Otherwise, they will compete against each other, wasting energy and potentially creating a hot spot around the heater, which can cause bud rot or kill plants.)
Air Conditioner
An air conditioner will help regulate the temperature inside the grow tent during summer months as well as during the day time when the grow lights are on. Air conditioners will off set the heat produced by the grow light and remove some humidity from the air. Many units can be automatically set to turn on when the grow tent gets to warm and off when it gets cool enough.
(Note: make sure not to set the heater and the air conditioner to automatically turn on at overlapping temperatures. Otherwise, they will compete against each other, wasting energy and potentially creating a hot spot around the heater, which can cause bud rot or kill plants.)
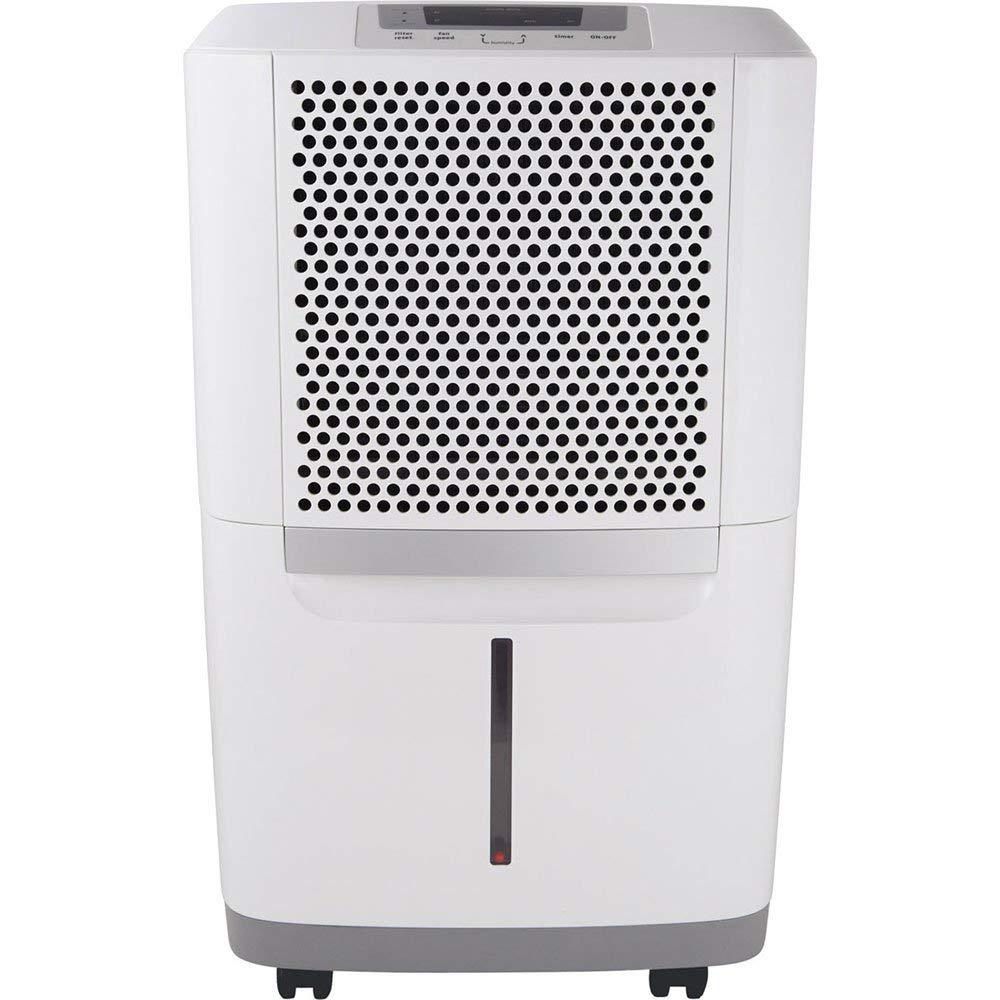
Dehumidifier
A dehumidifier is a useful compliment to both an air conditioner and a heater. As the plants respirate, they will release humidity into the air of the grow setup. Dehumidifiers remove moisture from the air and can be set to automatically turn on when humidity inside of the grow tent is too high.
(Note: humidity control is one of the most difficult and important aspects of grow tent management. Without proper humidity control, it won’t matter what the temperature inside of the grow tent is because the plants will be unable to respirate properly.)
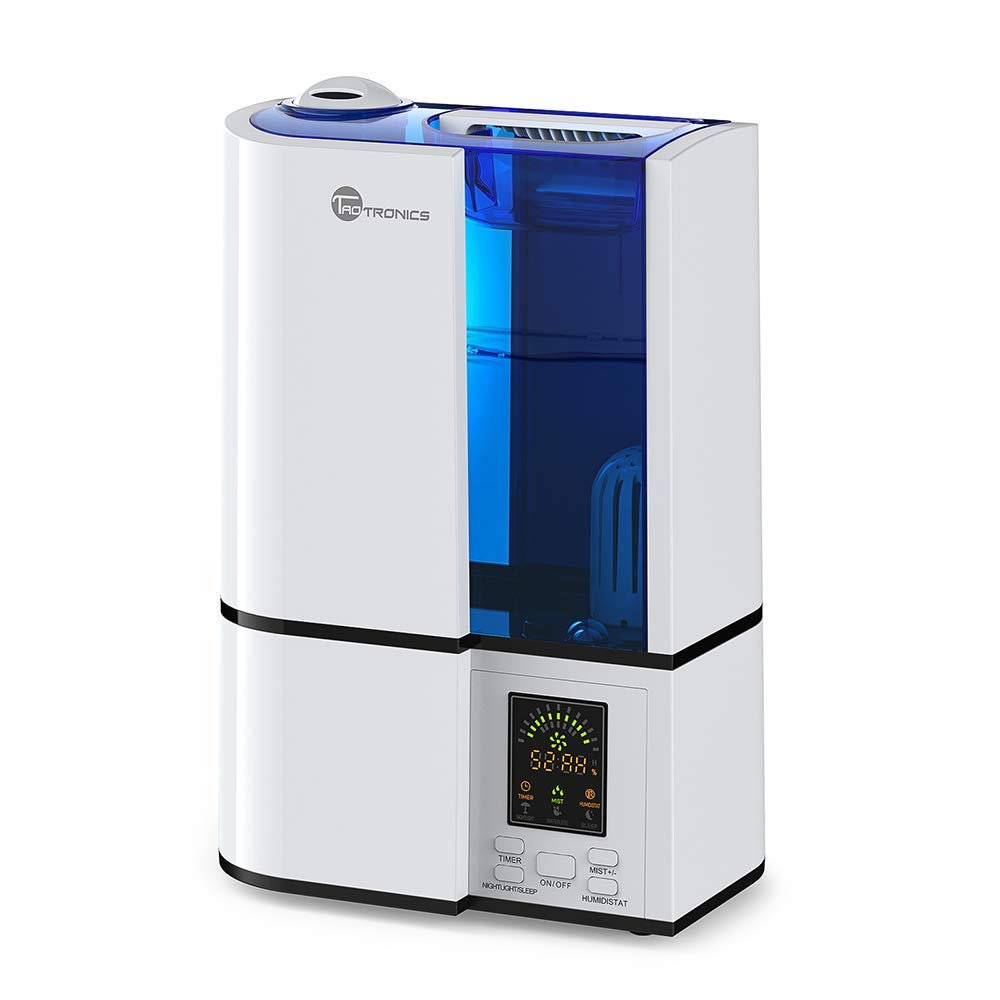
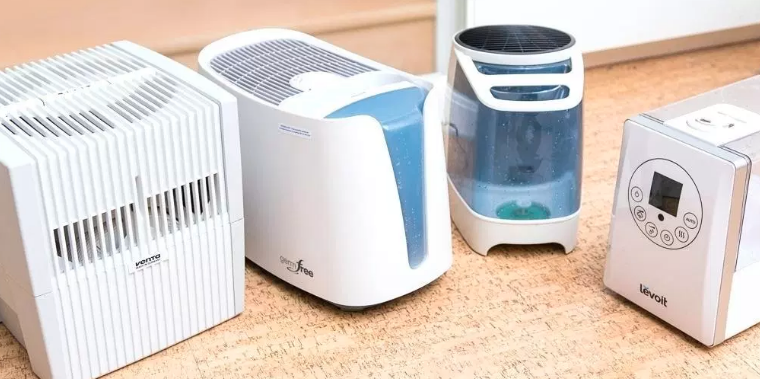
Humidifier
If a dehumidifier removes too much moisture from the air, then of course a humidifier will put moisture back into the air. Together, the humidifier and dehumidifier work with the air conditioner and heater to balance the temperature and humidity in the grow tent. These 4 appliances form a perfect team.
(Note: humidity control is one of the most difficult and important aspects of grow tent management. Without proper humidity control, it won’t matter what the temperature inside of the grow tent is because the plants will be unable to respirate properly.)
Hygrometer
A hygrometer measures both the relative humidity inside of the tent as well as the ambient temperature. Digital hygrometers are an essential tool for regulating and monitoring the environment inside of your grow tent. Without this basic data, it is very difficult, if not impossible, to efficiently control the air quality of your grow setup.
(Note: hygrometers are super cheap and extremely useful. Even if you have a thermometer already, you will need a way to measure humidity, and a cheap digital hygrometer will give you that data at a glance.)

5. Flexibility & Customization
Unlike in previous decades, there are an endless number of ways to arrange a grow set up today. No matter how large or small your grow area is, as long as it can fit at least once cannabis plant, there is a grow kit or grow set up that will fit inside of it. Even if you have only a small cabinet space to work with, you can still create a fancy, high-end grow system for that space.
However, several of the most useful items in a grow room are not very flashy. They are simple tools that nevertheless provide for immense flexibility and customizability in your grow tent. Most grow kit or grow setup will contain these items, but if yours does not, be sure to pick a few of them up for yourself:
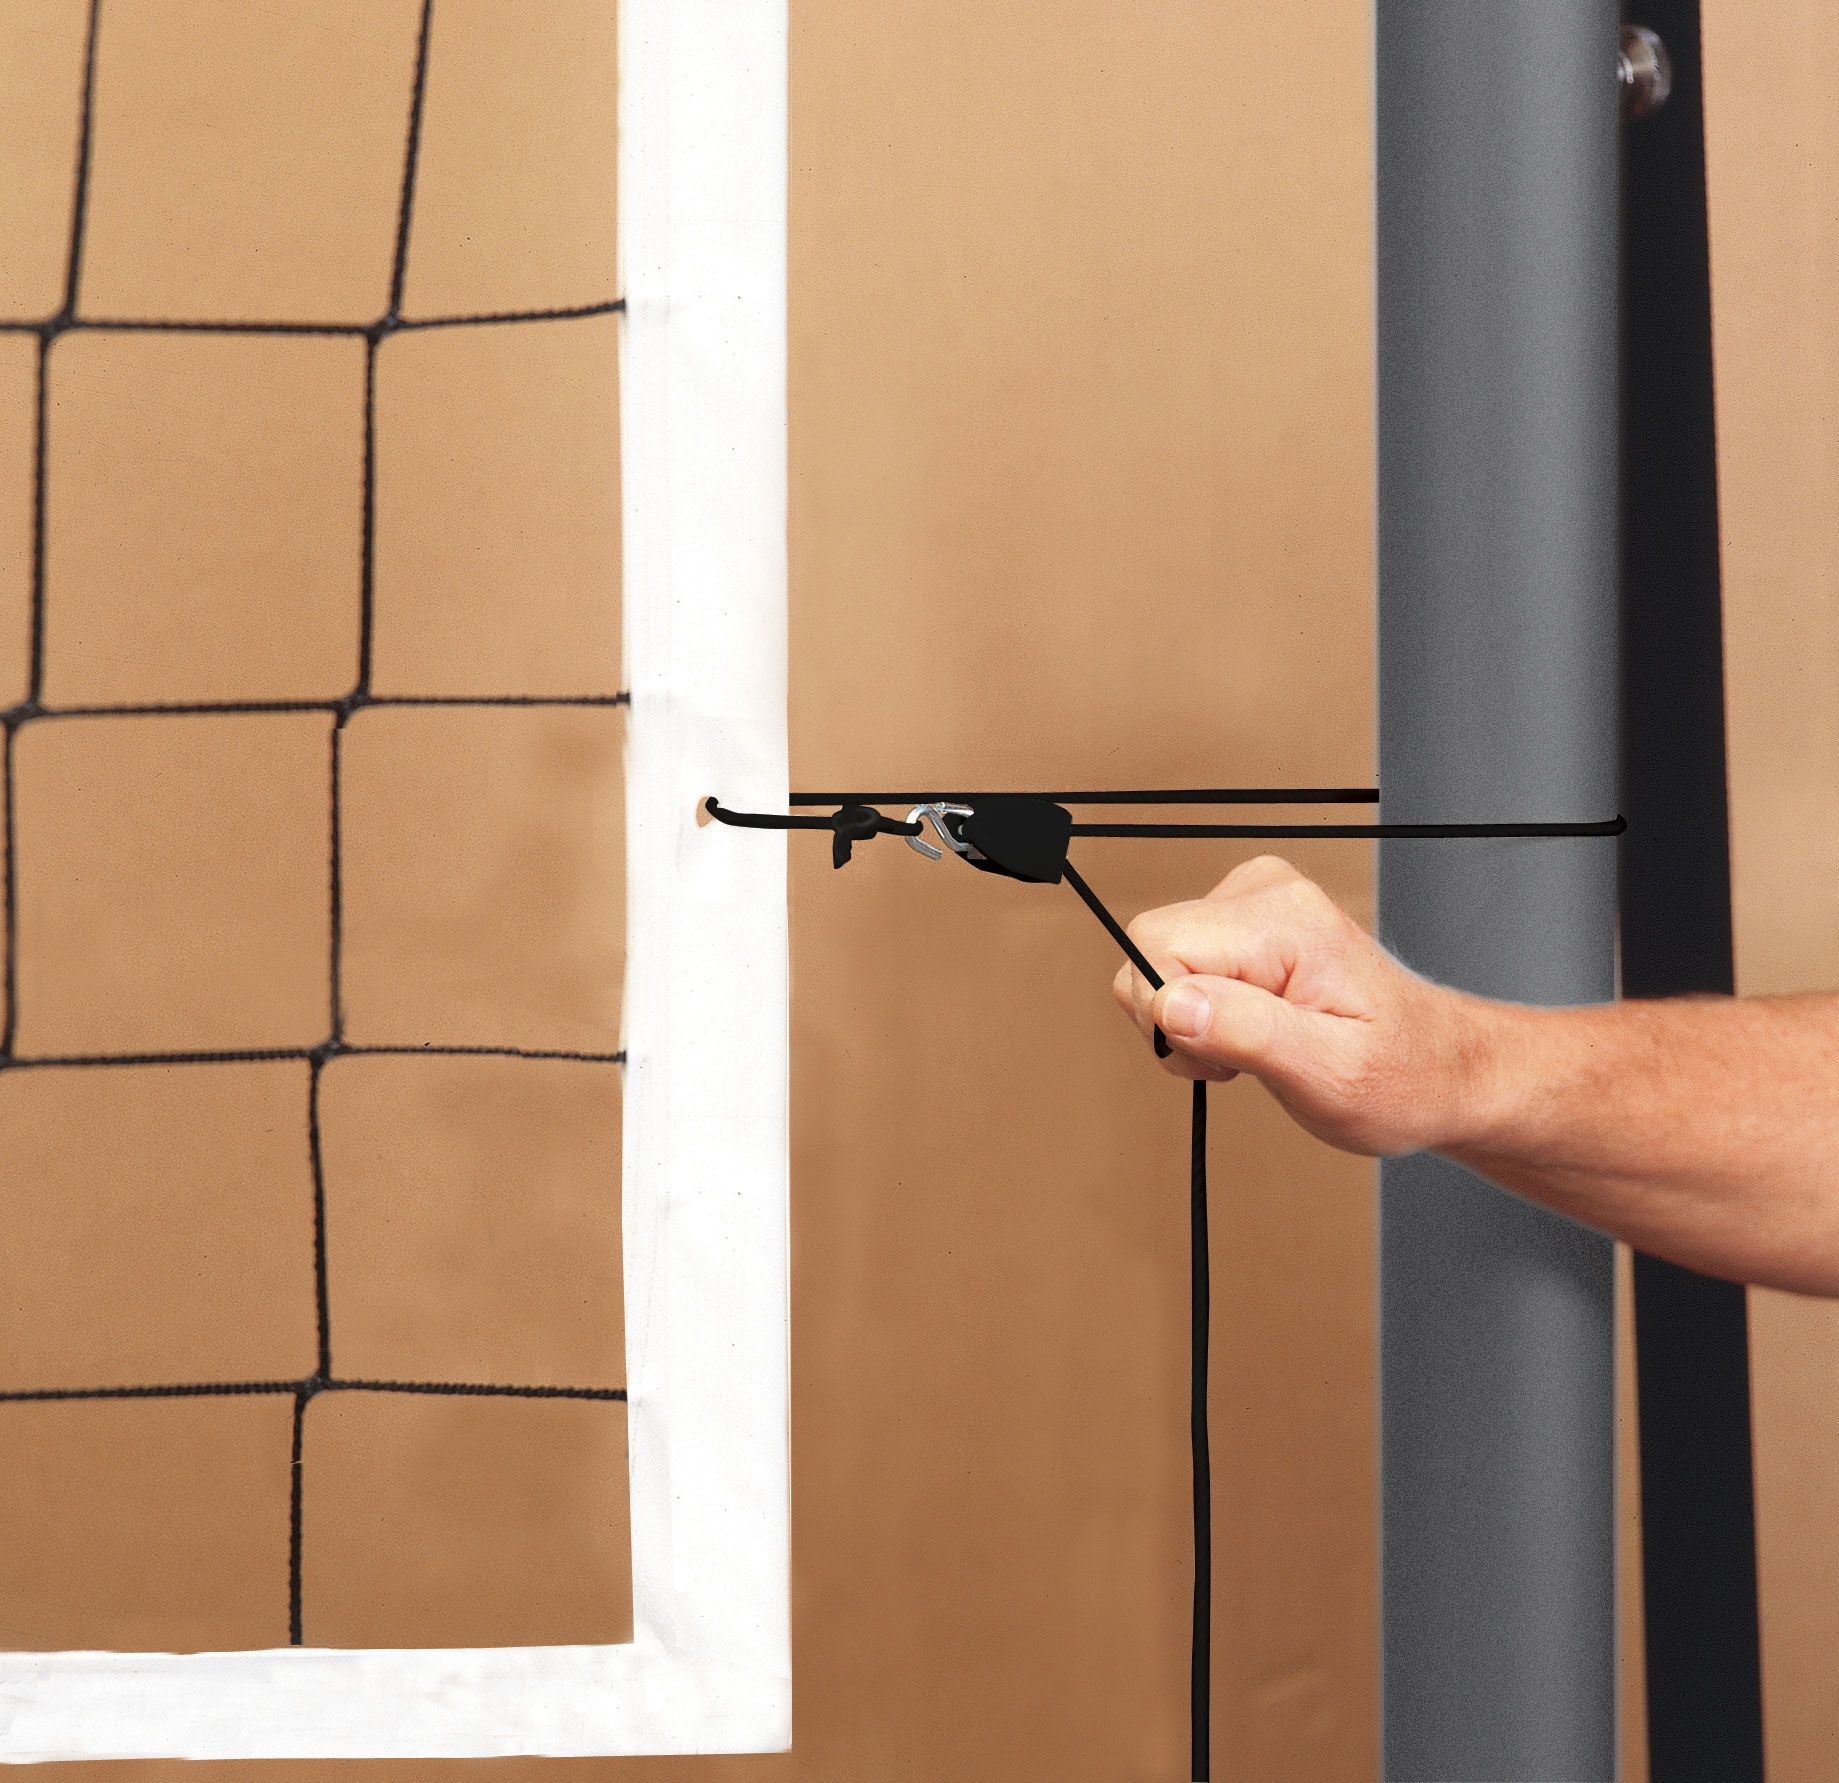
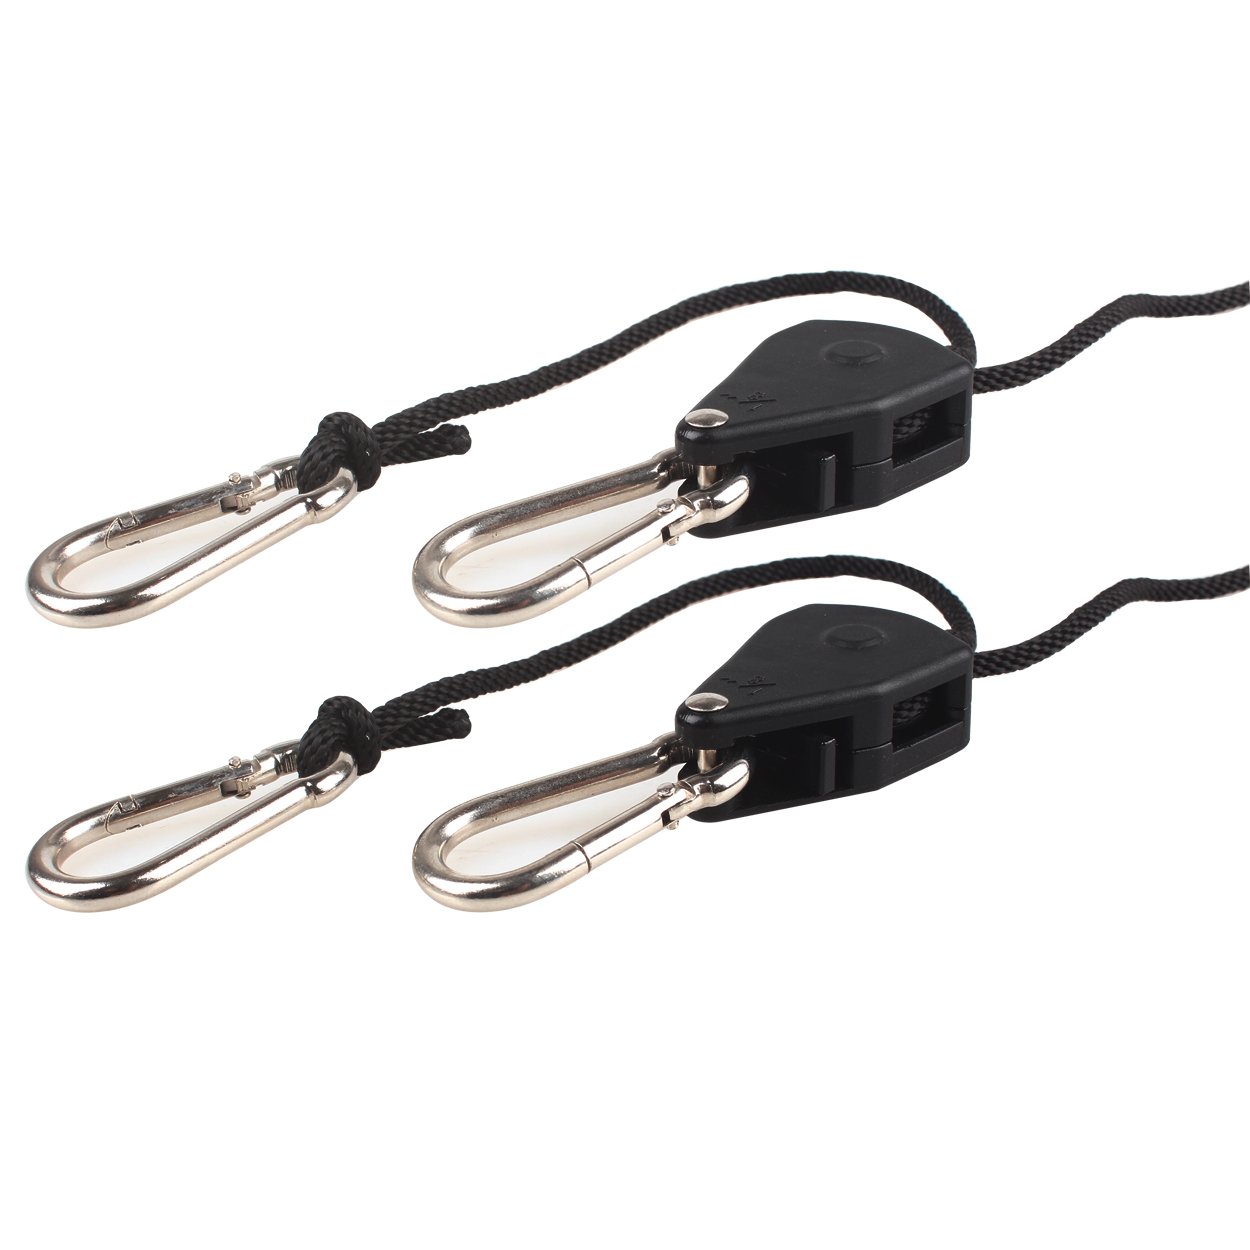
Rope Clip Hangers
Rope clip hangers are one of the smallest yet most useful tools in a grow tent. They are used for hanging and securing appliances like fans and lights from the frame of a grow tent. The clips allow for easy attachment, while the pulley or ratchet system makes tightening them a synch. That way, if you need to adjust a fan or lift up the grow light, you can do so with ease.
Rope clip hangers are often sold in pairs or as a set because most growers use more than one in their grow setups. Make sure to secure both the bottom and top of any heavy appliances you hang with at least two rope clip hangers so as not exceed the strength of the hanger.
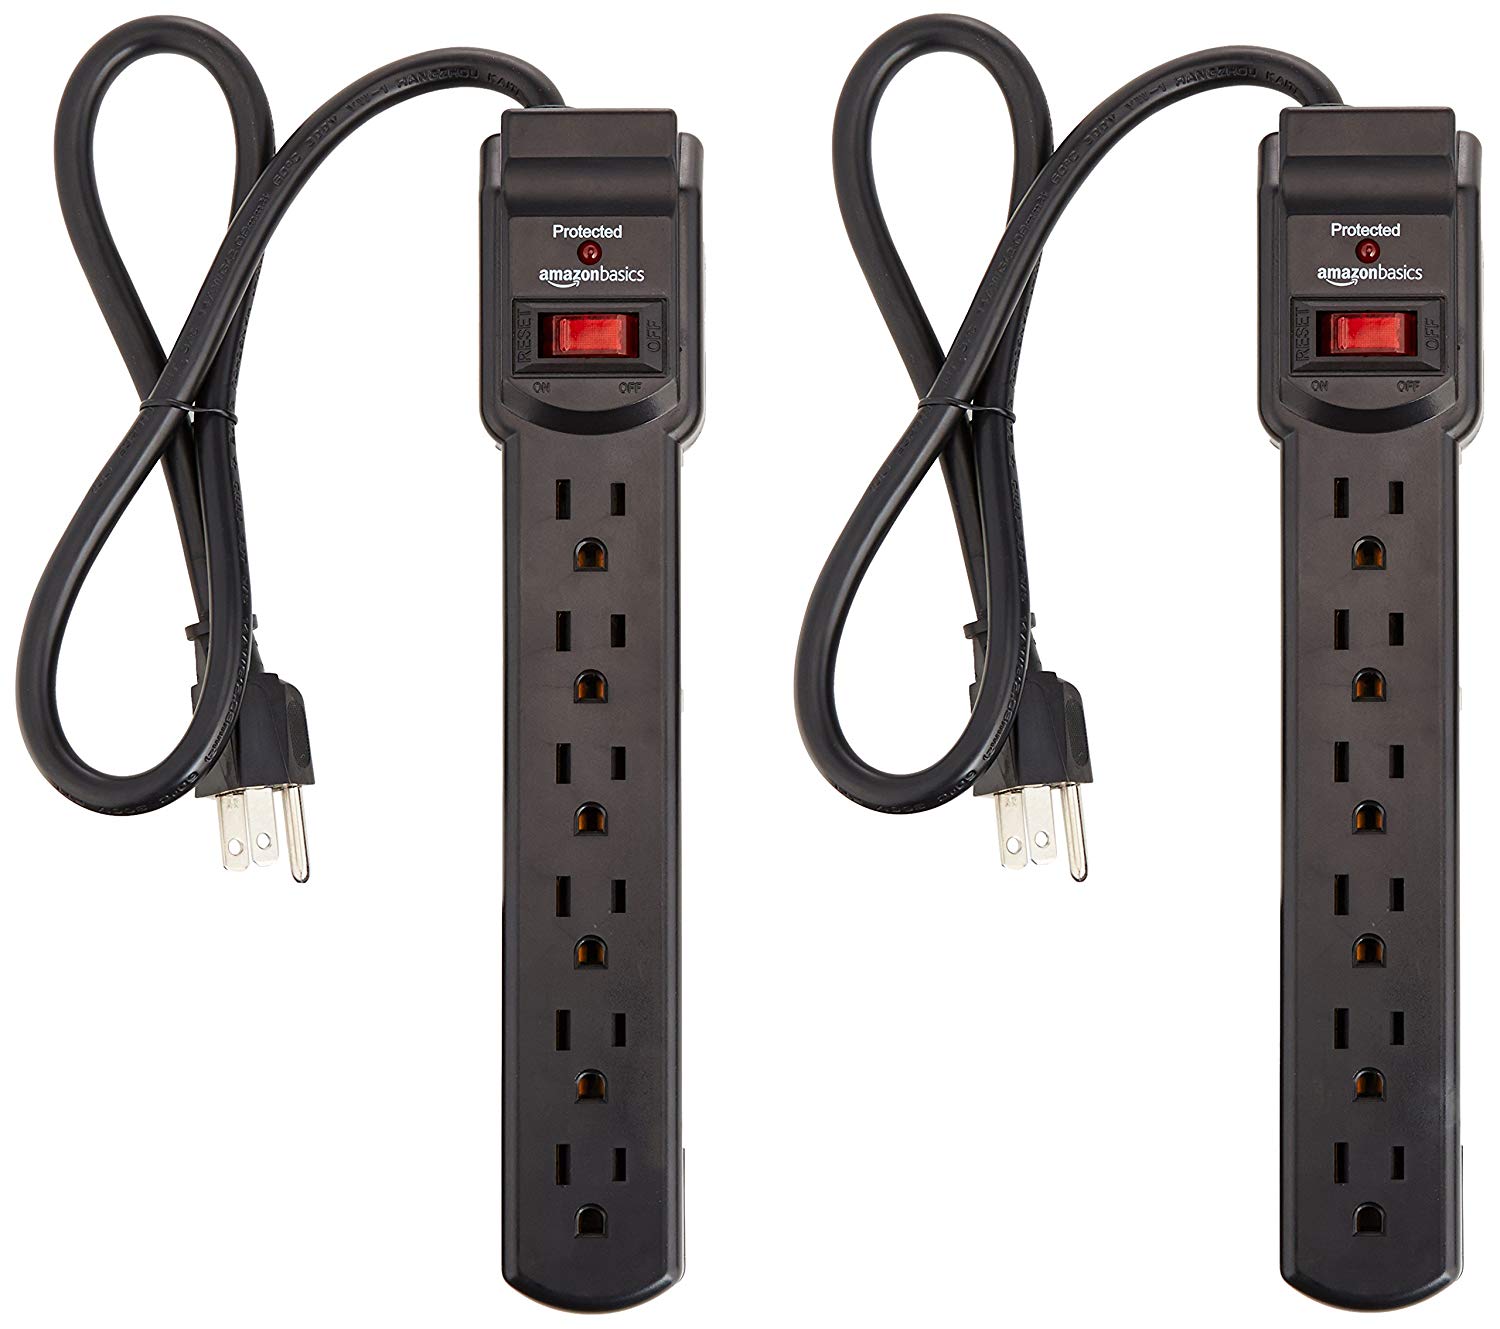
Surge Protector Power Strip
It should go without saying that a few surge protector power strips will come in handy when setting up appliances in your grow tent. Not only will they provide multiple plug points for your light, humidifier, heater, etc., but they will also protect your appliances from breaking should there be a surge of power. This can save your entire grow operation from failing due to a busted grow light that cost hundreds of dollars to replace.
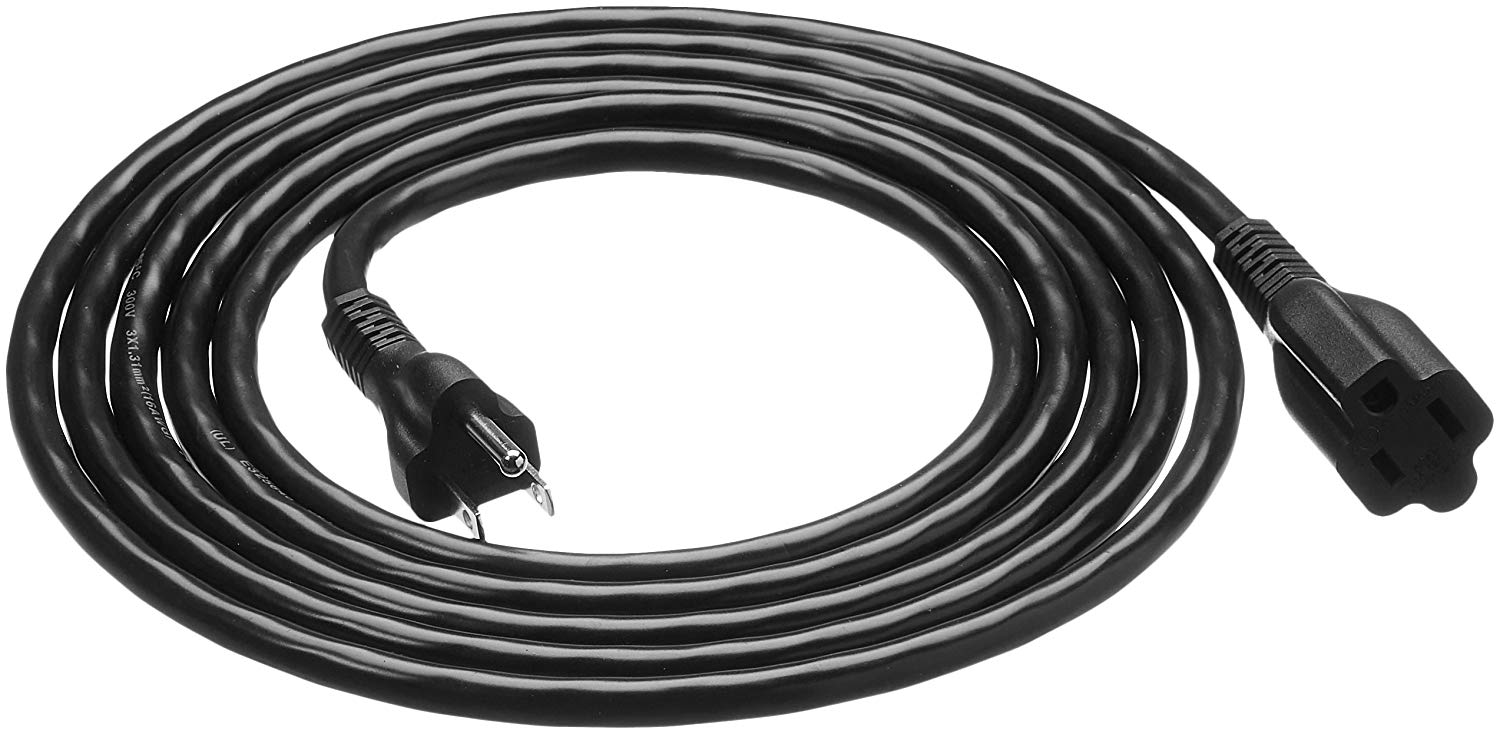
Extension Chords
With fans and lights hanging from the ceiling and a heater and air conditioner on opposite sides of grow tent, a few extension chords can make it possible to plug in all of your appliances no matter how spread out they are.
6. Gardening Tools
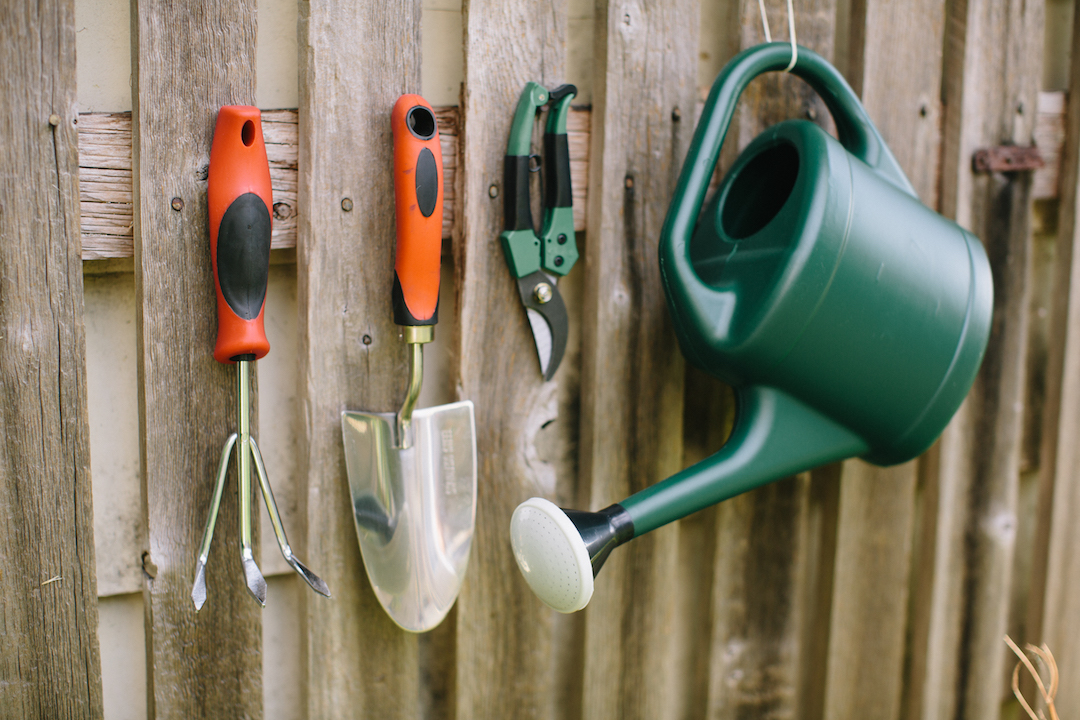
Whether cannabis cultivators think of themselves as farmers or botanists or simply medical patients, they all have one thing in common: every grower is, to some degree, a gardener.
The gardening tools you use to grow cannabis do not need to be fancy, but they should be comfortable to use. Many growers make the mistake of going for cheaper tools only to realize that the grips on the trowels and hand rakes hurt their hand over time, or that the spout of their elegant looking watering can is at an inconvenient angle, leading to wrist and arm pain.
Therefore, it is a good idea to make sure you buy tools that are specifically designed for long-term, serious gardening. Some growers try to get away with taking short cuts, such as using a kitchen water pitcher instead of watering can. But eventually, you will want the extra grip support that comes from tools that are specifically designed for heavy use. Your hands will thank you for it sooner or later.
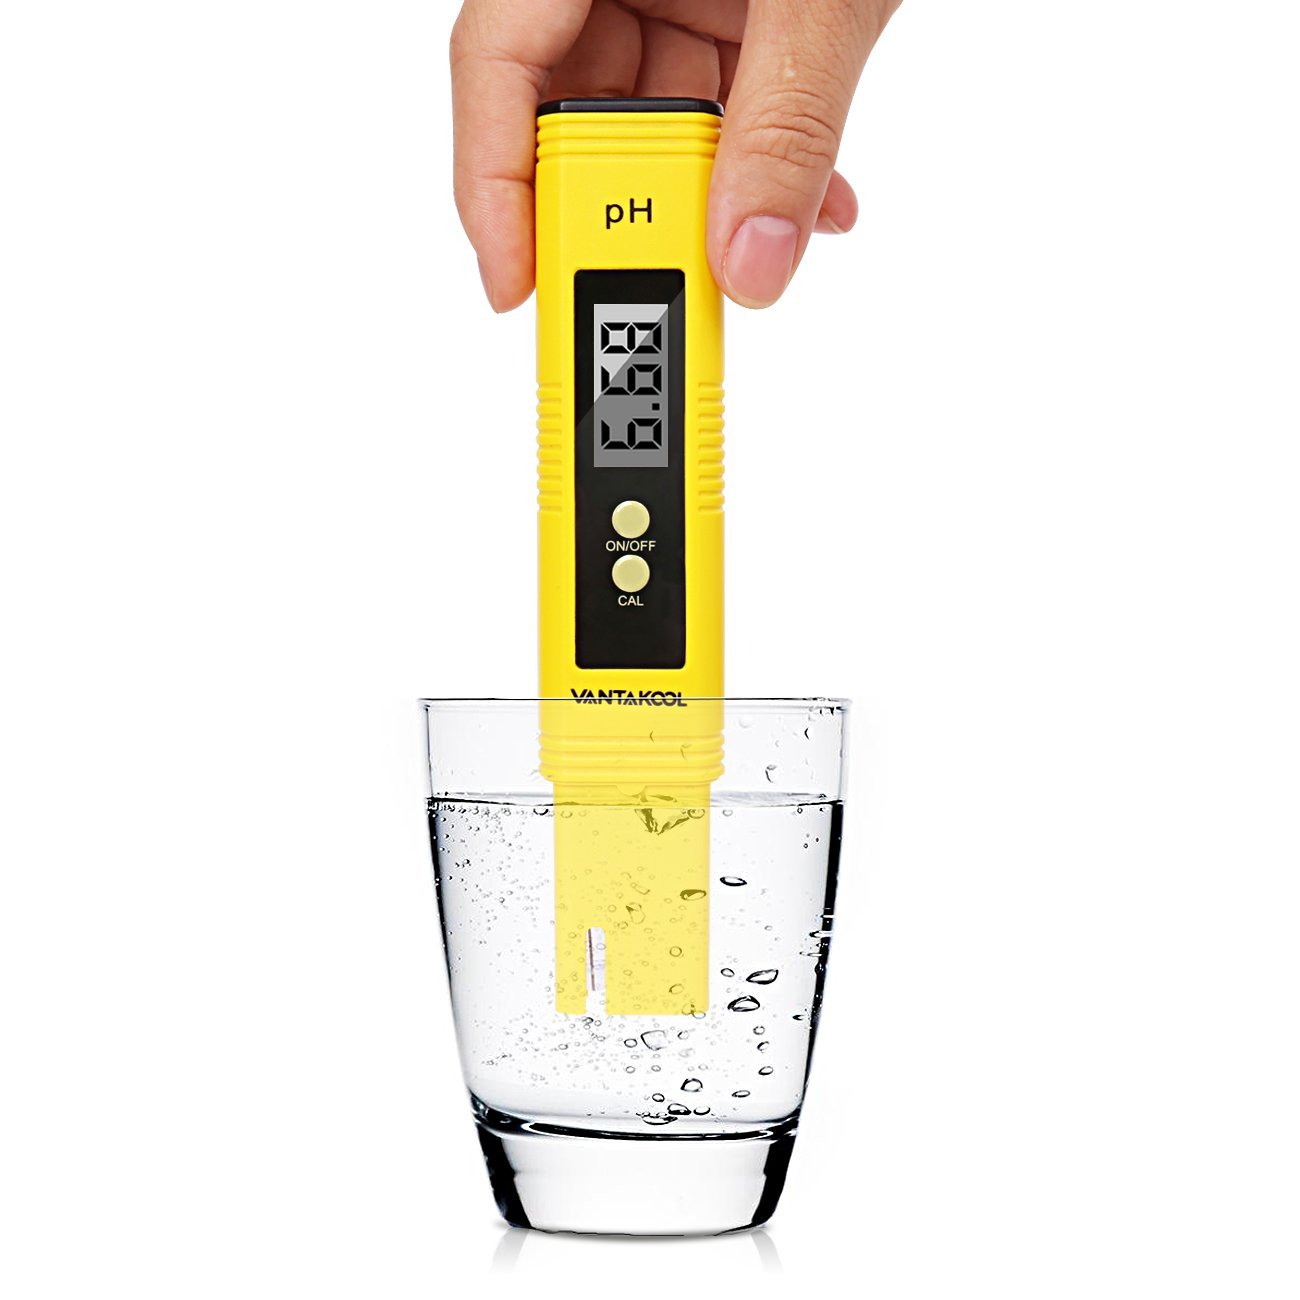
PH Tester
A good pH meter is an essential tool for any grower. It gives you the ability to test the pH of the water you give your cannabis plants, which is important for maintaining the health of the plants. Many of the problems that growers run into over the course of a grow cycle can stem from imbalanced pH levels. Without a proper pH meter you will have a lot of trouble diagnosing and addressing these kinds of problems.
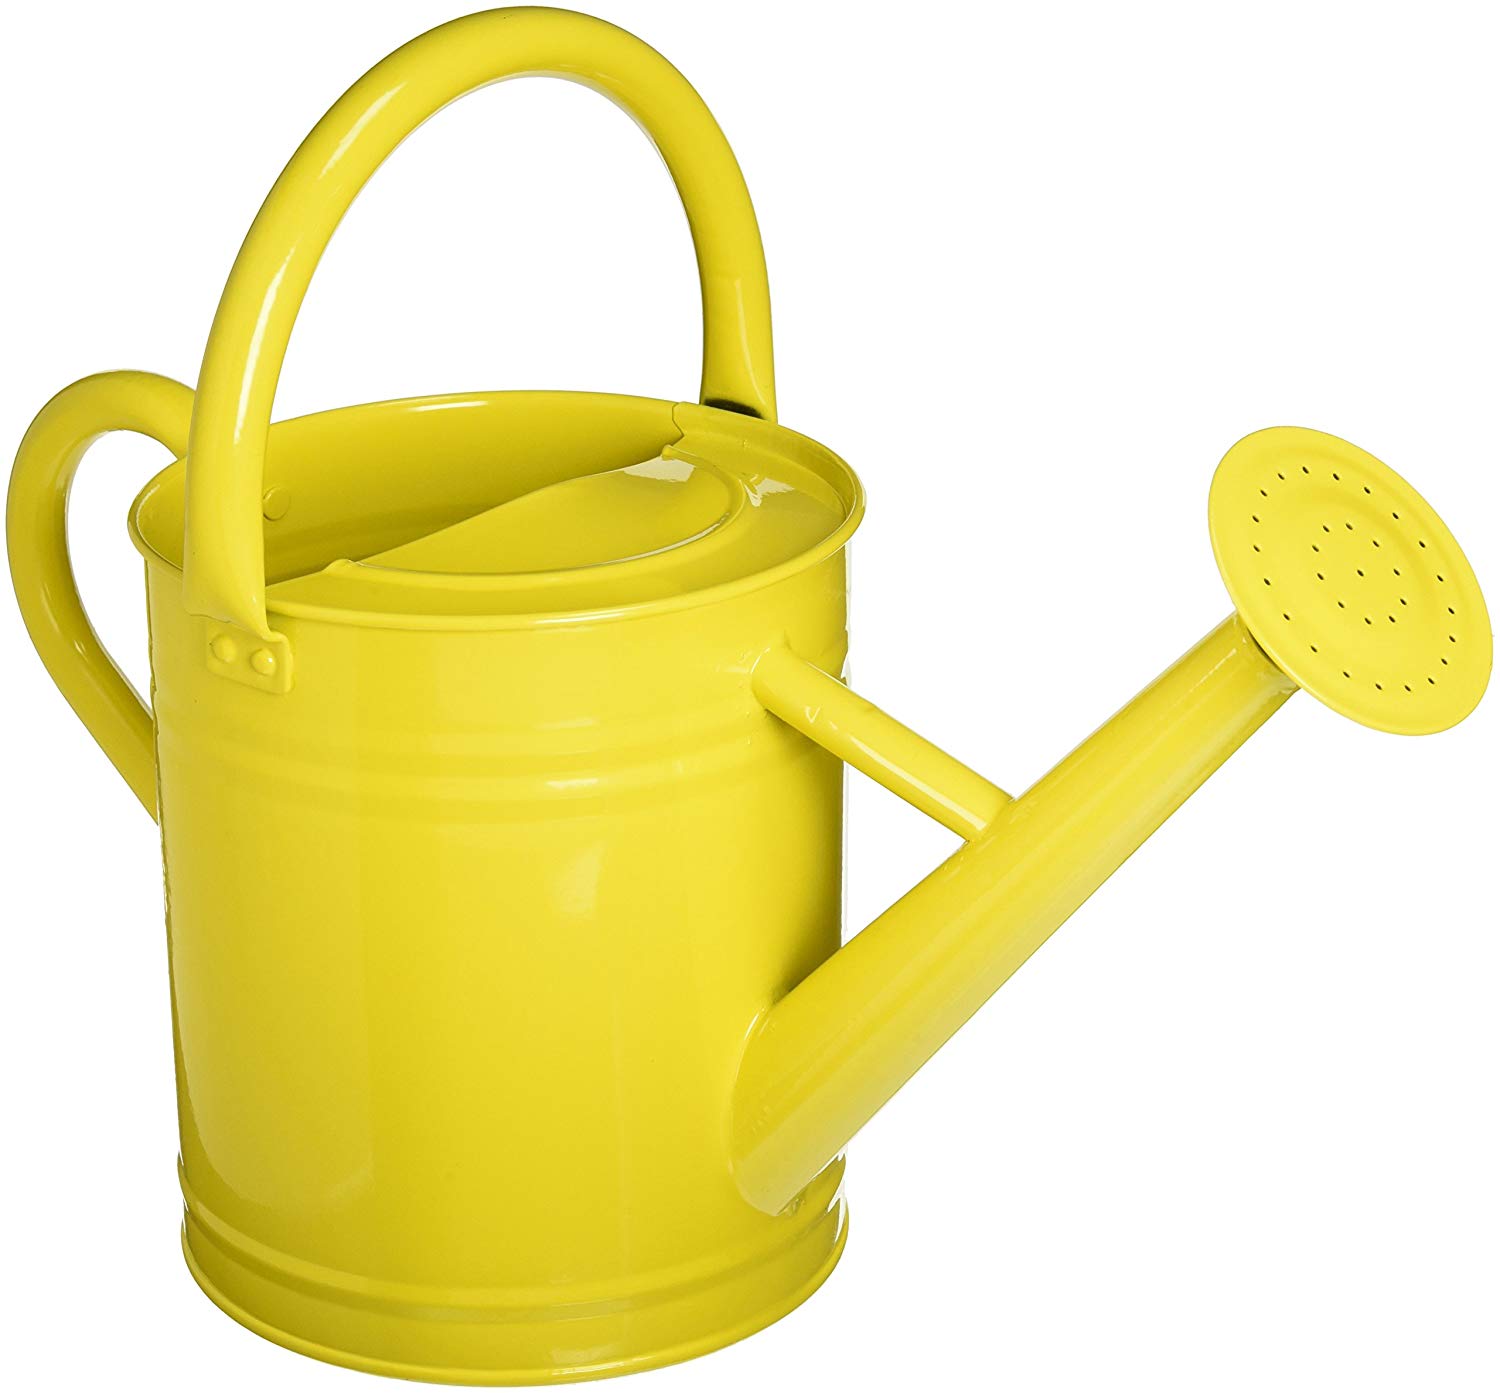
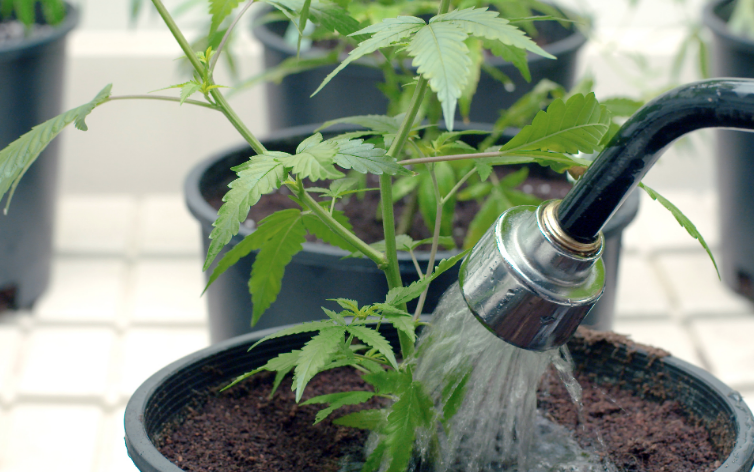
Watering Can
Obviously a watering can is useful for watering your cannabis plants. You do not absolutely need one, but they are handing for carrying water into the grow tent. If you get a watering can, try to get one that has an adjustable nozzle so that you can control the force and spread of the water as it comes out of the can. Otherwise, a strong water flow can damage young seedlings.
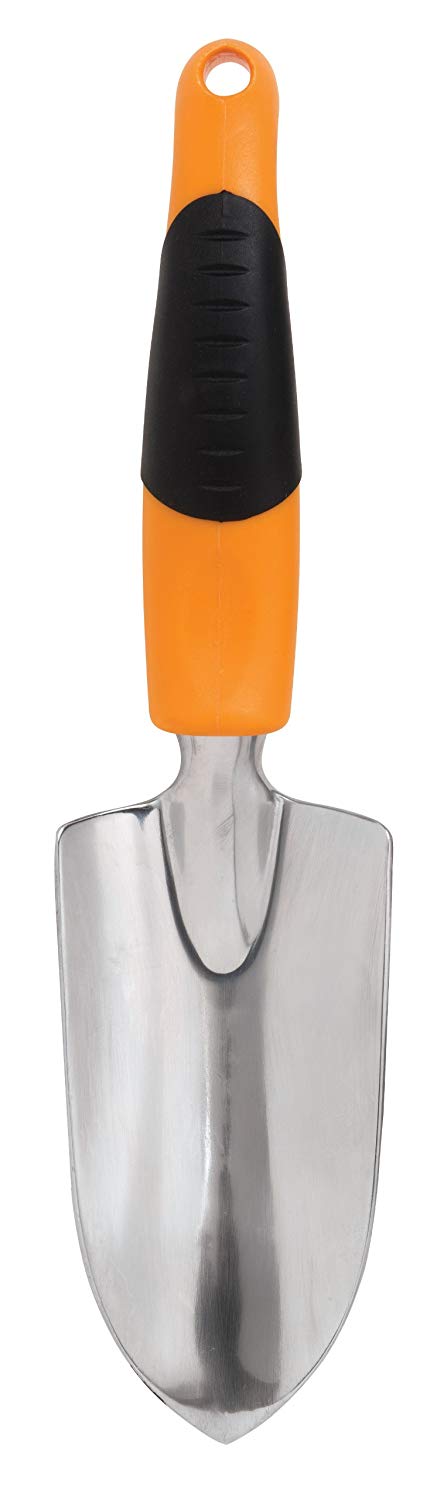
Trowel
When you are dealing with dirt, it helps to have a trowel. Some growers get away with using other tools, such as scoops and even kitchen equipment like metal spoons. But when you are filling a lot of pots and moving a large amount of dirt around over a long time period, it helps to have a tool that built specifically for the purpose. The shape makes it easier to dig into the dirt and the handle is easy to grip, which will leave your hands feeling much less sore than they otherwise would.
Hand rake
Similar to a trowel, a hand rake is a good tool to have on hand since you will probably be scraping soil around in the pots at some point during the grow cycle. While not entirely necessary (after all, you could use your hands), a hand rake does help the work go faster and saves your hands from a lot of pain in the long run.

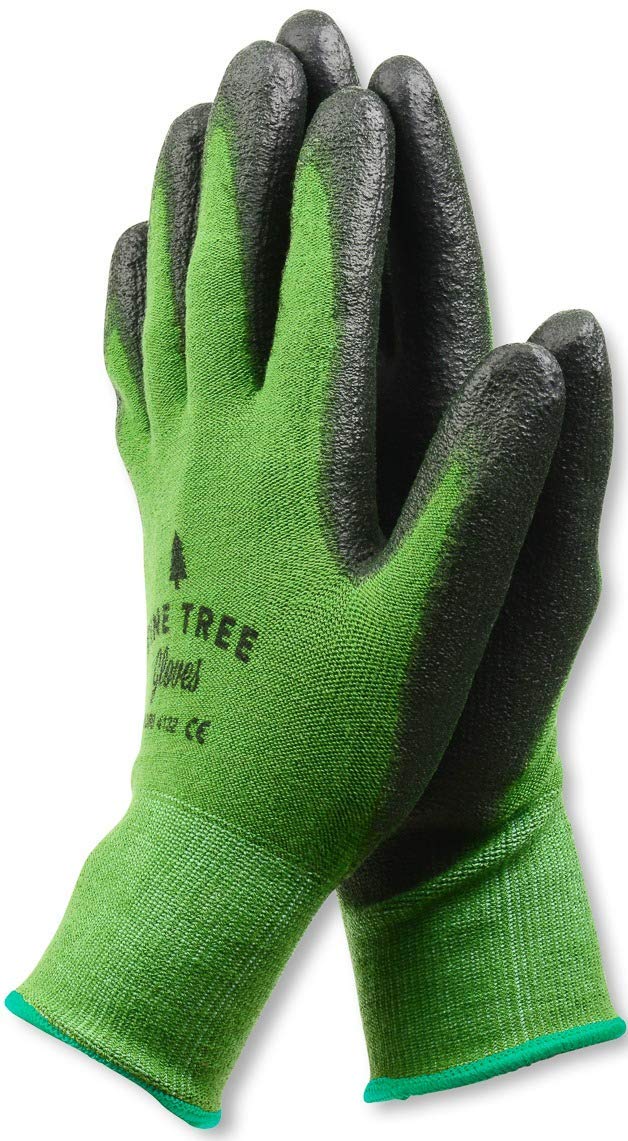
Gardening gloves
Gardening gloves are a common sense tool for anyone dealing with growing plants. They will protect your hands from rough grips and abrasive materials. Also, they have extra strong grip material on the palms so that you can hold onto tools with more force.
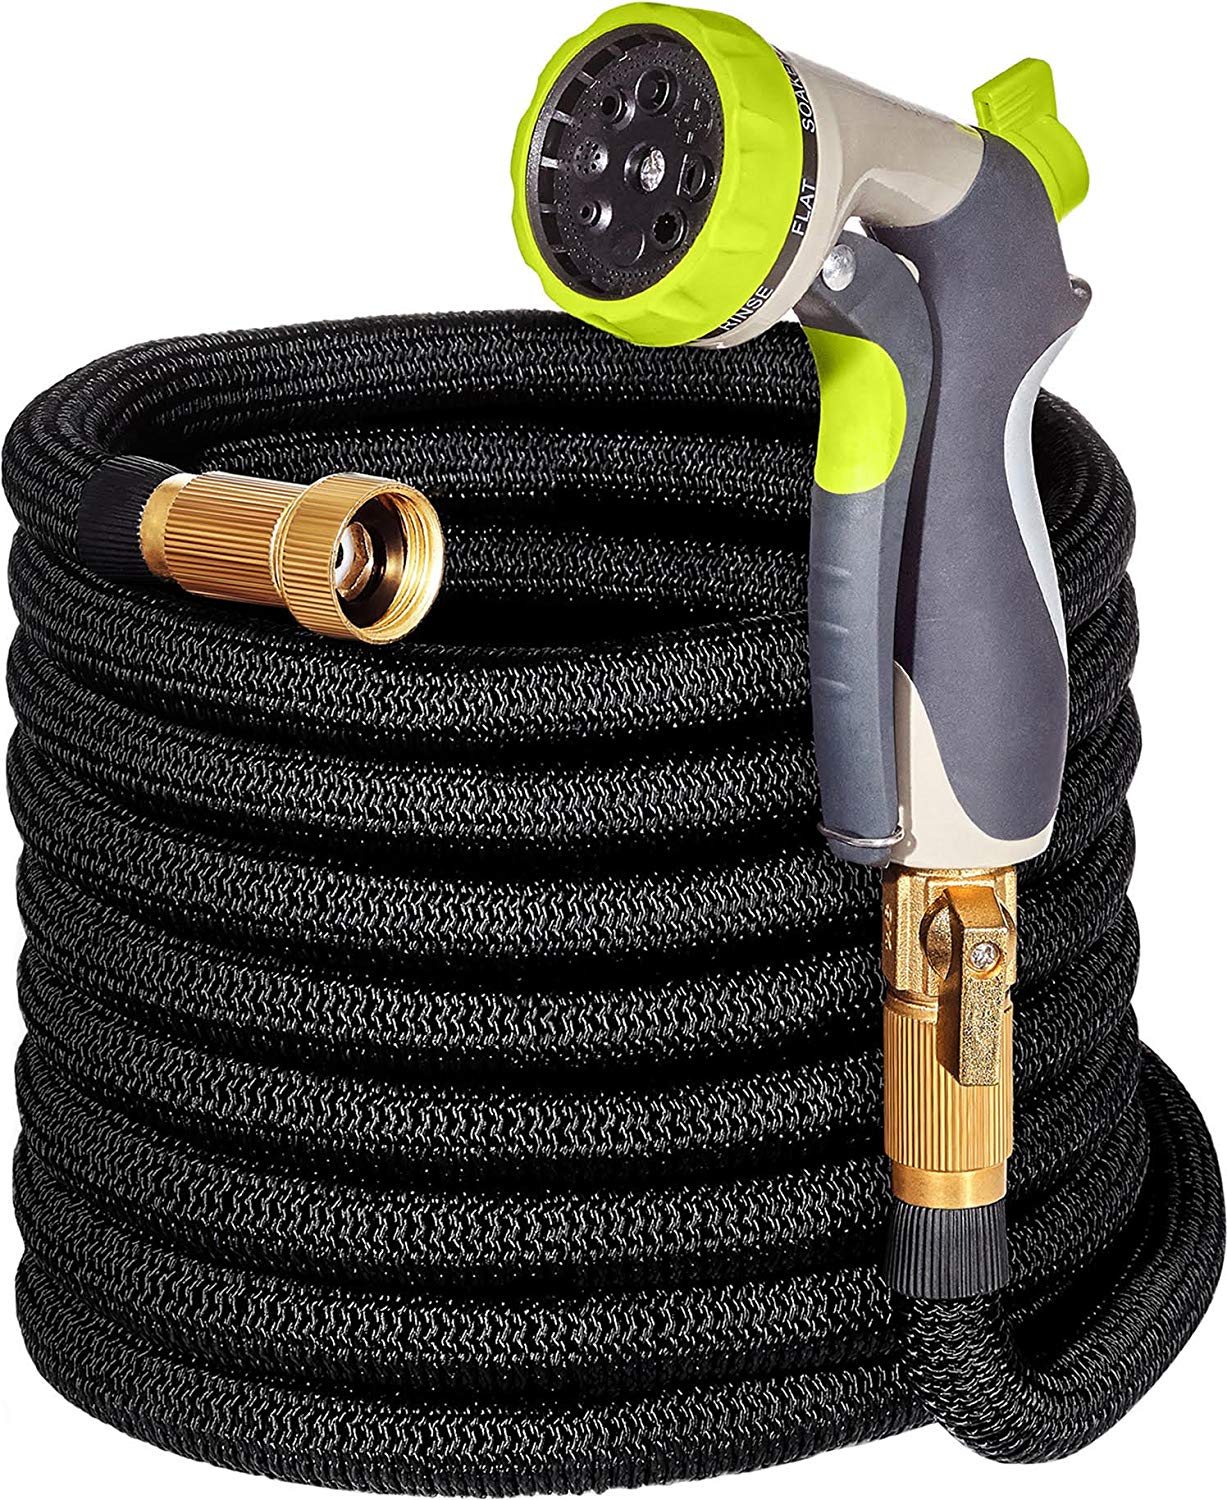
Hose
A hose is by far the best option for watering your plants. If your grow tent is near a tap with balanced pH water, consider using a hose to deliver the water to the base of the plants. Just like with a watering can, try to find a how with a wide attachment so you can control the force and spread of the water that comes out.
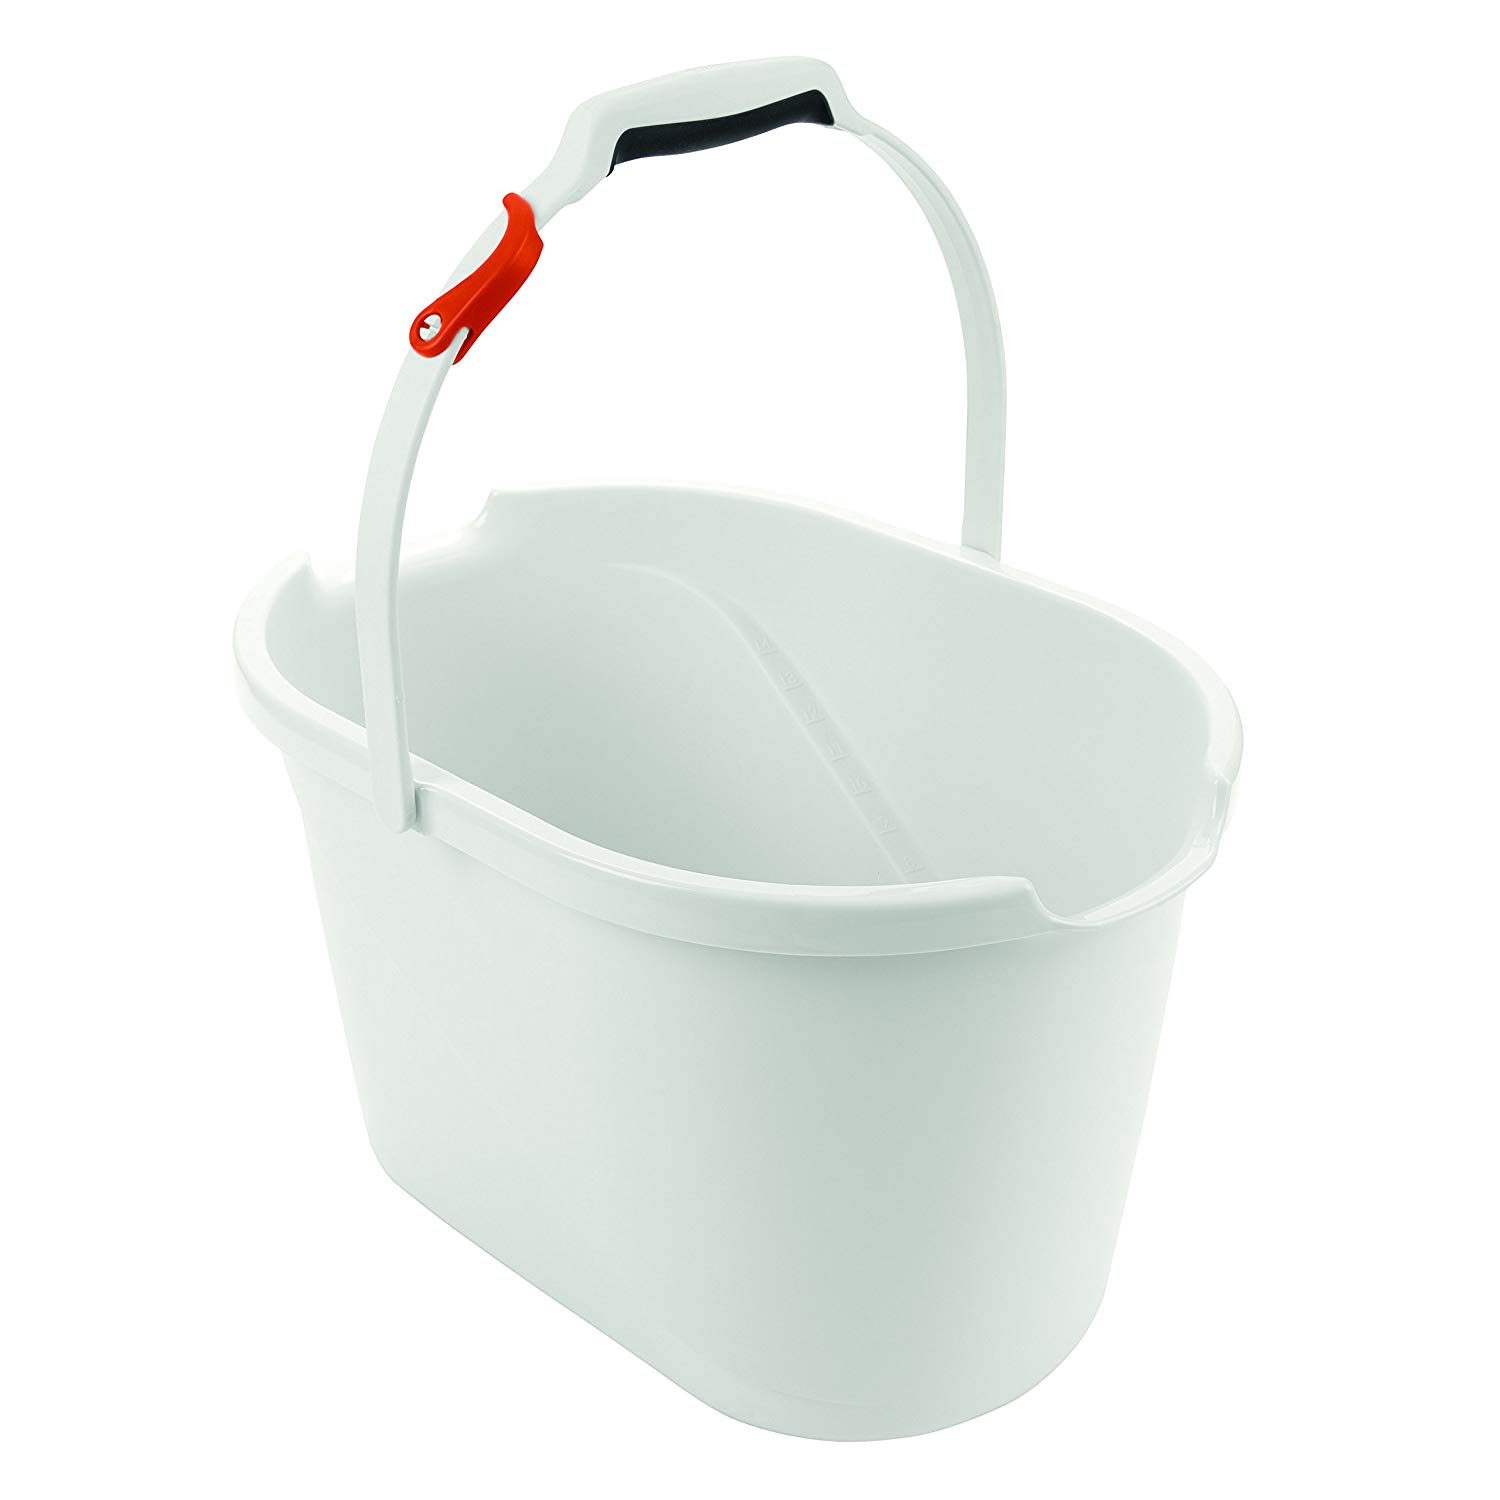
Bucket
A bucket is a useful item to have in any cannabis grow setup. It comes in hand for a variety of tasks, including mixing nutrients, holding waste materials, and transporting or storing other tools.
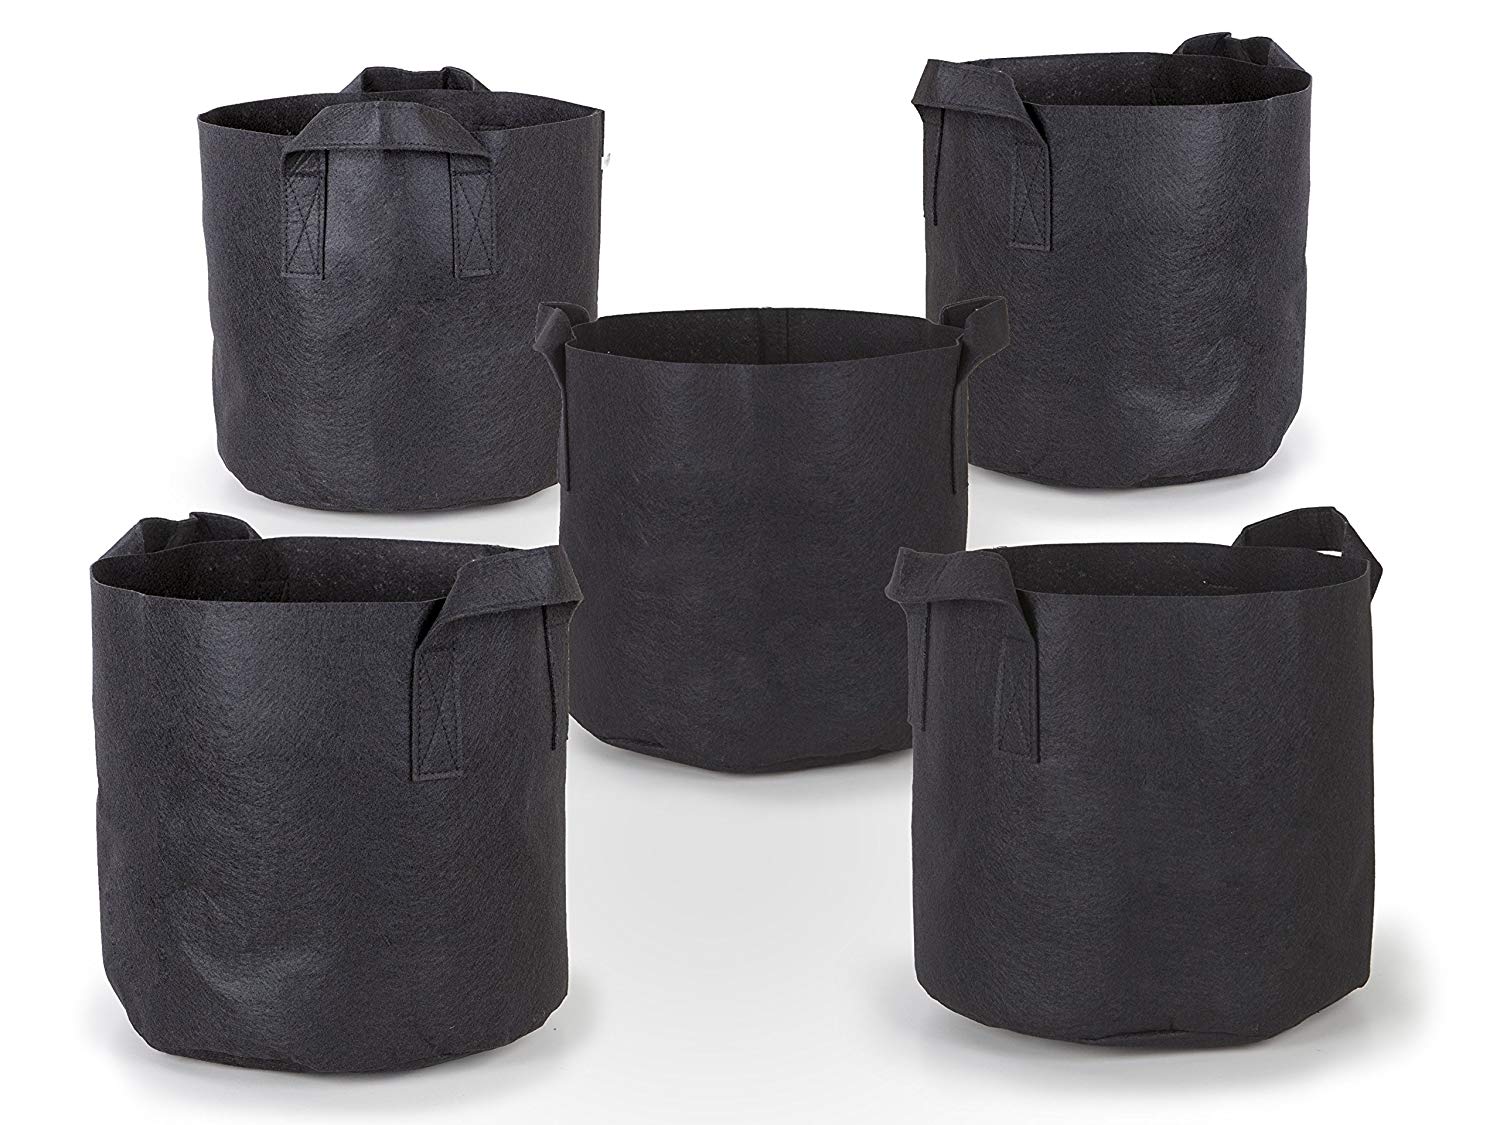
Pots
You can use any type of pot you like, but cloth pots are cheap and work just fine for growing cannabis. Sure the edges of the fabric pots do dry out a little faster than with other types of pots, but they also allow more air to reach the root systems of your plants, which is essential for good root health.
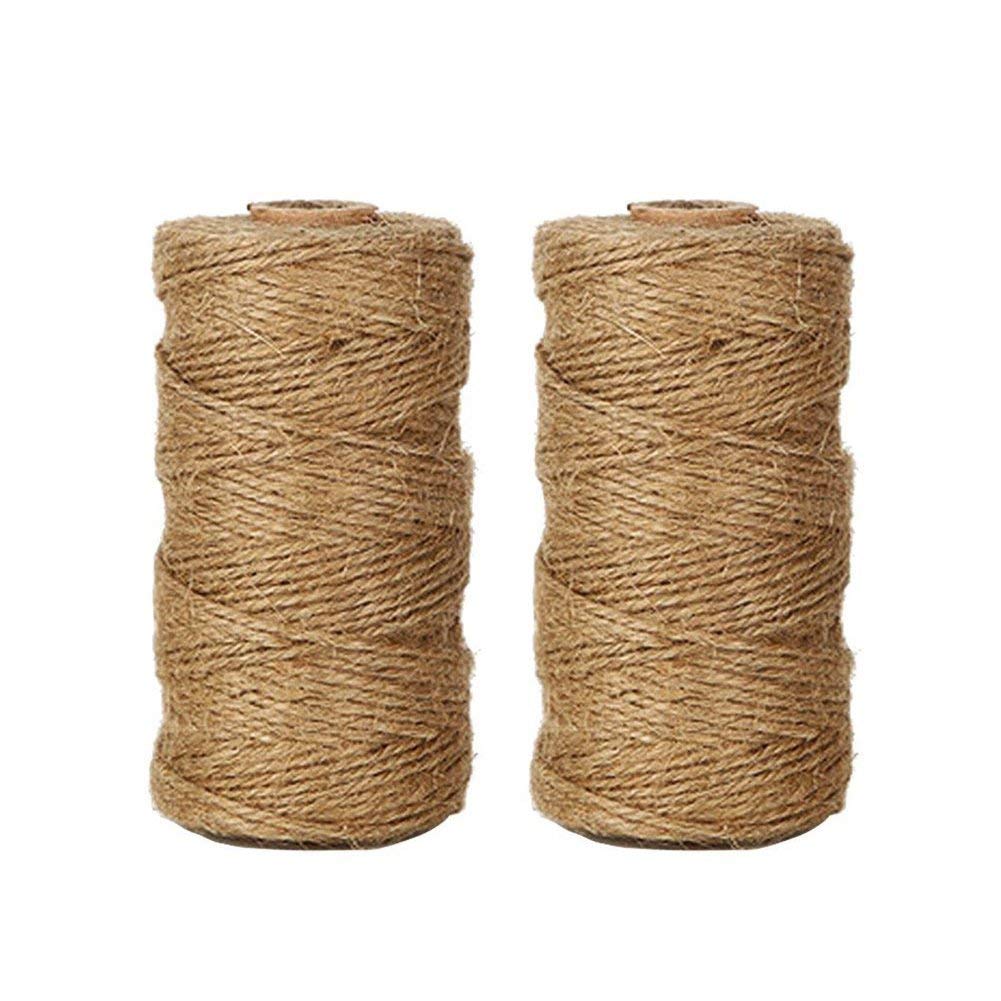
String & Twine
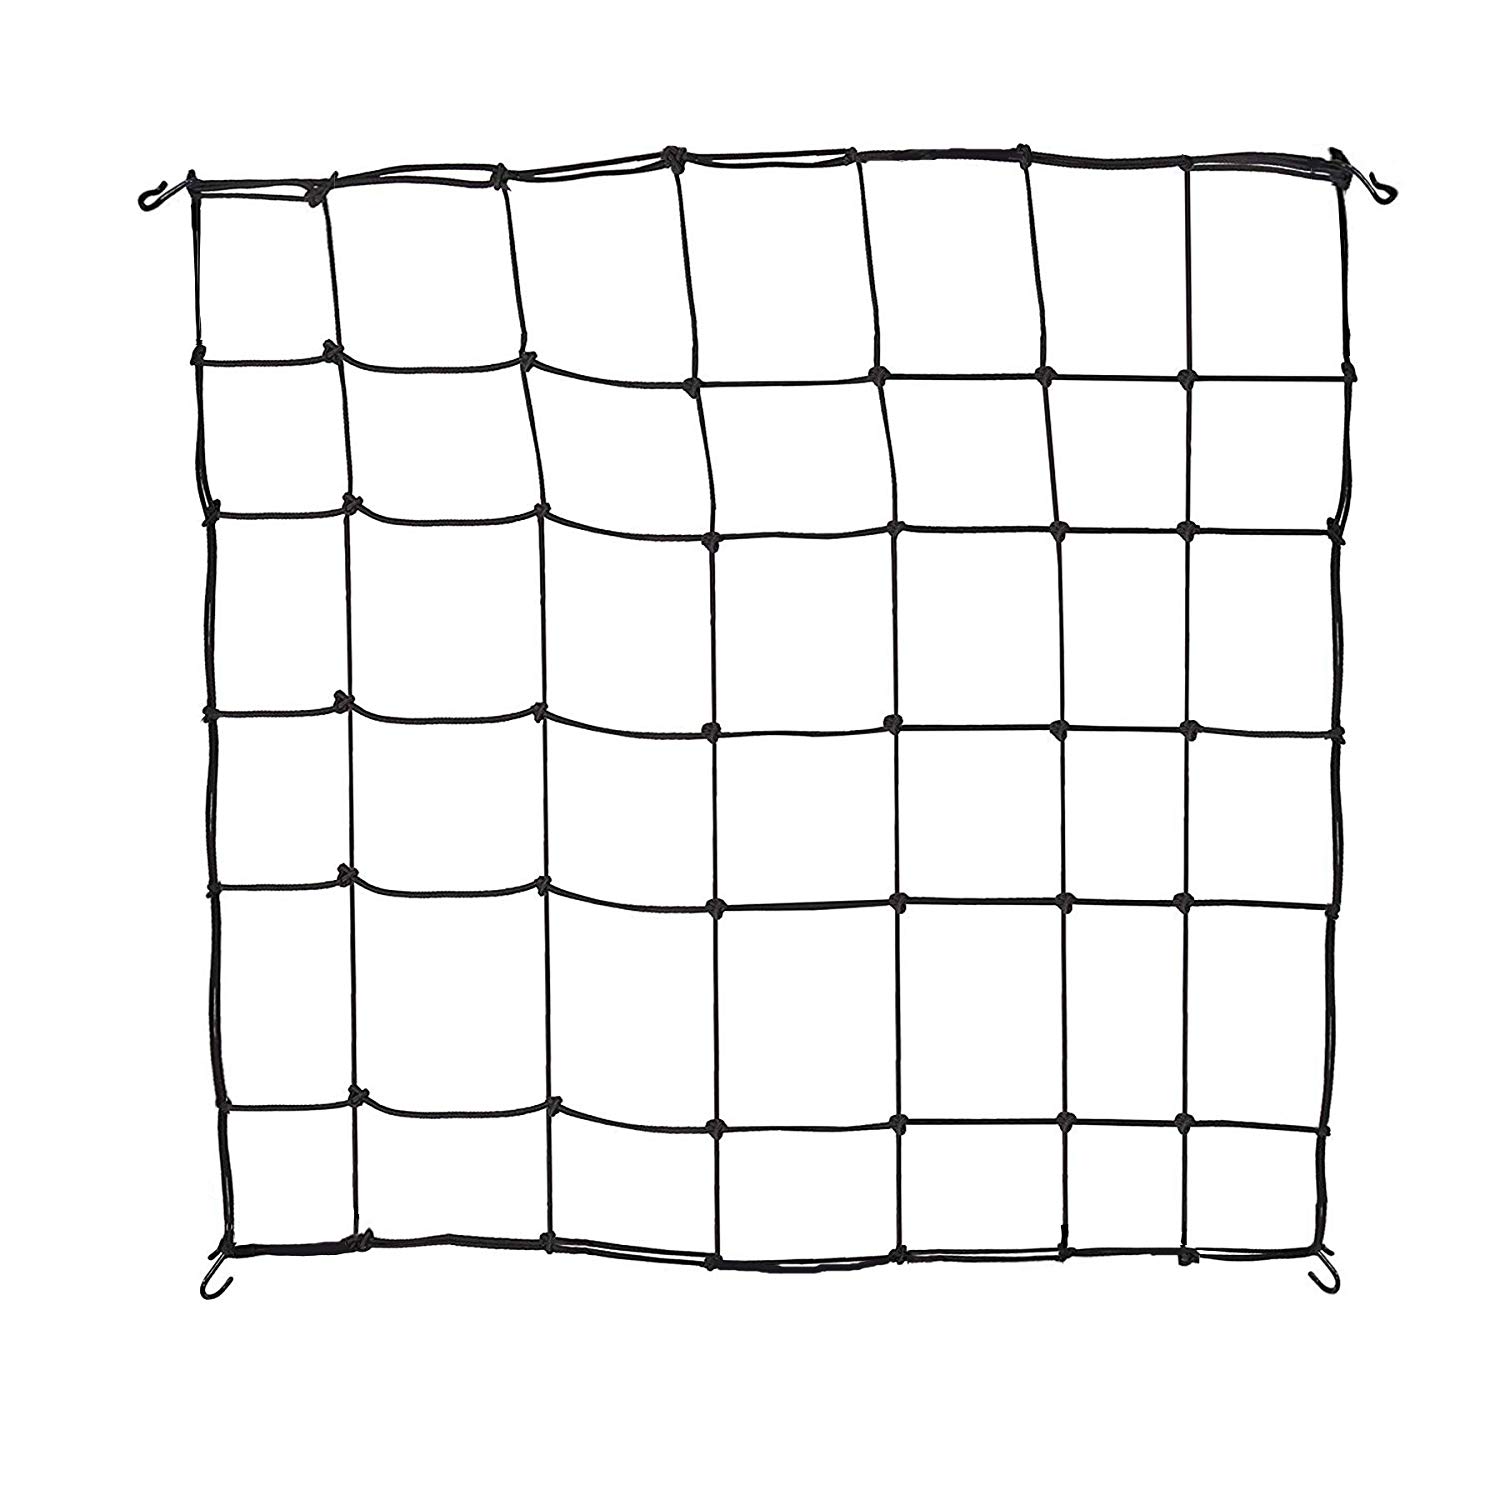
String or twine will help you train your young plants during the early vegetative growth phase. Twine can also be used for hanging scrog nets and making small trellises when necessary. It is one of the basic staples of any garden and is good to have on hand for unforeseen use cases.
Trellis Netting
Netting is important for scrogging during the late vegetative growth stage. A scrog net will have hooks at the corners for easy attachment to the frame of a grow tent. The netting should also be stretchable so that you can easily adjust its position to suit the arrangements of your plants as they grow.

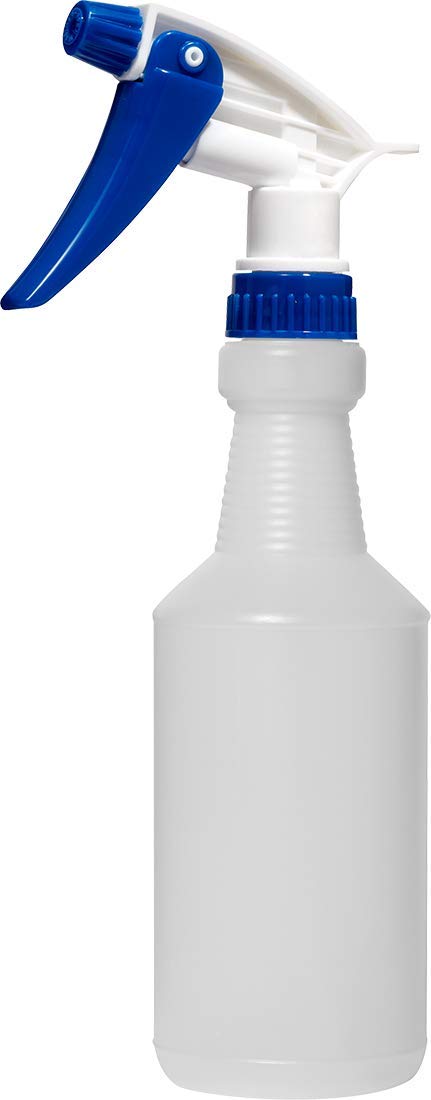
Spray bottle
A spray bottle will come in handy when you need to spray pest repellants over your plants. Spray bottles come in many shapes and sizes, and some are purposefully built for spraying pest repellants on plants. They can also help with any clean up jobs.
Jeweler’s Loop
A jeweler’s loop is not a typical gardening tool, but it will come in handy at the end of the flowering stage when you need to examine trichomes in order to determine when the buds are ready for harvest. The jeweler’s loop can also help diagnose issues such as pest infestations and bud rot.

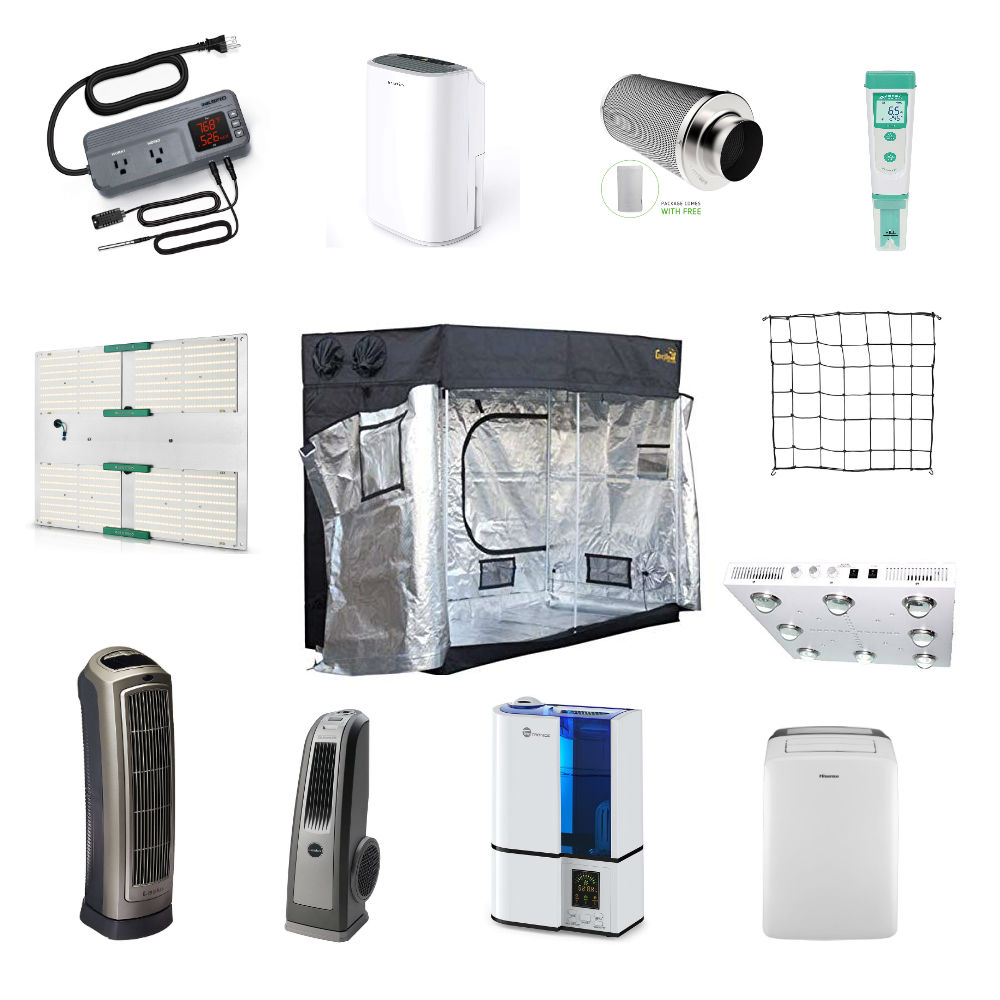
List Of Grow Tent Equipment: Equipment List For Grow Setups
Grow setups can be as simple or complicated as you like, but most of them have the same basic components:
- Grow tent: closed environment so you can control temperature, humidity, & light
- Grow light: LED grow light delivers exactly the right amount and color of light
- Fans: intake fans & inline exhaust fans move air in and out, while clip fans circulate air
- Carbon filter: removes particles and marijuana odor from exhaust air
- Heater: raises temperature when it drops too low
- Air conditioner: lowers temperature when it rises too high
- Dehumidifier: reduces relative humidity when it rises too high
- Hygrometer: measure relative humidity and temperature inside of the grow tent
- Rope clip hangers: allows for quick & easy adjustment of appliances hanging from frame
- Surge protector power chords: protects appliances from power surges and adds plug points
- Extension chords: delivers power to appliances throughout the grow tent
- Gardening tools: PH tester, watering can, trowel, rake, pots, bucket, string or twine, gloves, etc.
2. How To Choose A Grow Space For Your Cannabis Grow Setup
How do you choose a space to grow cannabis in?
The very first question many new growers ask themselves is, “where should I put my grow tent?”
Answering this question can be tricky. Grow setups can be large and take up entire rooms. Moreover, you will need somewhere near the grow tent to store all of the little items and tools that come into use during a grow cycle: watering cans, buckets, gloves, nutrients, UV glasses, shears, etc.
Thankfully, many places in your home can serve as fairly good grow spaces. Some are more convenient than others, and we are going to discuss the various factors below that you should consider before you make a decision. But overall, grow rooms can be set up almost anywhere, and are especially well suited to areas that meet these basic criteria:
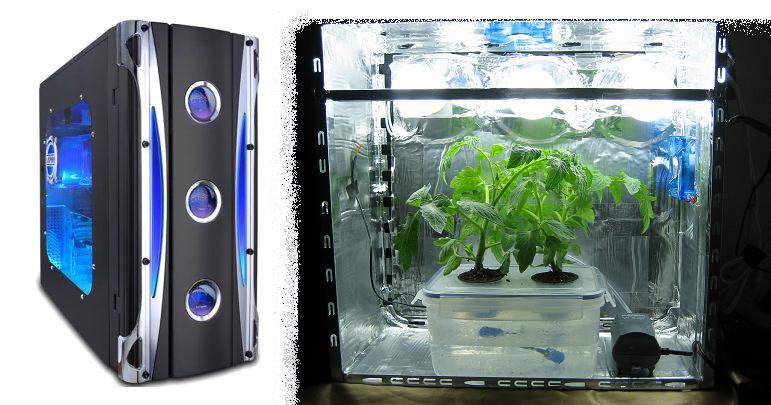
1. Privacy & Discretion
Choose a private place. Many home growers start by thinking about which possible grow tent locations in their home would be most discreet. Often, growing weed is a fairly personal undertaking. As such, growers are usually private and do not want their grow setups to attract a lot of attention.
Some growers take things to another level and create ‘stealth grows.’ Pictured to the right is a stealth grow inside of a computer.
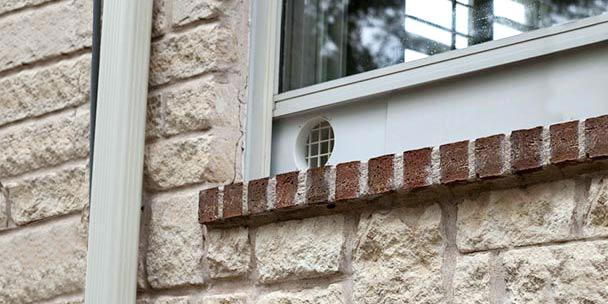
2. Ventilation
Choose a place with access to ventilation. It is extremely important to think about how the exhaust from the tent is going to ventilate to the outside before anything else. After all, you do not want to have to run aluminum ducting throughout your home. If you do have to run ducting through your home, try to run it through walls up to the top of the building and ventilate out of the attic. Otherwise, choose a spot near a window or opening that can be modified in a discreet way into a vent.
3. Water Access
If you are lucky, you can find a place for your grow setup that has a faucet or water source nearby. Otherwise, get ready to carry buckets of water back and forth through your home. This does not mean you can only grow in a bathroom, laundry room, but for instance, a master bedroom with a en suit bathroom is a perfect location.
4. Sizing Up The Grow Space
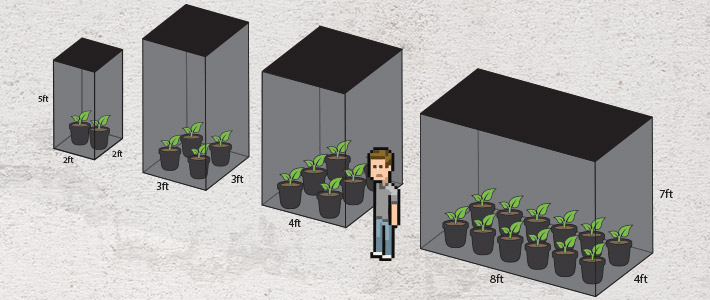
How large should your grow space be? Well… how many plants do you want to grow?
After reading phase 1, where we covered the different types of seeds and marijuana plants you can grow, hopefully you have a sense of how many plants you want to grow and whether you want to grow tall photoperiods or shorter autoflowers. If you are growing photoperiods, you should choose a space with at least around 10-12 feet (2-3 meters) of head room so that you can raise the grow light up high enough to keep a good amount of distance between the grow light and the tops of the buds.
A good rule of thumb is to grow no more than 2 plants per square meter, but this depends of the strain and your growing style. Still, keeping a good amount of distance between your plants is important so that you have enough space to properly train, top, and SCROG your plants during the growth stage. Also, you will need a bit of room around the plants to work and put appliances.
So when you measure your potential grow space, allow for an extra few inches between and around your plants. This will also help you determine what size grow tent you will need.
How to choose a place for your grow tent
Here are a few factors to consider when choosing a place to grow your weed. Basically, the order of priority in the decision should be the following:
- Privacy & Discretion: choose a place that is discreet and private
- Ventilation: choose a place with convenient venting to the outside
- Access to water: if possible, find a place near a faucet so that you don’t have to carry buckets of water around your home
- Size of grow space: allow for a few extra inches between and around your plants as well as a few feet of head room above the eventual maximum heigh of your mature flowering plants
Examples of good locations in the home:
- Bedrooms: bedrooms are common choices because they are so private
- Closets: closets are often the perfect size and are relatively discreet, just close the door
- Basements: basements can get dirty, wet, and smell strange, and no one will care
- Attics: attics are very discreet, but they do not often have water sources nearby
- Laundry room: laundry rooms are perfect but sometimes less private than other locations
3. Example Grow Systems: Low Budget Vs. Top Performance
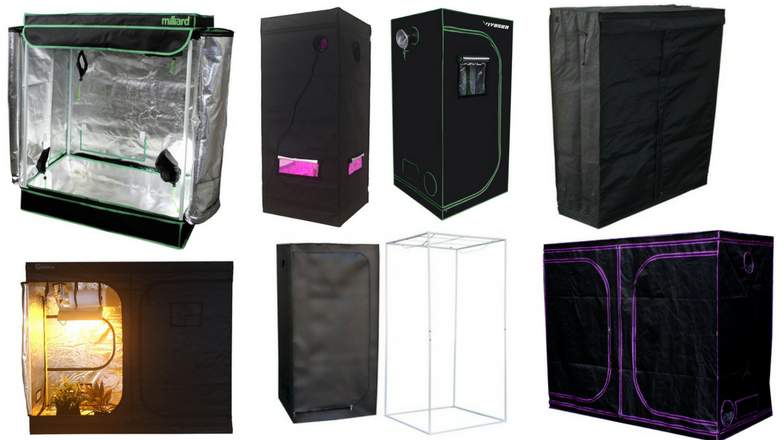
2 Example Grow Rooms: Low Budget vs. High Performance
Now that you understand how a grow setup works, let’s take a look at two example grow rooms: a low budget grow room and a high performance grow room. This will give you a sense of the range of quality and performance that is possible to achieve with different budgets.
Depending on your growing goals, you could also used parts from both grows to create a hybrid grow with many of the benefits of the high performance grow for a lower overall total cost.
1. $300 Low Budget Grow Setup
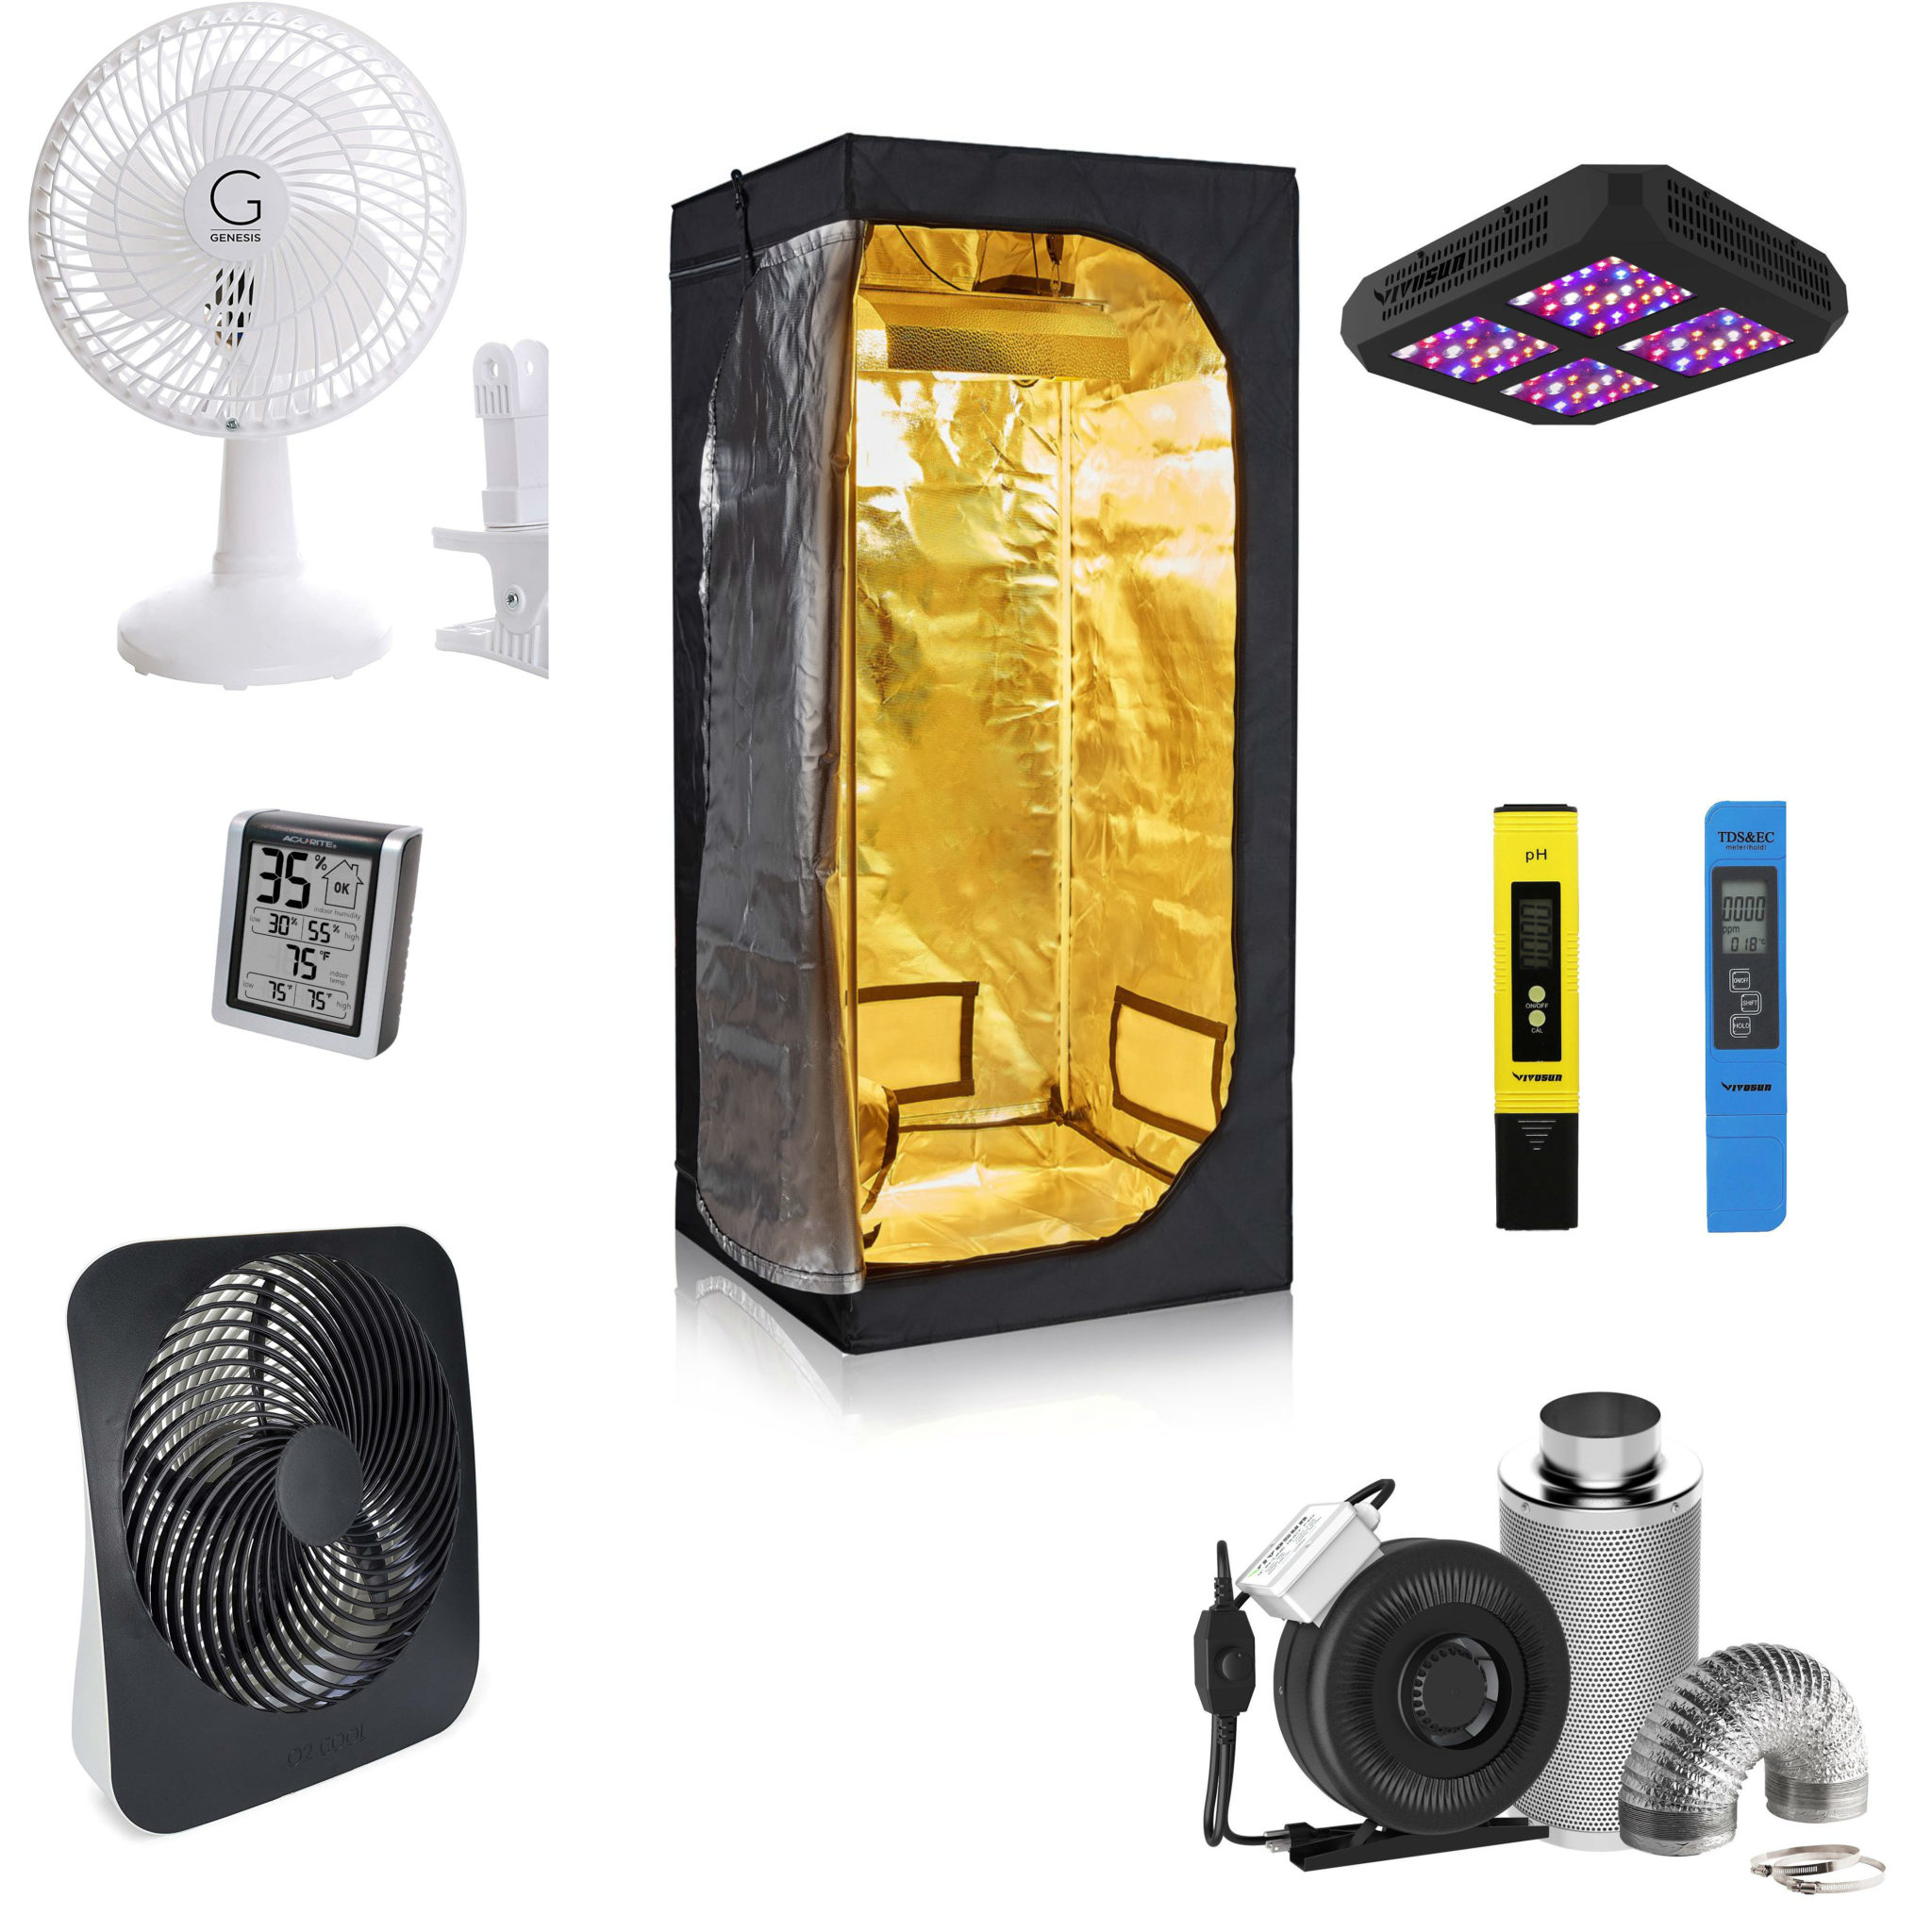
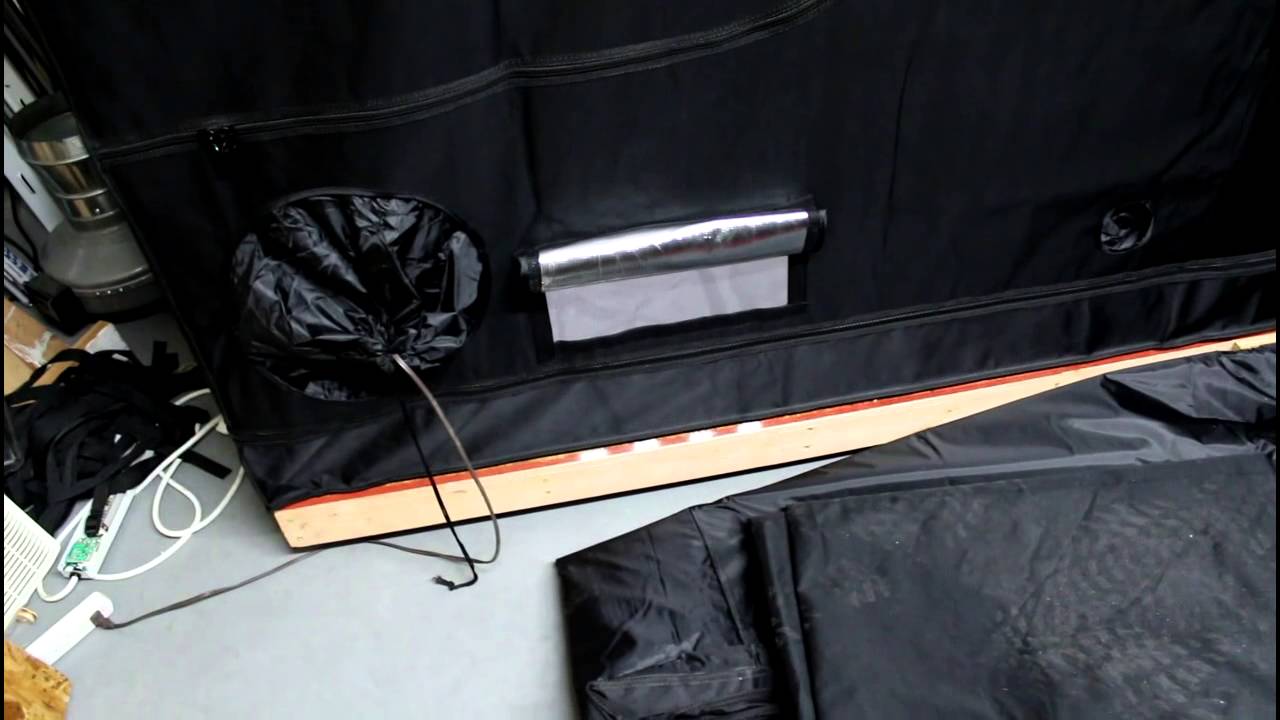
This $300 grow setup is perfect for beginners who are learning how to grow weed for the first time. You can set this system up in under 2 hours (often less) and fit it into most closets, making it the perfect grow setup for discreet growing in bedrooms and basements.
One of the downsides to this particular grow system is that it does not include any of the appliances that help to regulate growing conditions such as humidity and temperature, such as a humidifier or a heater. While that might not be a problem if you live in a temperate climate where daily temperatures do not fluctuate very often, this will make it harder correct the climate within grow tent if it moves outside of the acceptable range for your plants.
However, with a little bit of resourcefulness, even humidity and temperature can be controlled. So, when all is said and done, these are the only items you will absolutely need to buy. You can figure out the rest of it using things from around your house or workshop.
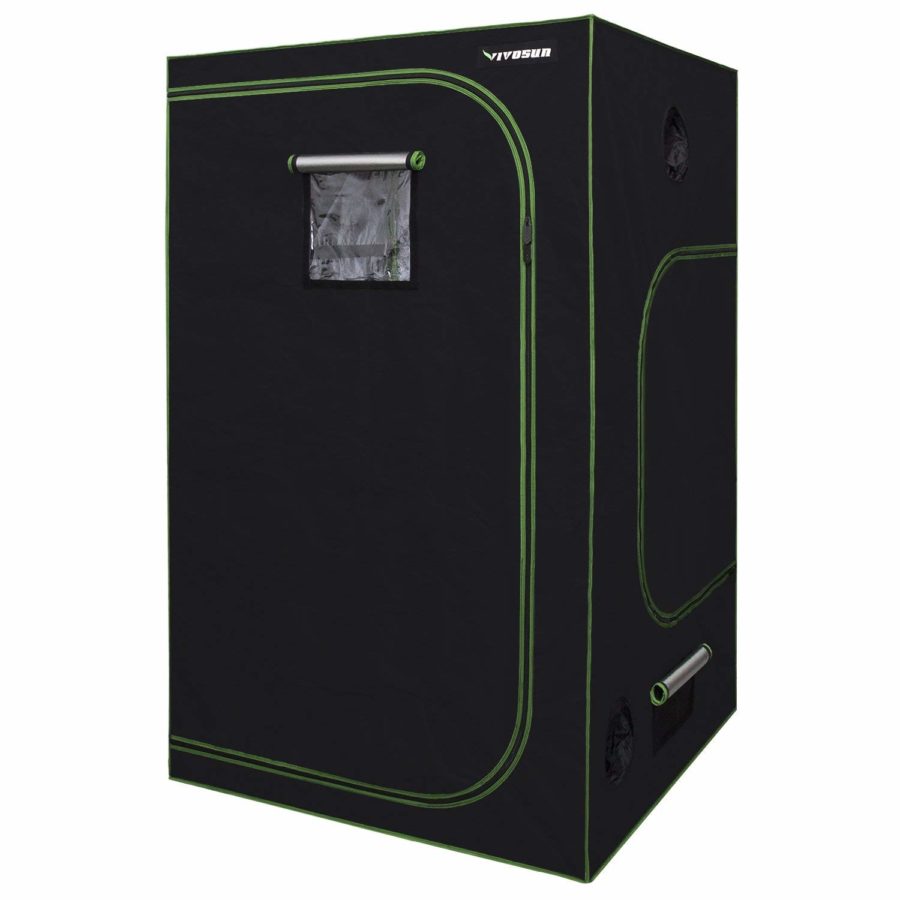
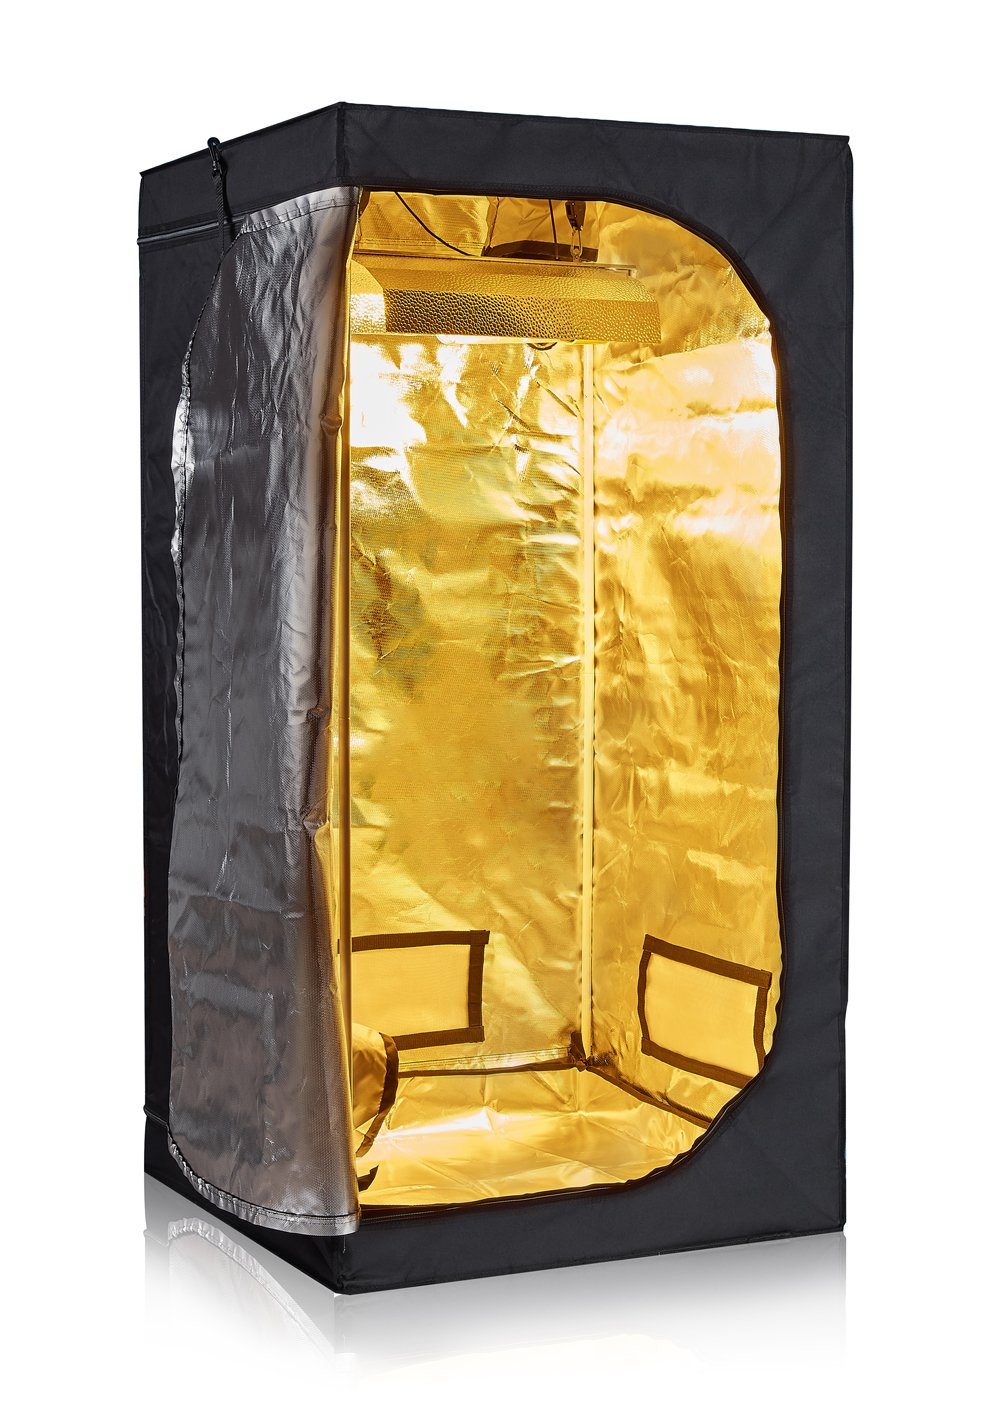
1. Grow Tent
TopoLite Grow Tent for Hydroponic Indoor Growing System Dark Room Grow Boxes (32″x32″x63″)
The TopoLite grow tent features reflective walls for maximum light saturation as well as floor vents and a sturdy frame. At just over 5 feet tall, this grow tent is perfect for growing autoflowers in discreet locations.
- Perfect for growing autoflowers
- Reflective walls
- Sturdy frame
- Floor vents
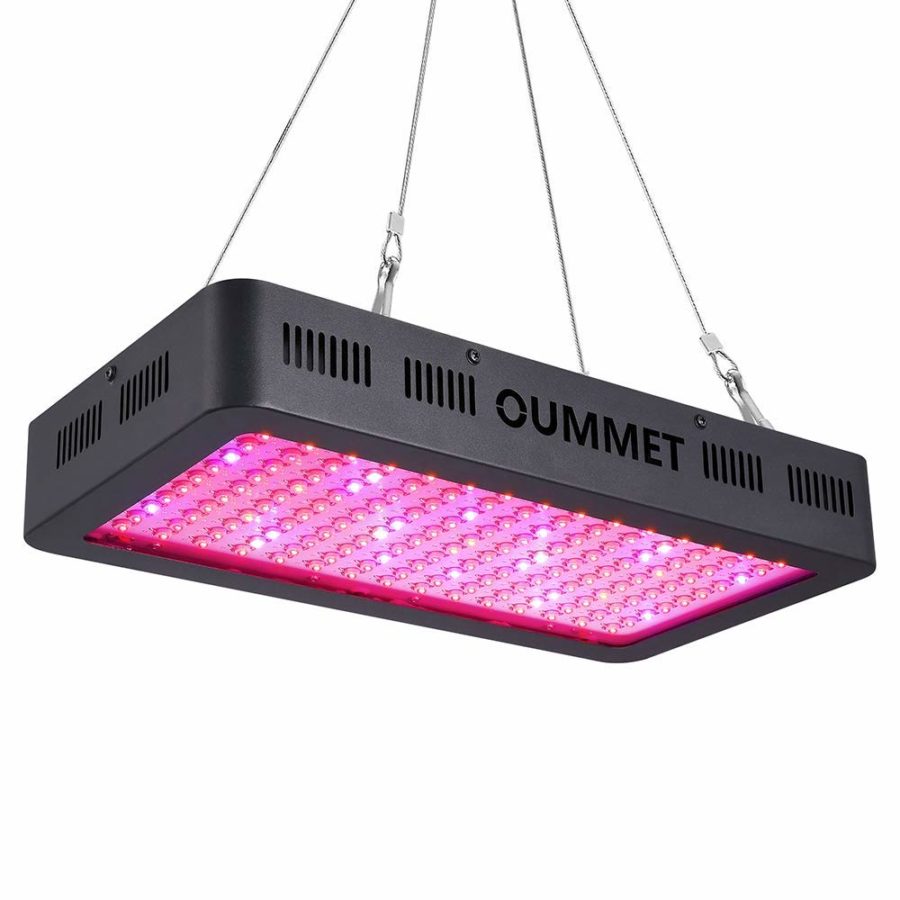
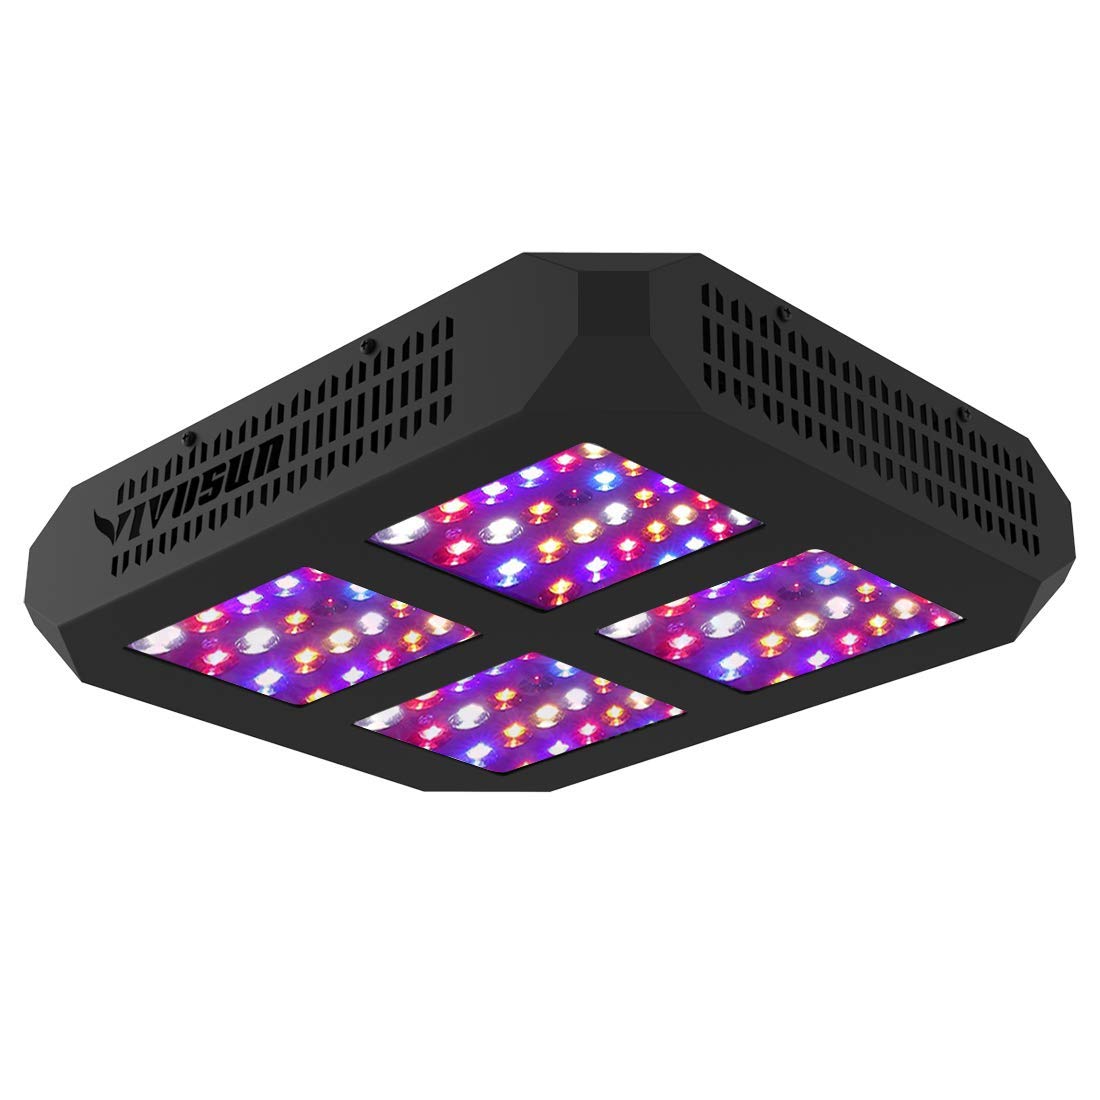
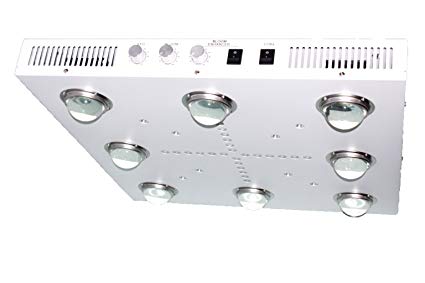
2. LED Grow Light
VIVOSUN 600W LED Grow Light Full Spectrum for Hydroponic Indoor Plants Growing Veg and Flowering (120PCS LED Diodes)
This budget-friendly grow light is perfect for beginners who are looking to start small autoflower grows. With enough power to grow around 4 autoflower plants in a 3 foot square area (such as the above TopoLite grow tent), this tried and true light will last for at least several grow cycles before needing to be replaced. Best of all, it is energy efficient, making it perfect for low budget grows.
3. Exhaust Kit
VIVOSUN Air Filtration Kit: 4 Inch 203 CFM Inline Fan with Speed Controller, 4” Carbon Filter and 8 Feet of Ducting Combo
The Vivosun exhaust kit comes with everything you need to get started growing immediately. Simply connect the carbon filter and aluminum ducting to the fan and you are good to go. It is quiet and powerful, which makes it the perfect option for discreet grow setups.

4. PH Pen
VIVOSUN pH & TDS Meter Combo, 0.05ph High Accuracy Pen Type pH Meter & +/- 2% Readout Accuracy 3-in-1 TDS EC Temperature Meter
The Vivosun pH meter and temperature meter combo will help you balance the PH of the water you give your plants so that you do not burn them. They are reliable meters that will last several grow cycles before needing to be replaced.

5. Temp RH Monitor
AcuRite 00613MB Humidity Monitor with Indoor Thermometer, Digital Hygrometer and Humidity Gauge Indicator
This tried and true digital hygrometer will give you humidity and temperature reading at a glance. It even tells you the high and low points of both temperature and humidity of the past 24 hours so that you can get a sense of the fluctuations your plants are experiencing.

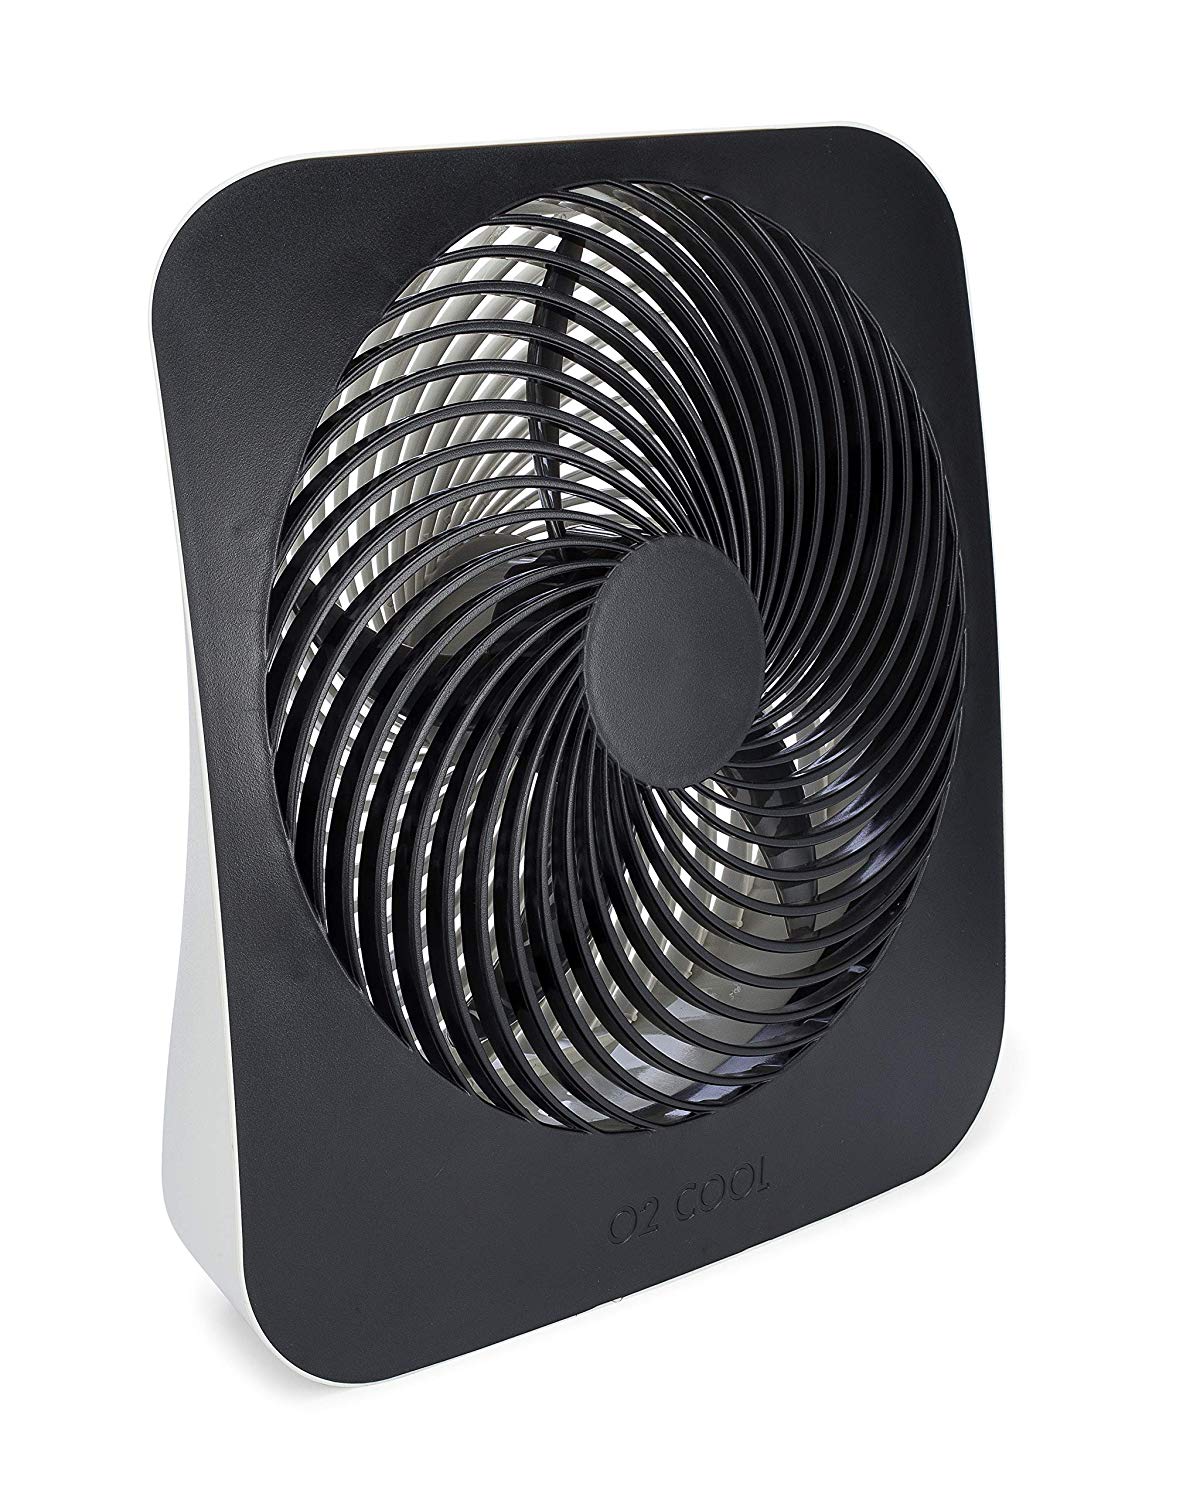
6. 10″ Fan
O2COOL 10-Inch Portable Desktop Air Circulation Battery Fan – 2 Cooling Speeds – With AC Adapter
It might not look like much, but for a cheap 10″ fan, it delivers enough power to push fresh air around your tent with even power, creating a smooth breeze. It also features 2 modes so that you can control the air intake rate and keep the pressure within the tent slightly negative, which is necessary for proper air circulation.
7. 6″ Clip On Fan
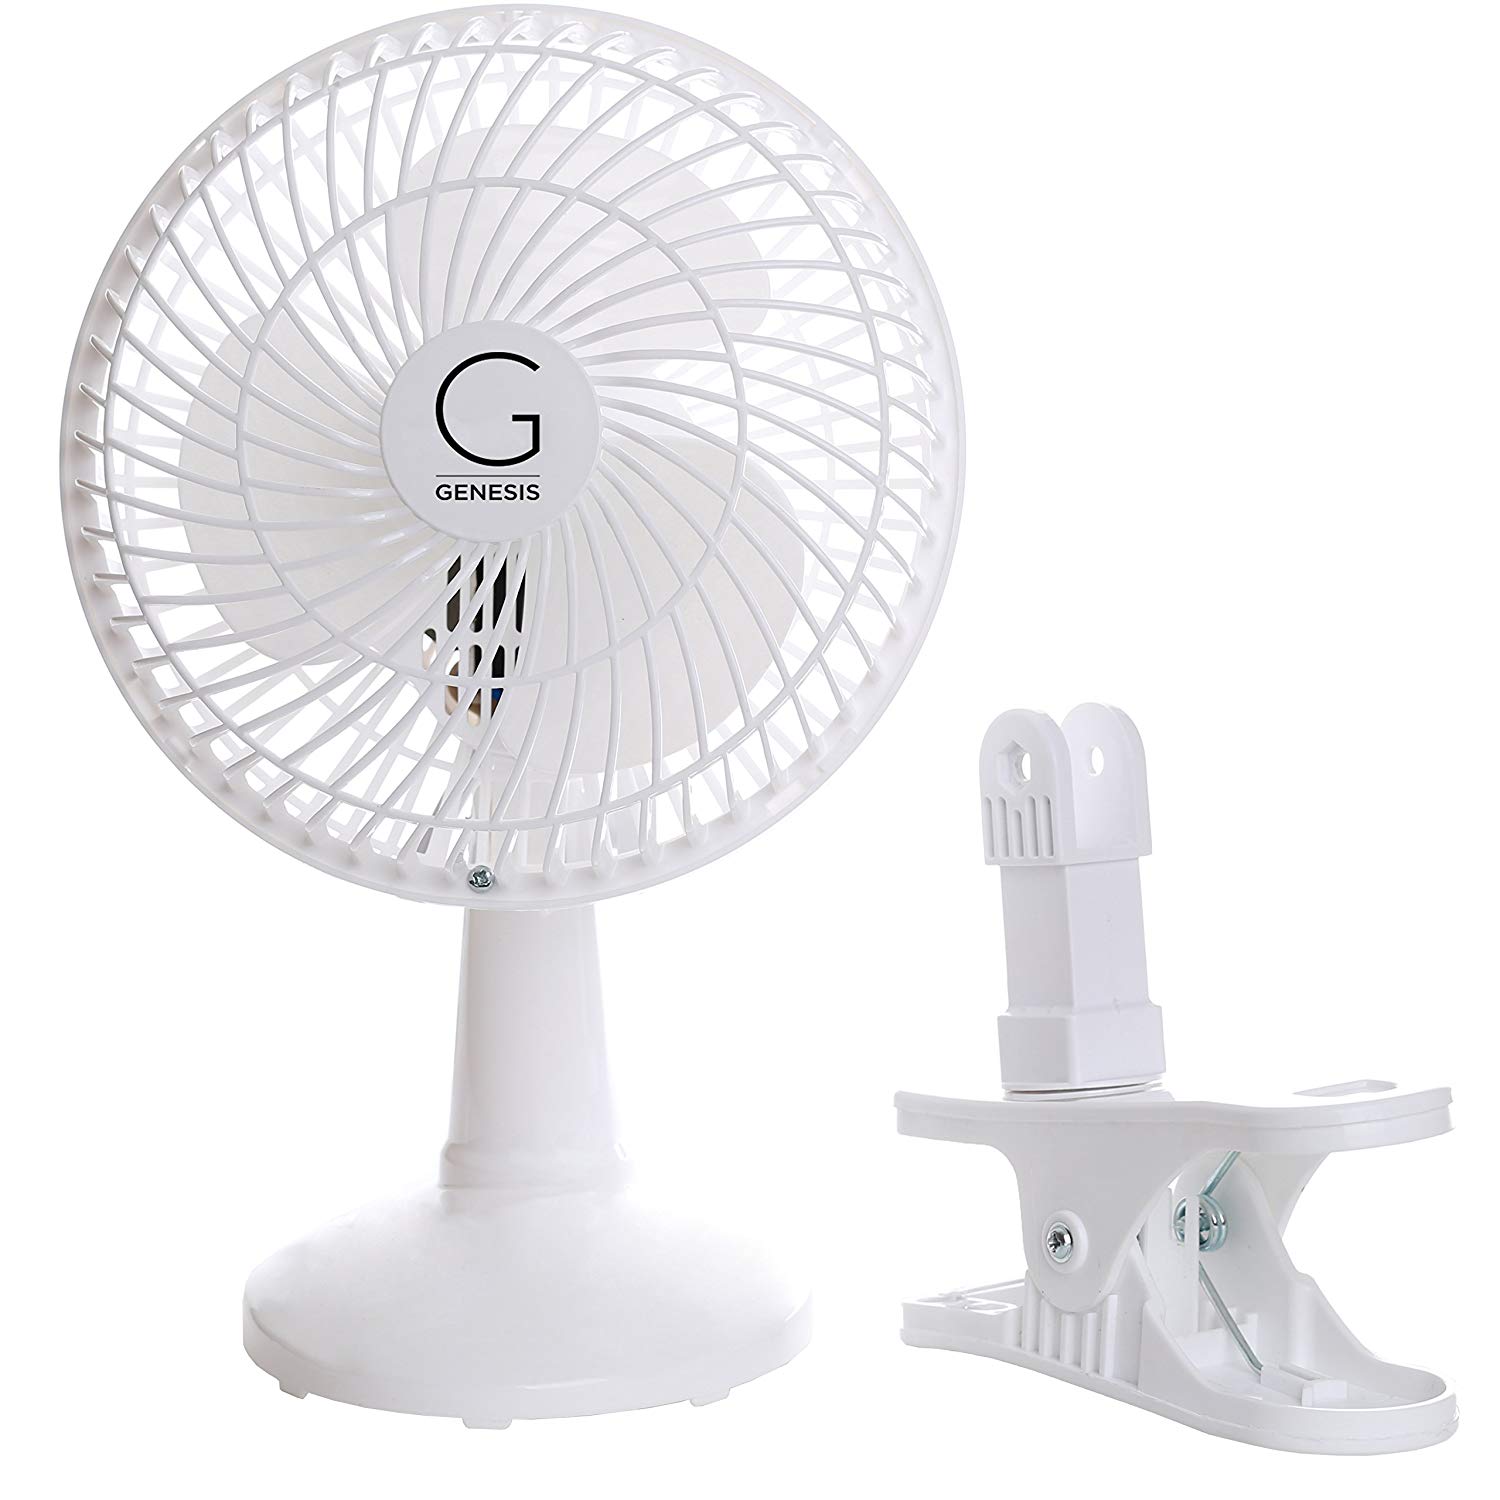
Genesis 6-Inch Clip-On Fan – Convertible Table-Top & Clip Fan, Fully Adjustable Head, Two Quiet Speeds – Ideal For The Home, Office, Dorm, & More
This clip on fan is an ideal compliment to the above intake fan. It helps circulate air within the grow tent and can be easily attached to any location or angle using the convenient clip and mount. It is quite and gentle, making it perfect for discreet grow setups.
If You Have Extra Money, Get These Also:
While not entirely necessary, the appliances below give you more control over the internal environment of the grow tent. Humidity and temperature are notoriously difficult to control without some extra help from these units, so if you have a bit of extra cash, consider picking up these appliances in the following order of priority.
1. Dehumidifier
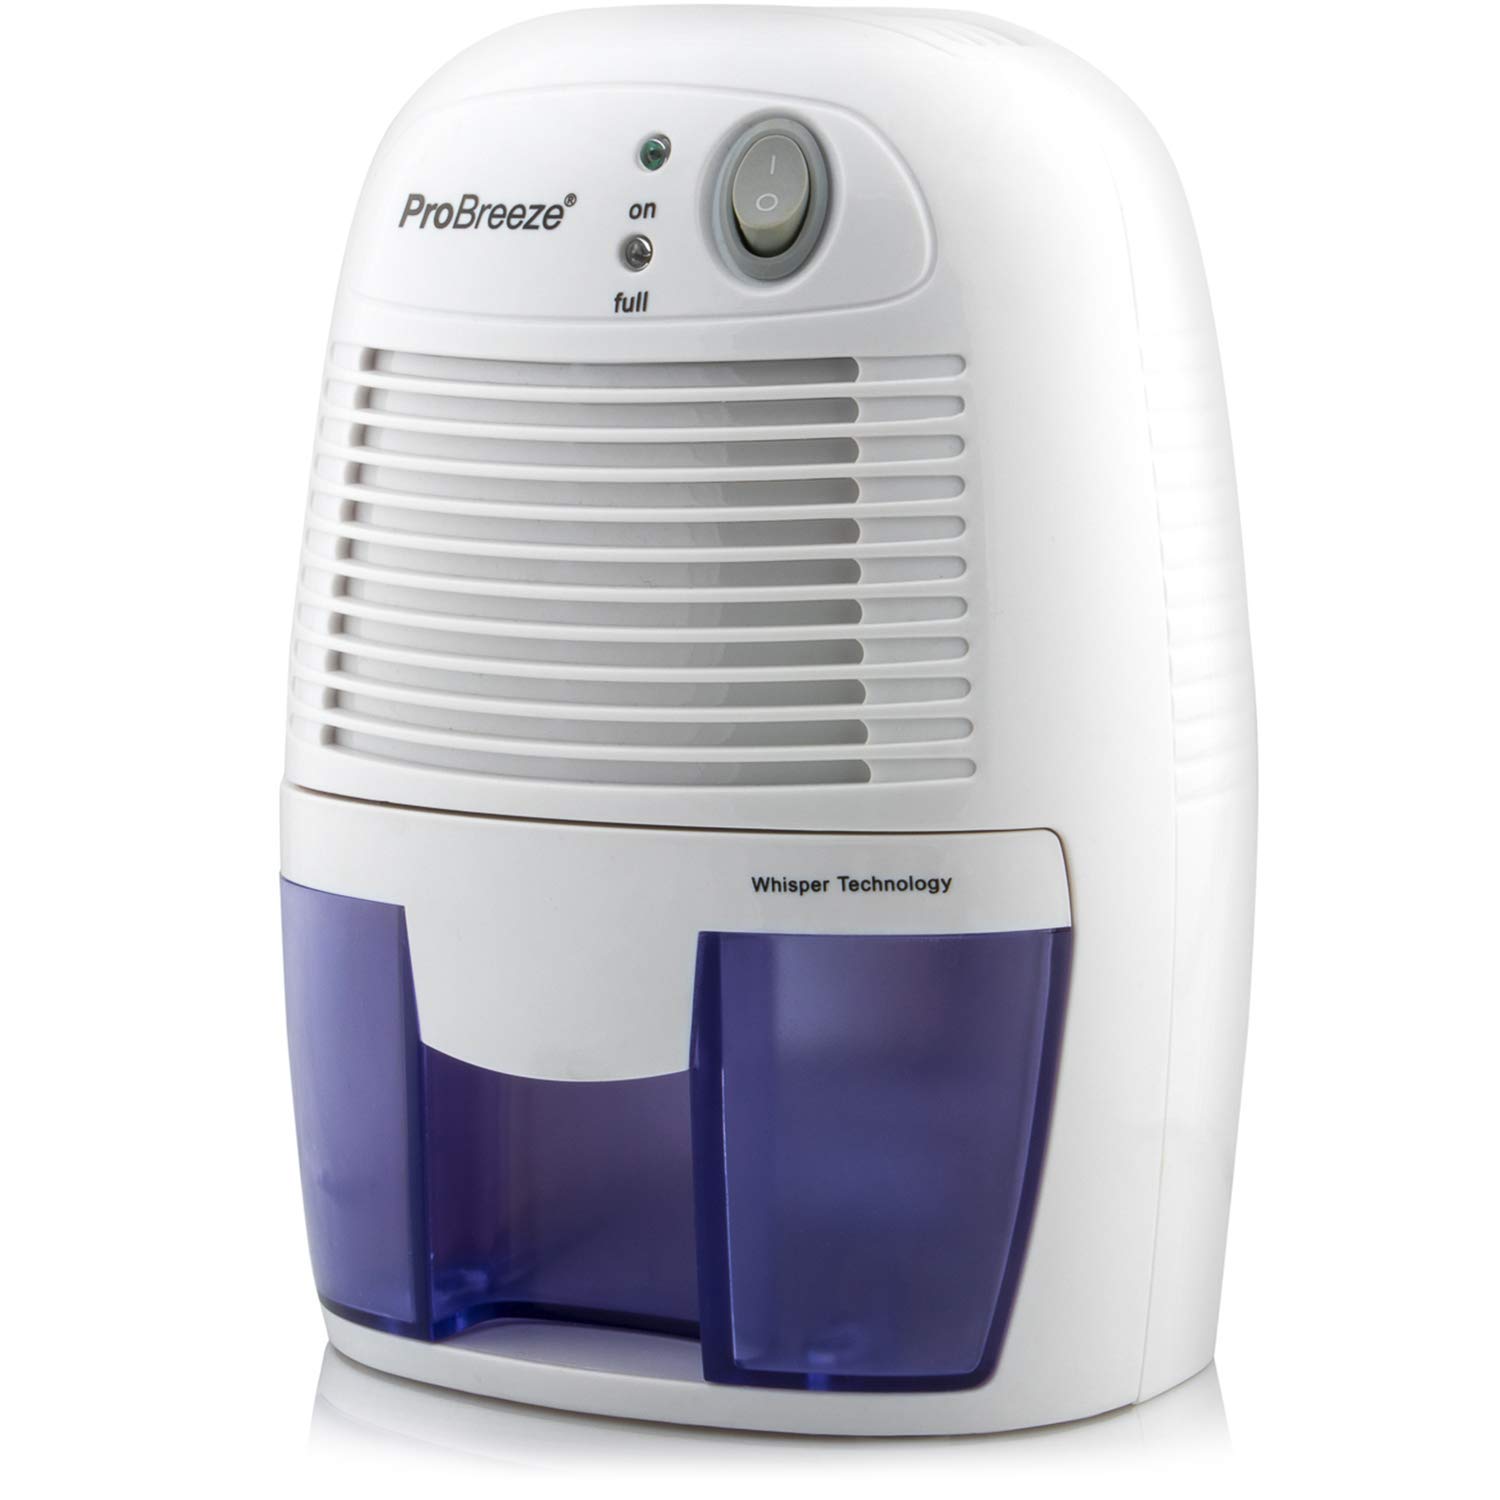
Pro Breeze Electric Mini Dehumidifier, 1200 Cubic Feet (150 sq ft), Compact and Portable for Damp Air, Mold, Moisture in Home, Kitchen, Bedroom, Basement, Caravan, Office, Garage
Perfect mini-dehumidifier for a small space like a grow tent. You will have to empty it frequently, but it will make humidity control a synch.
2. Humidifier
TaoTronics TT-AH001 Humidifiers for Bedroom Home Baby, Cool Mist, Quiet Operation, LED Display, 360° Nozzle, Waterless Auto Shut-Off, White-(4L/1.06 Gallon)
- Adds moisture to air
- Quiet
- Auto Shut-off when out of water
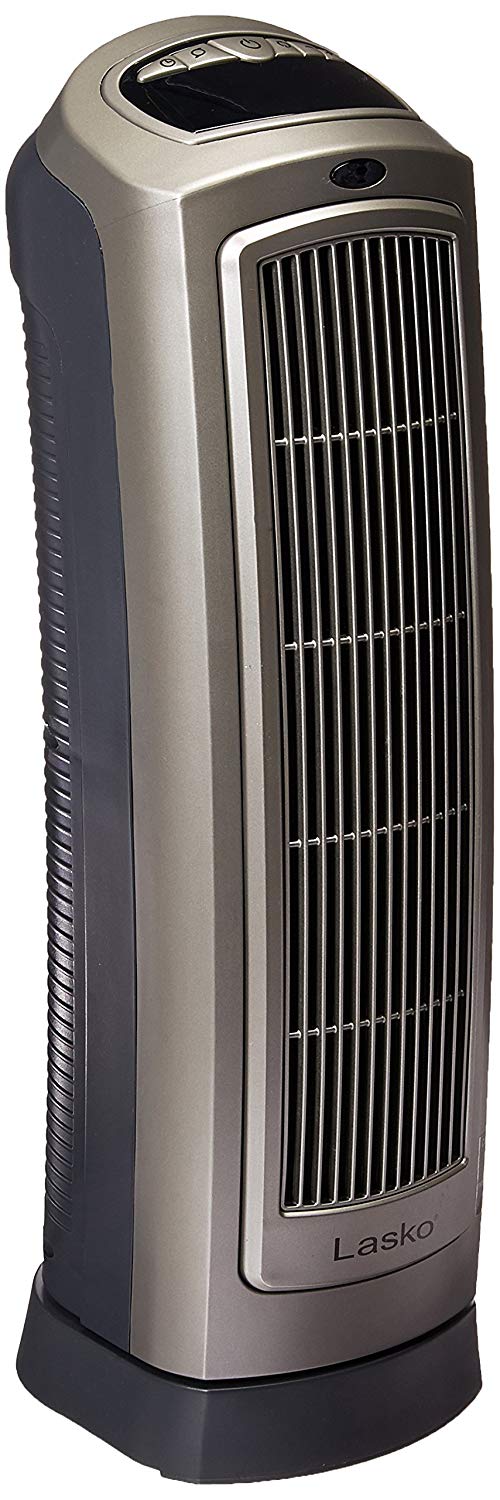
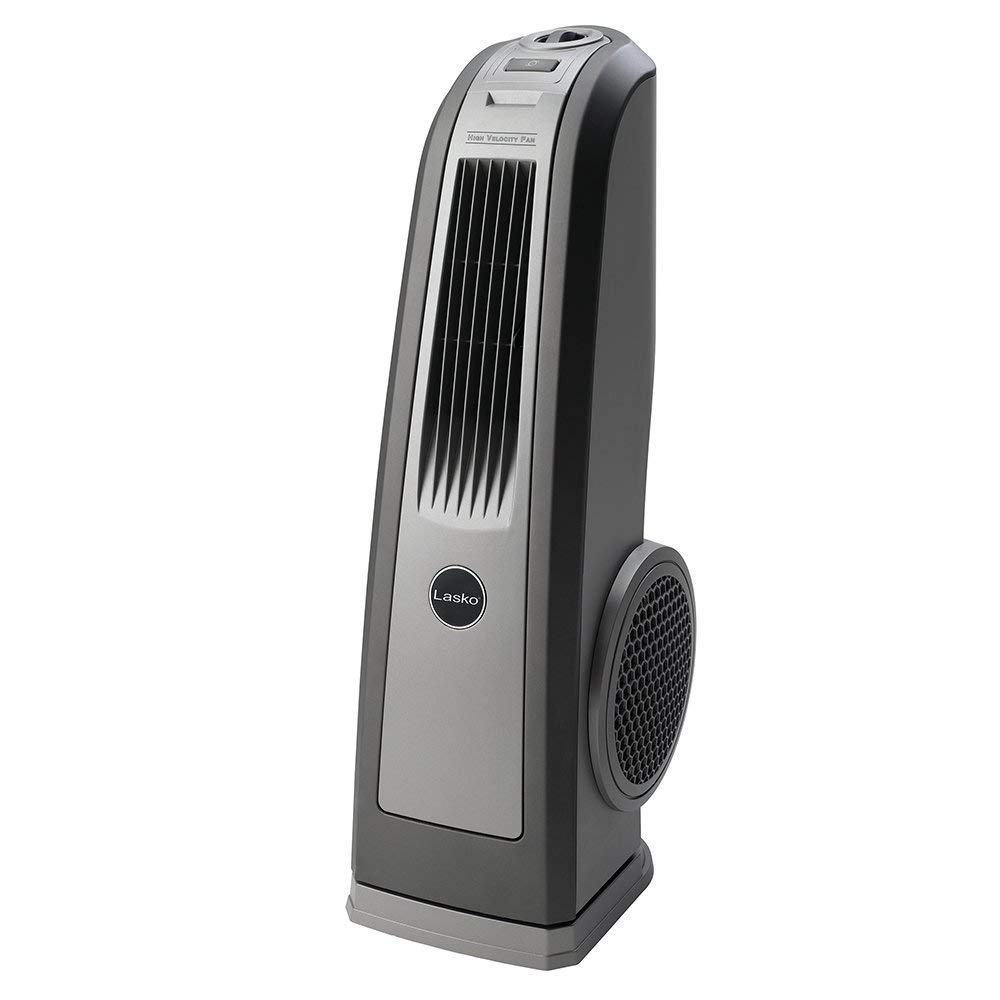
3. Heater
Lasko Heating Space Heater 8.5″L x 7.25″W x 23″H 755320
- Keeps temperature from fluctuating too much when lights are off
- Durable, long-lasting
- Not needed if lights will be on 24/7
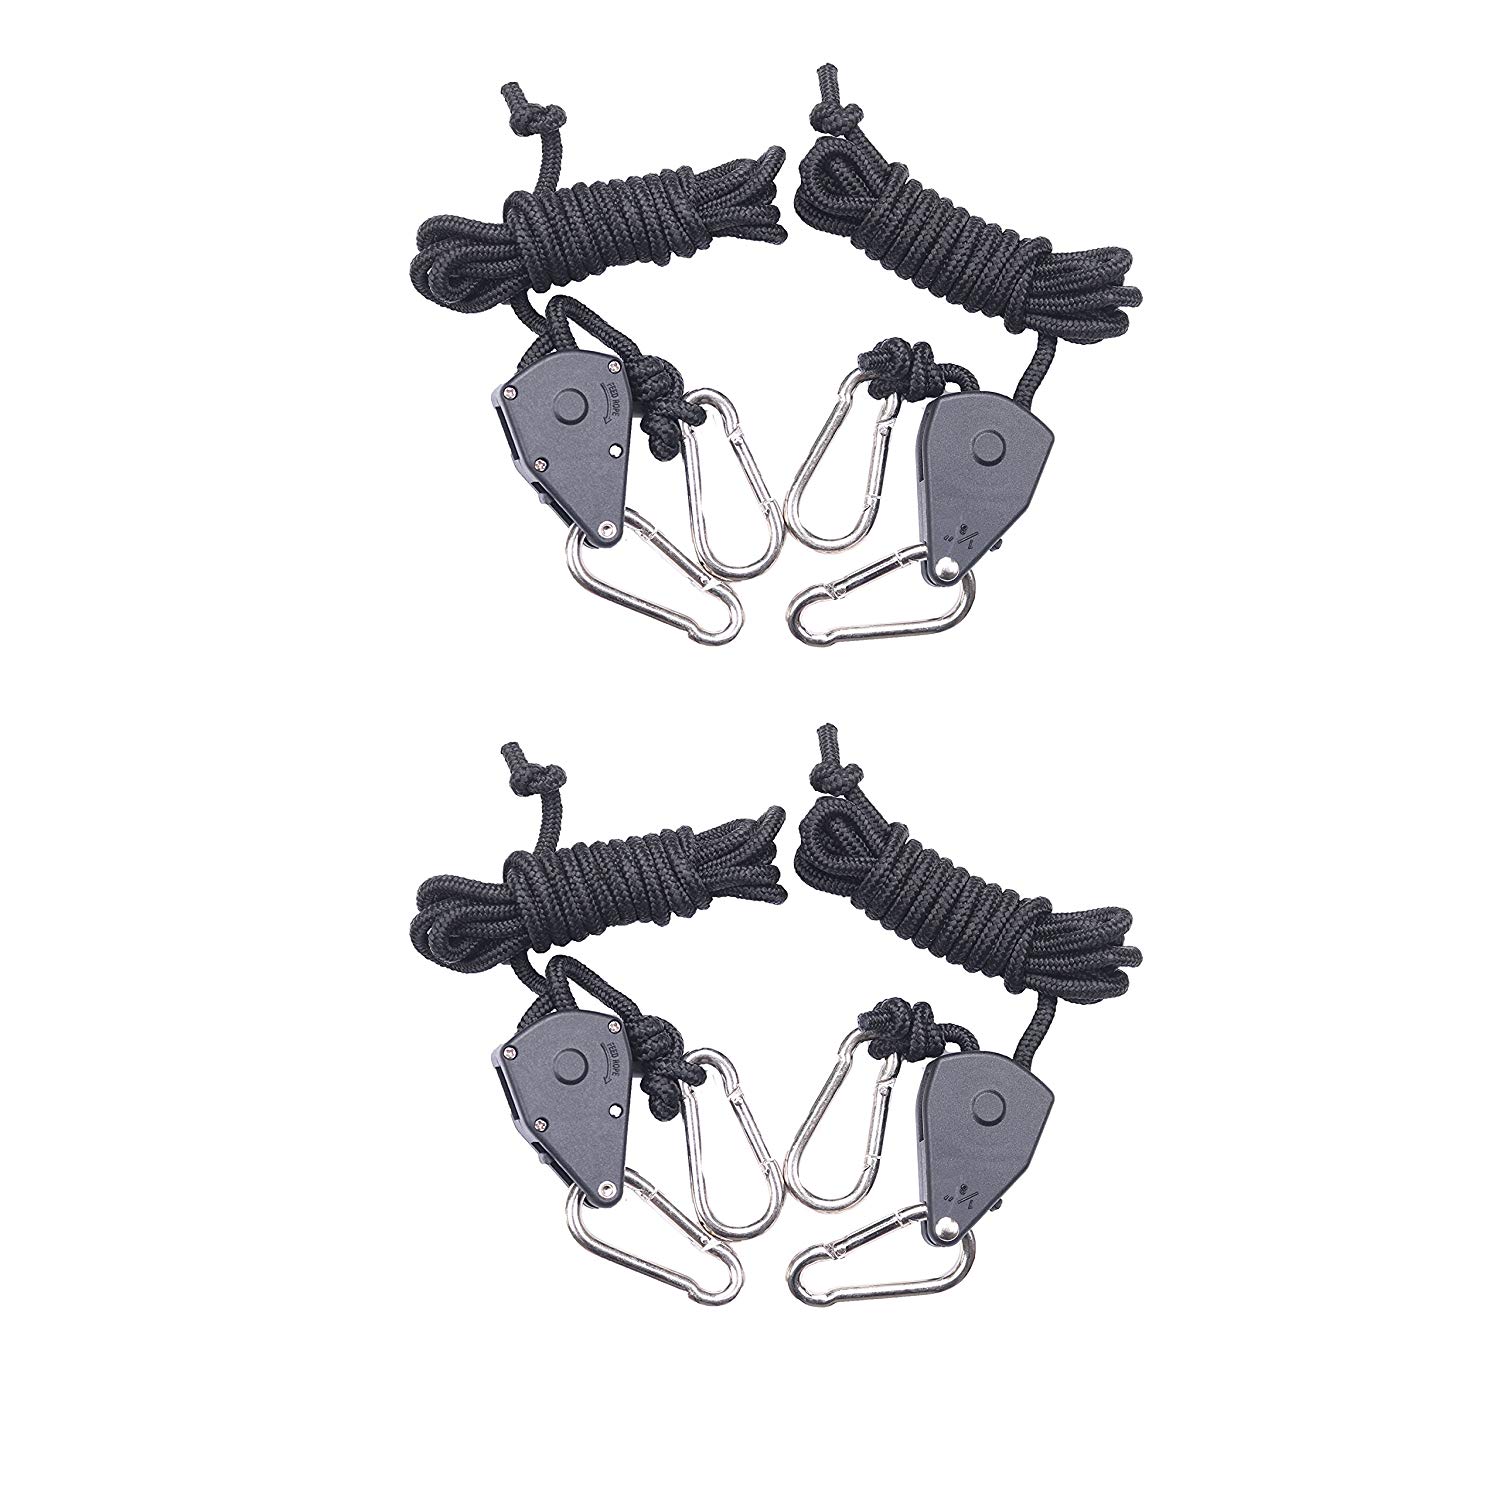
4. 1/8″ Adjustable Hangers
2-Pairs Zazzy 1/8 inch Adjustable Grow Light Hangers Rope Clip Hanger Ratchet for Growing Tent
- Adjustable rope clip hangers
- Easily hang and secure appliances from the frame of the grow tent
Low-budget $300 Grow Setup
Only the basic necessities:
- Grow Tent: TopoLite Grow Tent for Hydroponic Indoor Growing System Dark Room Grow Boxes (32″x32″x63″)
- LED Grow Light: VIVOSUN 600W LED Grow Light Full Spectrum for Hydroponic Indoor Plants Growing Veg and Flowering (120PCS LED Diodes)
- Exhaust Kit: VIVOSUN Air Filtration Kit: 4 Inch 203 CFM Inline Fan with Speed Controller, 4” Carbon Filter and 8 Feet of Ducting Combo
- PH Pen: VIVOSUN pH & TDS Meter Combo, 0.05ph High Accuracy Pen Type pH Meter & +/- 2% Readout Accuracy 3-in-1 TDS EC Temperature Meter
- Temp RH Monitor: AcuRite 00613MB Humidity Monitor with Indoor Thermometer, Digital Hygrometer and Humidity Gauge Indicator
- 10″ Fan: O2COOL 10-Inch Portable Desktop Air Circulation Battery Fan – 2 Cooling Speeds – With AC Adapter
- 6″ Clip On Fan: Genesis 6-Inch Clip-On Fan – Convertible Table-Top & Clip Fan, Fully Adjustable Head, Two Quiet Speeds – Ideal For The Home, Office, Dorm, & More
If you have a bit of extra money:
- Dehumidifier: Pro Breeze Electric Mini Dehumidifier, 1200 Cubic Feet (150 sq ft), Compact and Portable for Damp Air, Mold, Moisture in Home, Kitchen, Bedroom, Basement, Caravan, Office, Garage
- Humidifier: TaoTronics TT-AH001 Humidifiers for Bedroom Home Baby, Cool Mist, Quiet Operation, LED Display, 360° Nozzle, Waterless Auto Shut-Off, White-(4L/1.06 Gallon)
- Heater: Lasko Heating Space Heater 8.5″L x 7.25″W x 23″H 755320
- 1/8″ Adjustable Hangers: 2-Pairs Zazzy 1/8 inch Adjustable Grow Light Hangers Rope Clip Hanger Ratchet for Growing Tent
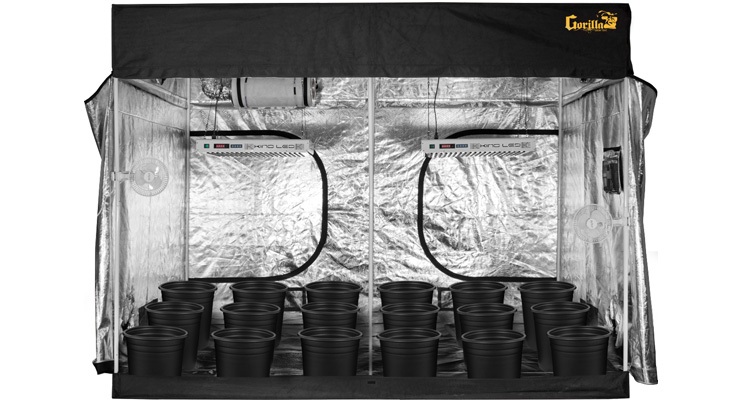
2. $3500 Grow Setup
The grow system we are about to discuss is a tried and true grow setup used by many advanced home growers. These are the exact models of each appliance that these advanced growers have used in their grow setups.
When you are ready to up your game and start growing seriously, this grow setup is worth exploring. With advanced grow light technology and an extendable grow tent for extra height, this grow setup will comfortably grow around 12-18 cannabis plants.
The big ticket items on this list are of course the grow lights. These LED grow lights are both advanced, horticulturalist grow lights, meaning that professional horticulture experts use them to grow plants in green houses and other commercial settings.
There are often cheaper options available for many of these appliances, but this constellation of growing equipment is known to work very well together. So if you do not want to play around and are looking for a grow setup that will work as expected, this is the grow system for you.
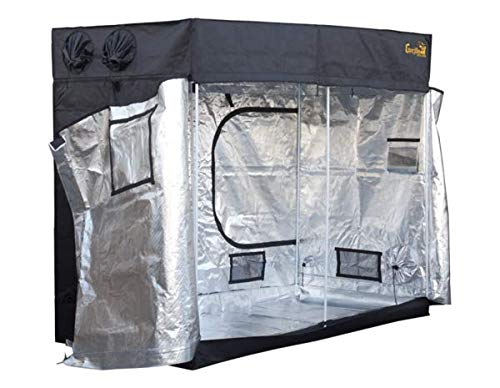
1. Grow Tent
Gorilla Grow Tent LTGGT48 Tent, 4′ x 8′ x 6’7″
- High quality materials
- Thicker mylar
- Direct control over height using either an included 1 foot extension or a separate 2 foot extension kit
- Metal frame
2. LED Grow Light
Optic 8+ COB LED Grow Light 500W (UV/IR) 3500k Cobs
- 6 cobs deliver powerful full-spectrum light
- Bloom booster LEDs for max yields
- Dimmable, multifunctional
3. LED Grow Light
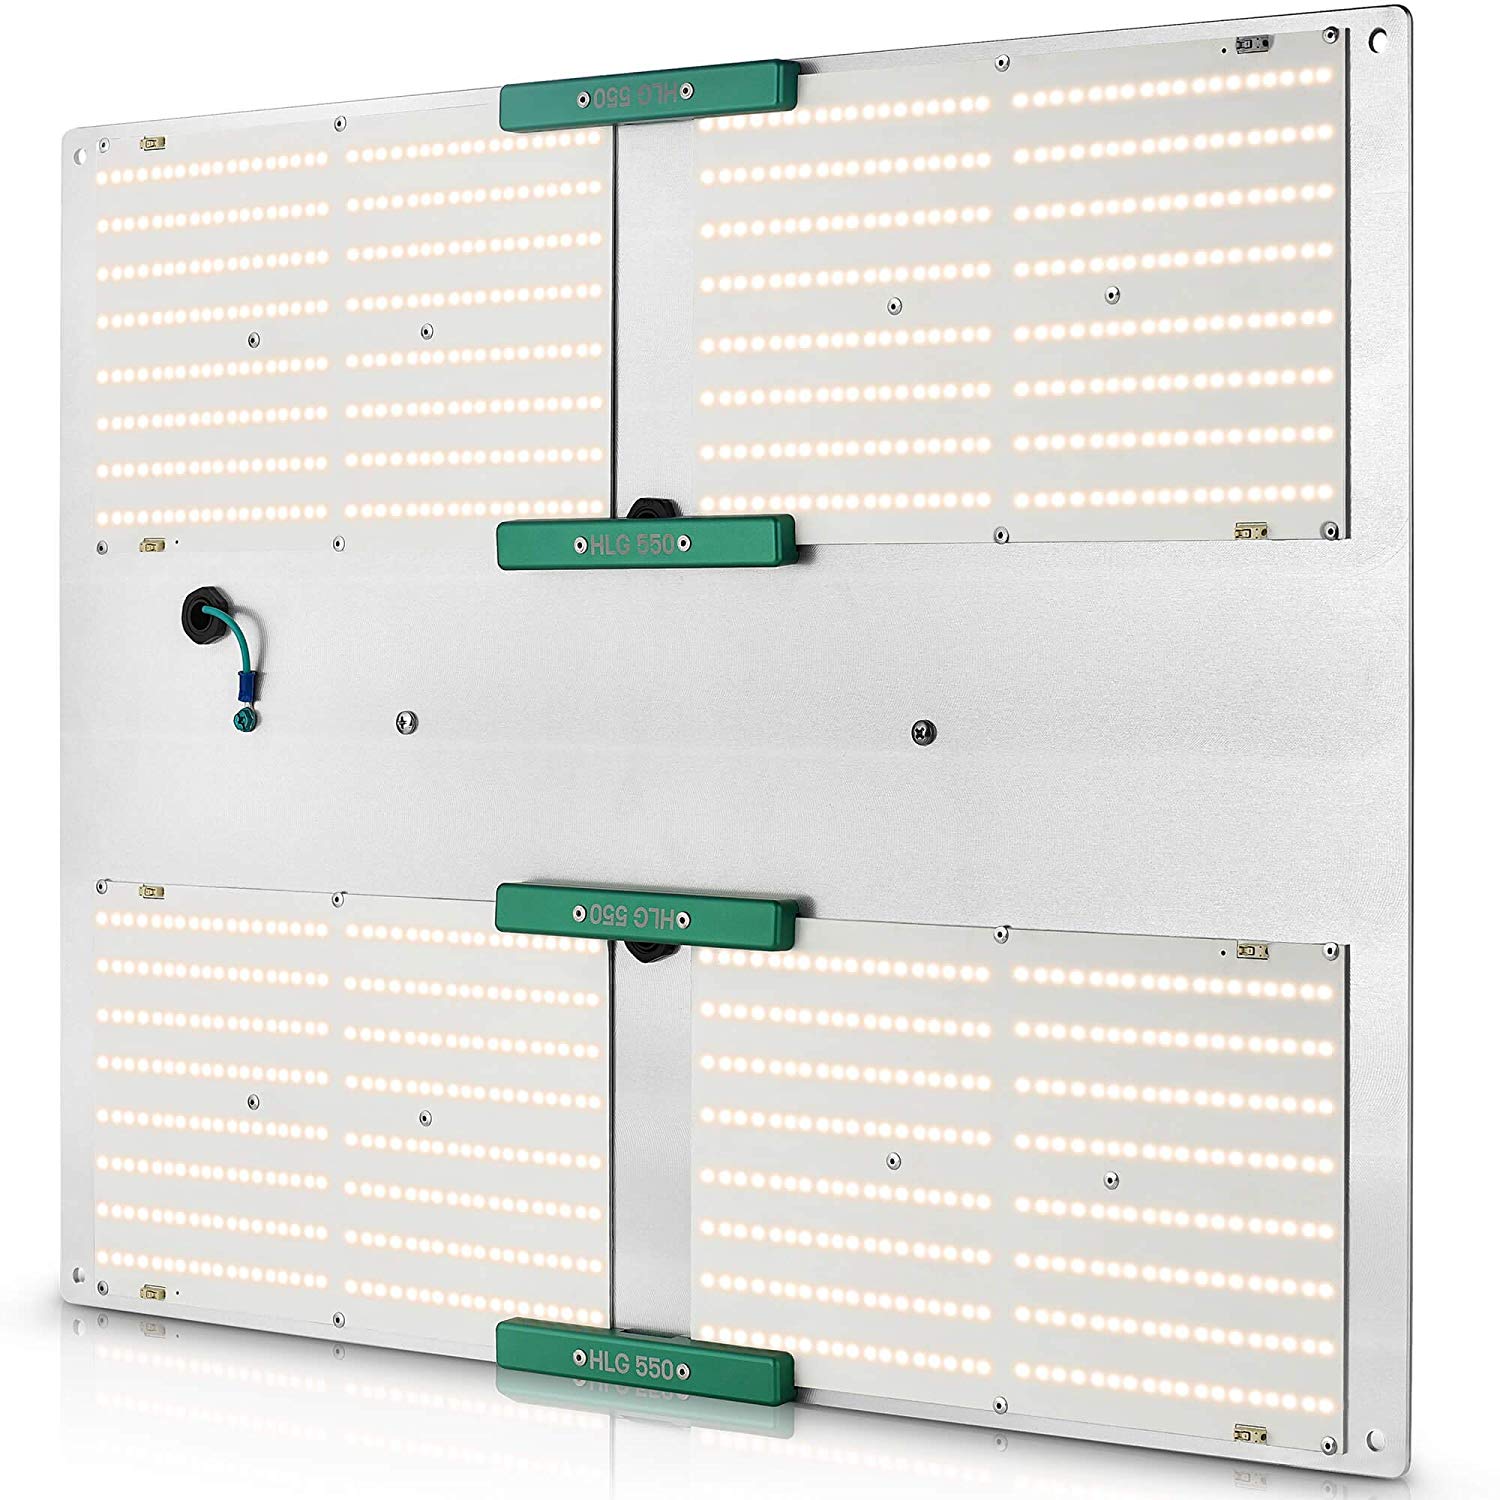
HLG 550 V2 (Version 2, 3000K, 120V Plug) Horticulture Lighting Group LED Grow Light | ETL Certified, Full-Spectrum, High-Efficiency, Veg/Flower Bloom 510W Samsung LM301B Quantum Board Dimmable
- No frills, powerful horticulture grow lights
- Long lasting (will last years)
- Full-spectrum, Dimmable
- Best in the business
4. Exhaust Fan Kit
VIVOSUN 6 Inch 440 CFM Inline Duct Fan with 6″ x 18″ Carbon Filter Odor Control with Australia Virgin Charcoal
This exhaust kit comes with everything you need to get started growing immediately. Simply connect the carbon filter and aluminum ducting to the fan and you are good to go. It is quiet and powerful, which makes it the perfect option for discreet grow setups.
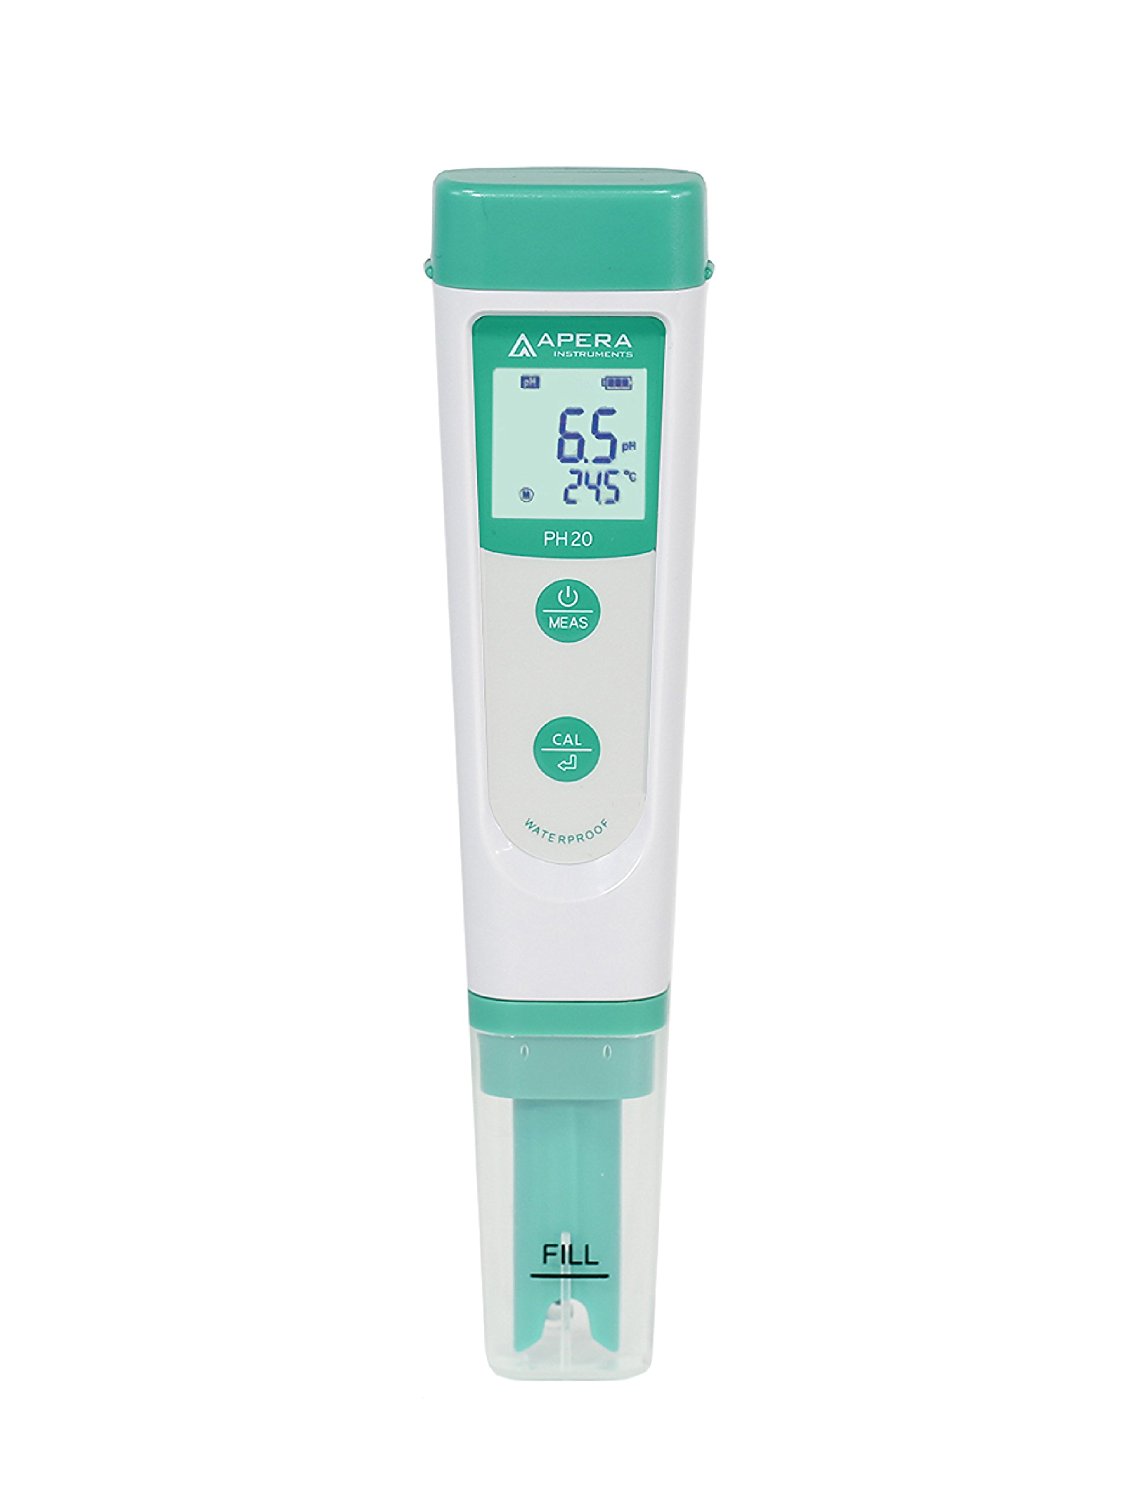
5. PH Pen
Apera AI209-T PH20 Value pH Tester Combo Kit with 8oz Calibration buffers (4,7,10), 4oz 3M KCL Storage Solution, Probe Cleaning Brush & CalBox
- Laboratory grade pH tester
- Durable, long lastin
- Comes with cleaning brush and storage solution to prevent degredation
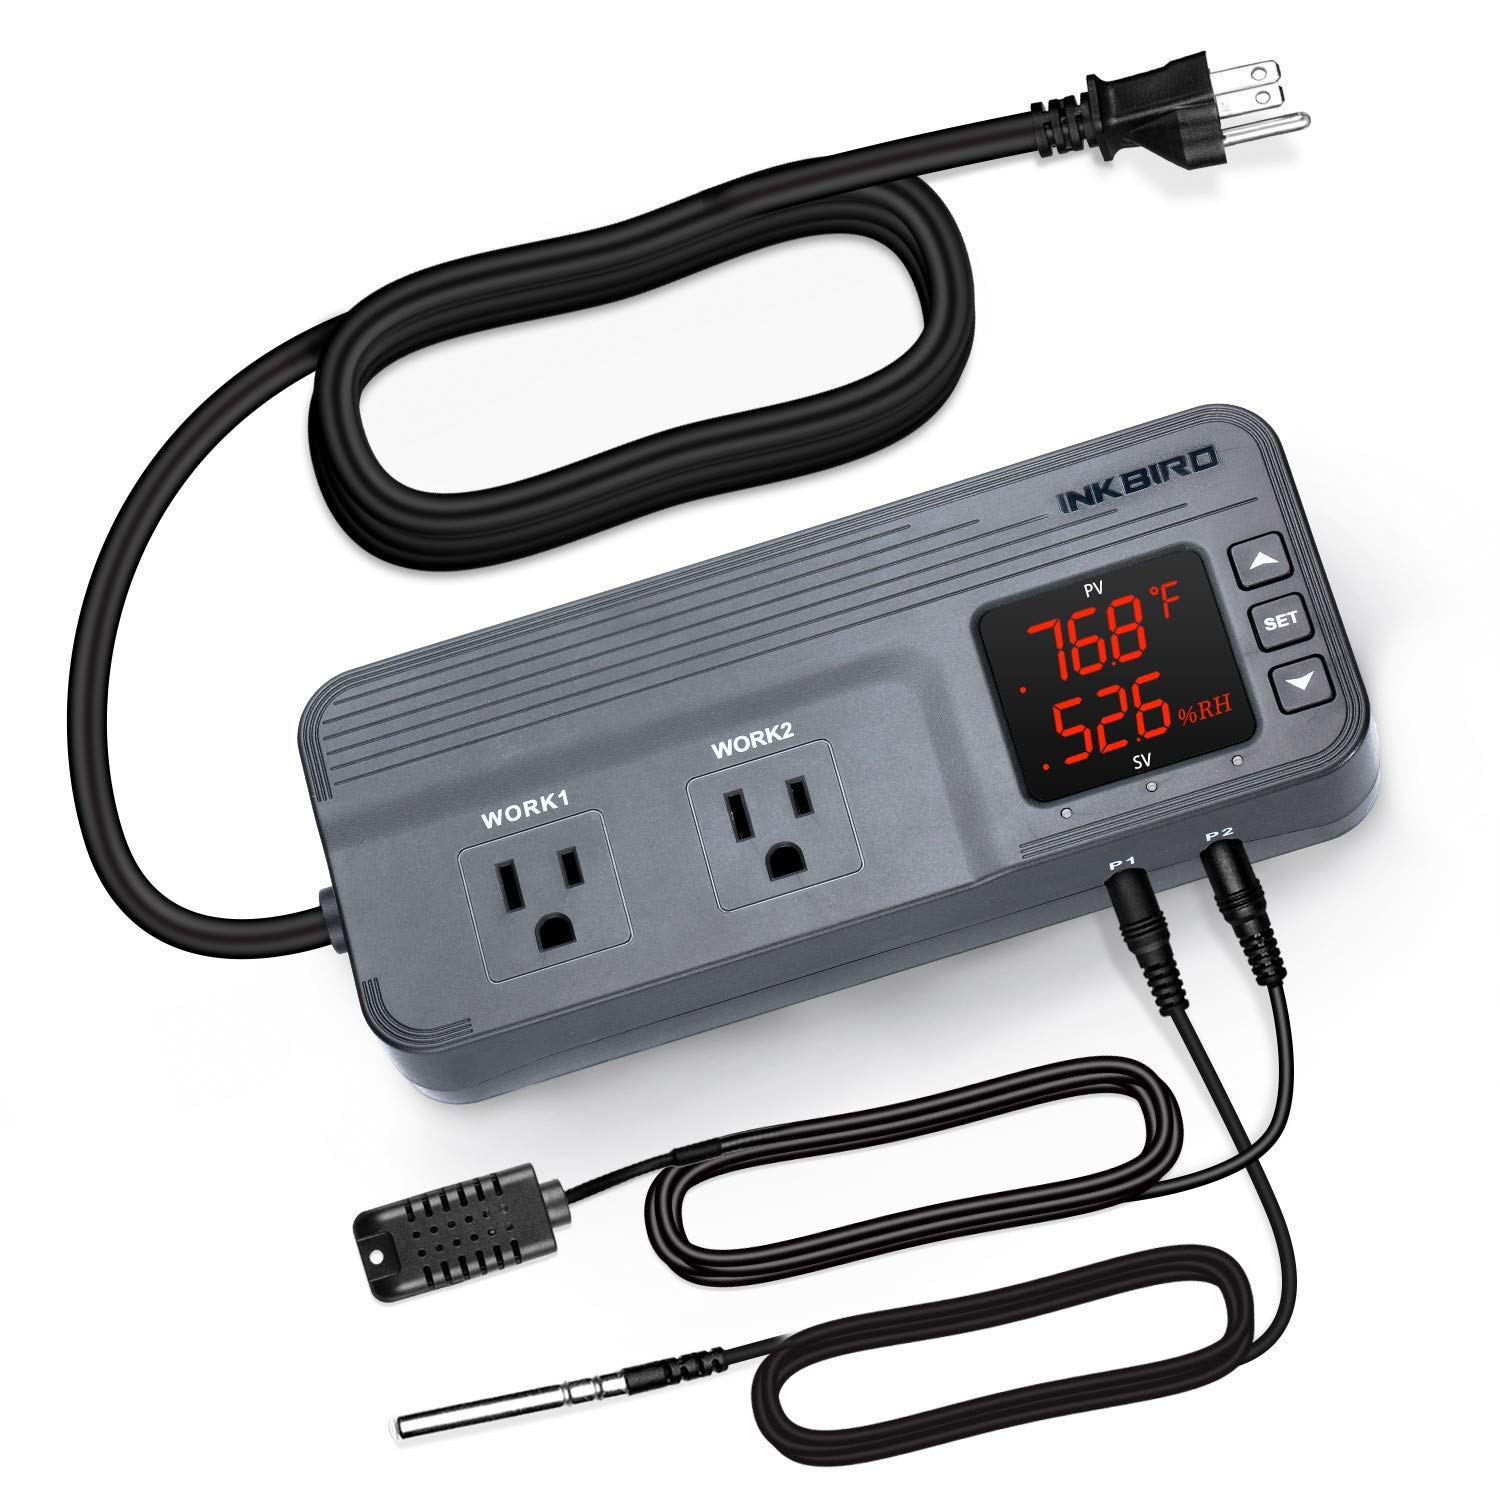
6. Humidity Controller
Inkbird Temperature and Humidity Controller ITC-608T Pre-Wired AC Dual Stage Outlet Thermostat with 12 Period Time Stage, 1800w, ETL Listed (with Temperature and Humidity Sensor)
- Perfect for controlling humidifier and dehumidifier
- Lab grade probe meters
- Programmable
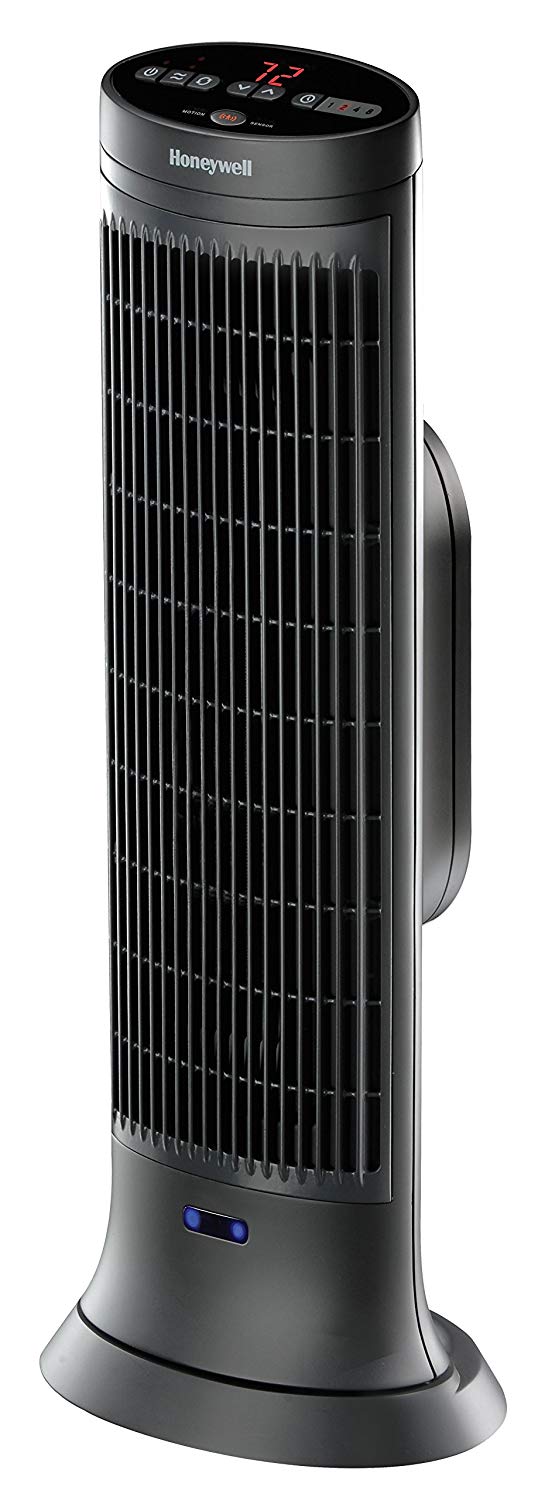
7. Oscillating Fan
Lasko 4924 Space-Saving HVB Oscillating High Velocity Blower Tower Fan Features Louvered Air Flow Control and Built-in Handle 1-Pack Silver
- 90 degrees of coverage to keep lower air in the tent moving around the plants
- 3 different fan speed settings
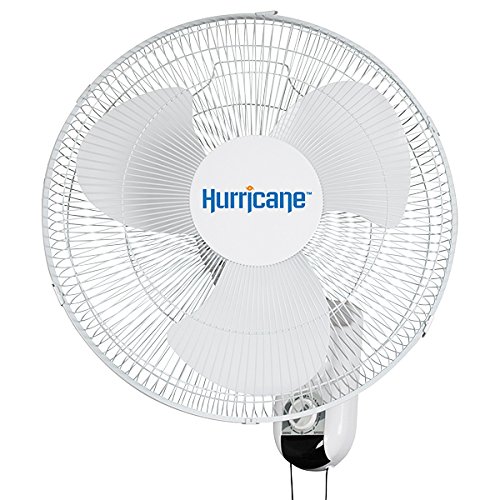
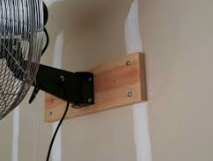
8. 16″ Wall Fan
Hurricane 736503 Classic 16 Inch Wall Fan, Oscillating
- Wall mounted fan, so you will have to attach it to a piece of plywood and then hang the plywood
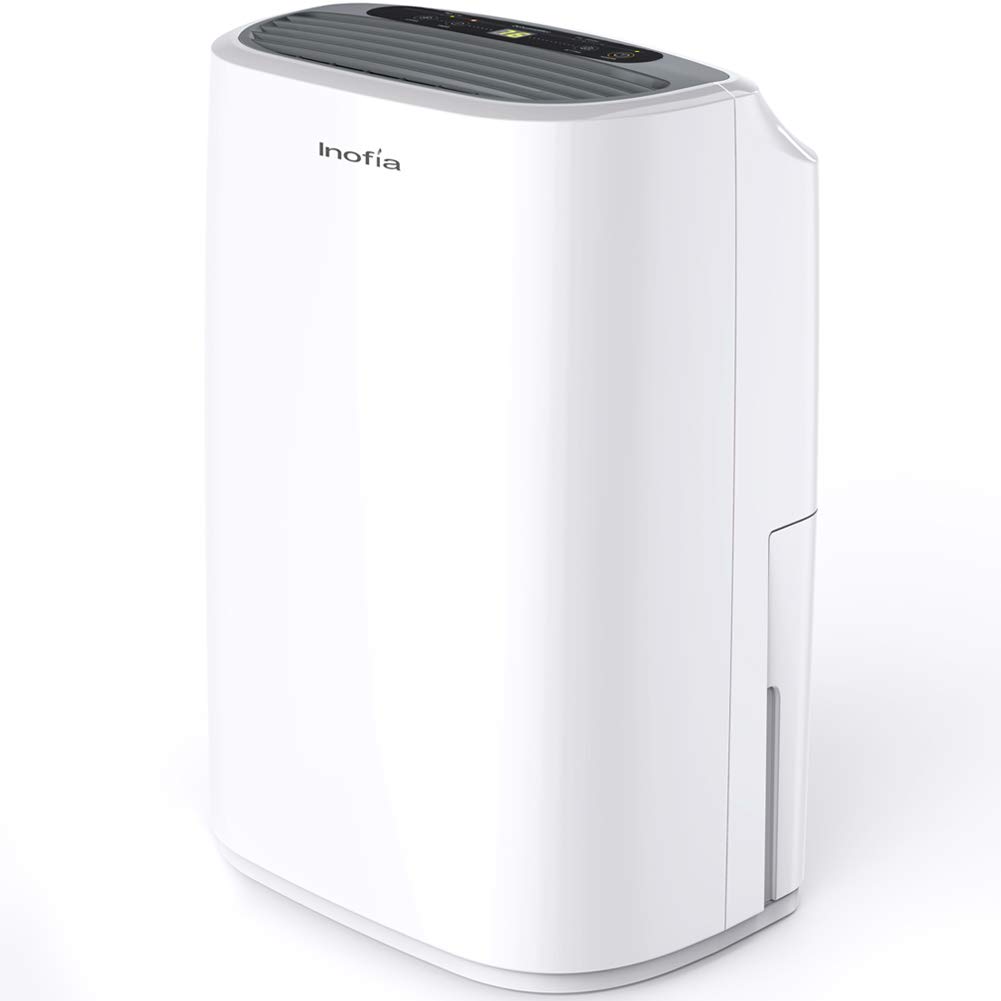
9. Dehumidifier
Inofia 30 Pints Dehumidifier Mid-Size Portable For Basements and Large Rooms, Intelligent Humidity Control For Space Up To 1056 Sq Ft, Continuous Drain Hose
- High performance
- Long lasting
- Drainage hose so that you do not have to drain by hand
- Quiet
10. Humidifier
TaoTronics TT-AH001 Humidifiers for Bedroom Home Baby, Cool Mist, Quiet Operation, LED Display, 360° Nozzle, Waterless Auto Shut-Off, White-(4L/1.06 Gallon)
- Keeps your grow tent humidified
- Quiet
- Auto shut-off when out of water
11. Heater
Lasko Heating Space Heater 8.5″L x 7.25″W x 23″H 755320
- Keeps temperature from fluctuating too much when lights are off
- Durable, long-lasting
- Not needed if lights will be on 24/7
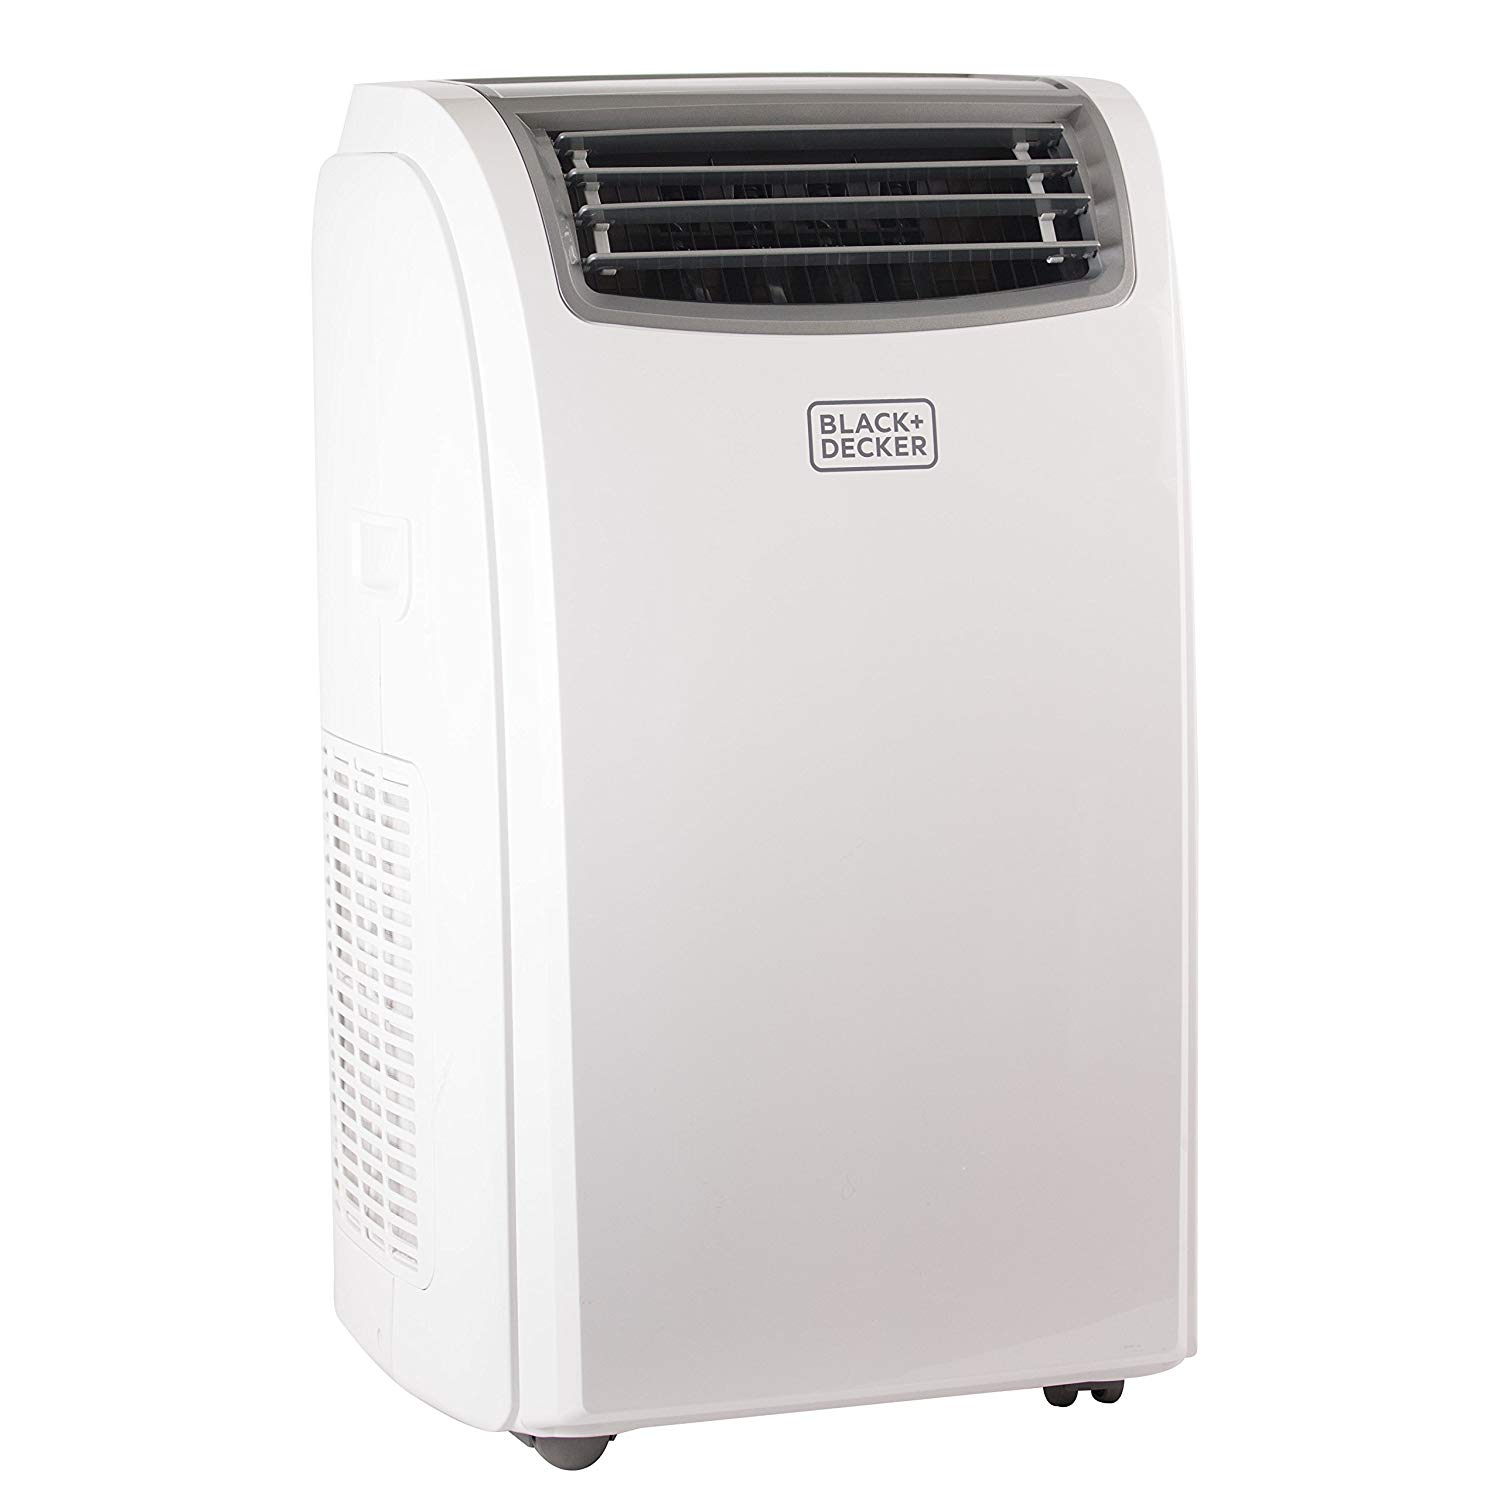
12. Air Conditioner
Hisense CAP-12CR1SEJS Portable Air Conditioner with Remote, 12,000 BTU
- Keeps grow tent cool
- Counter acts heating from grow lights
- Long lasting, powerful
- Quiet

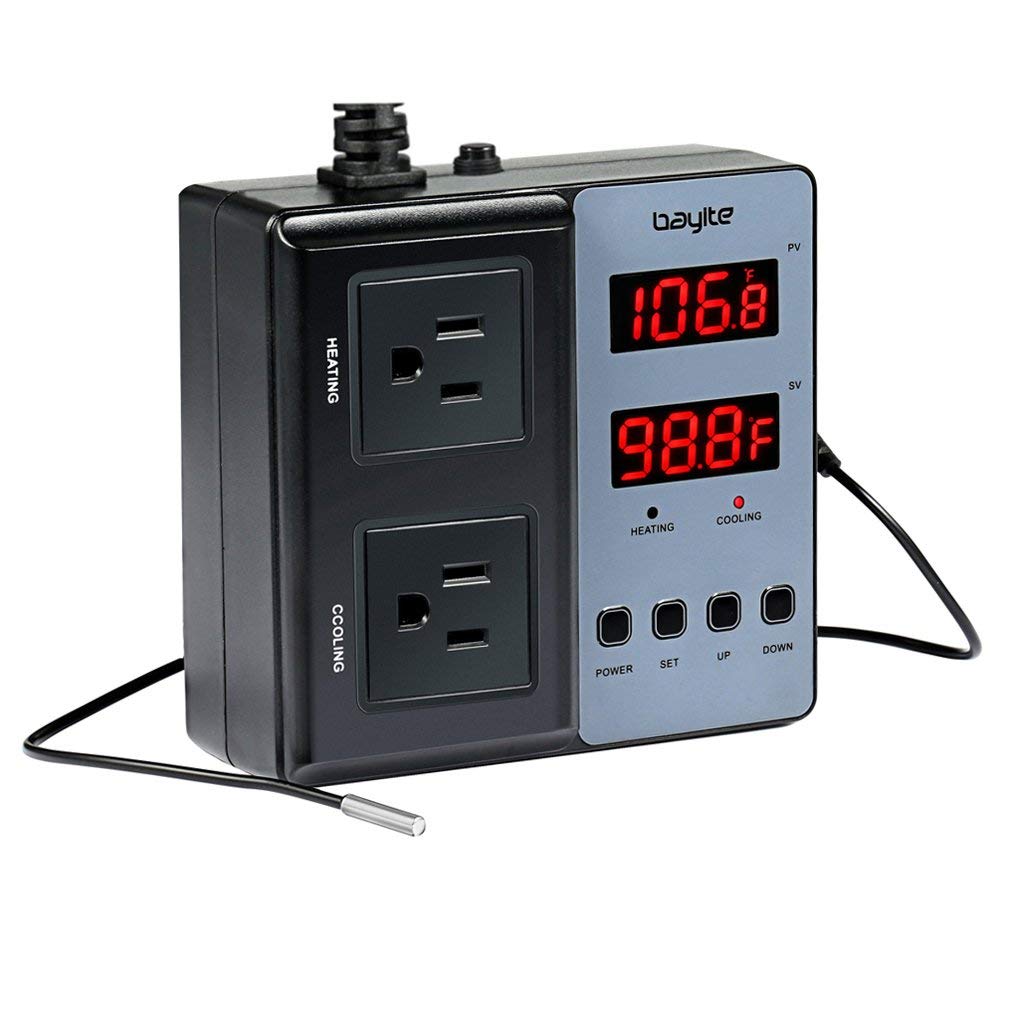
13. AC Temp Controller
bayite Temperature Controller BTC201 Pre-Wired Digital Outlet Thermostat, 2 Stage Heating and Cooling Mode, 110V – 240V 10A
- Controls Air conditioner
- Can control heater as well
- Programmable
- Probe meter for accurate temp readings
14. SCROG Netting
VIVOSUN 2 Pack Elastic Trellis Netting for Grow Tents of Any Dimensions 4’x4′ 4’x2′ 5’x5′ 3×3′
- Netting for SCROG phase
- Perfect net for training plant
- Hooks on corners for easy attachment to grow tent frame
15. 1/8″ Adjustable Hangers
2-Pairs Zazzy 1/8 inch Adjustable Grow Light Hangers Rope Clip Hanger Ratchet for Growing Tent
- Adjustable rope clip hangers
- Easily hang and secure appliances from the frame of the grow tent
- One of the most useful tools a grower can have in their grow tent
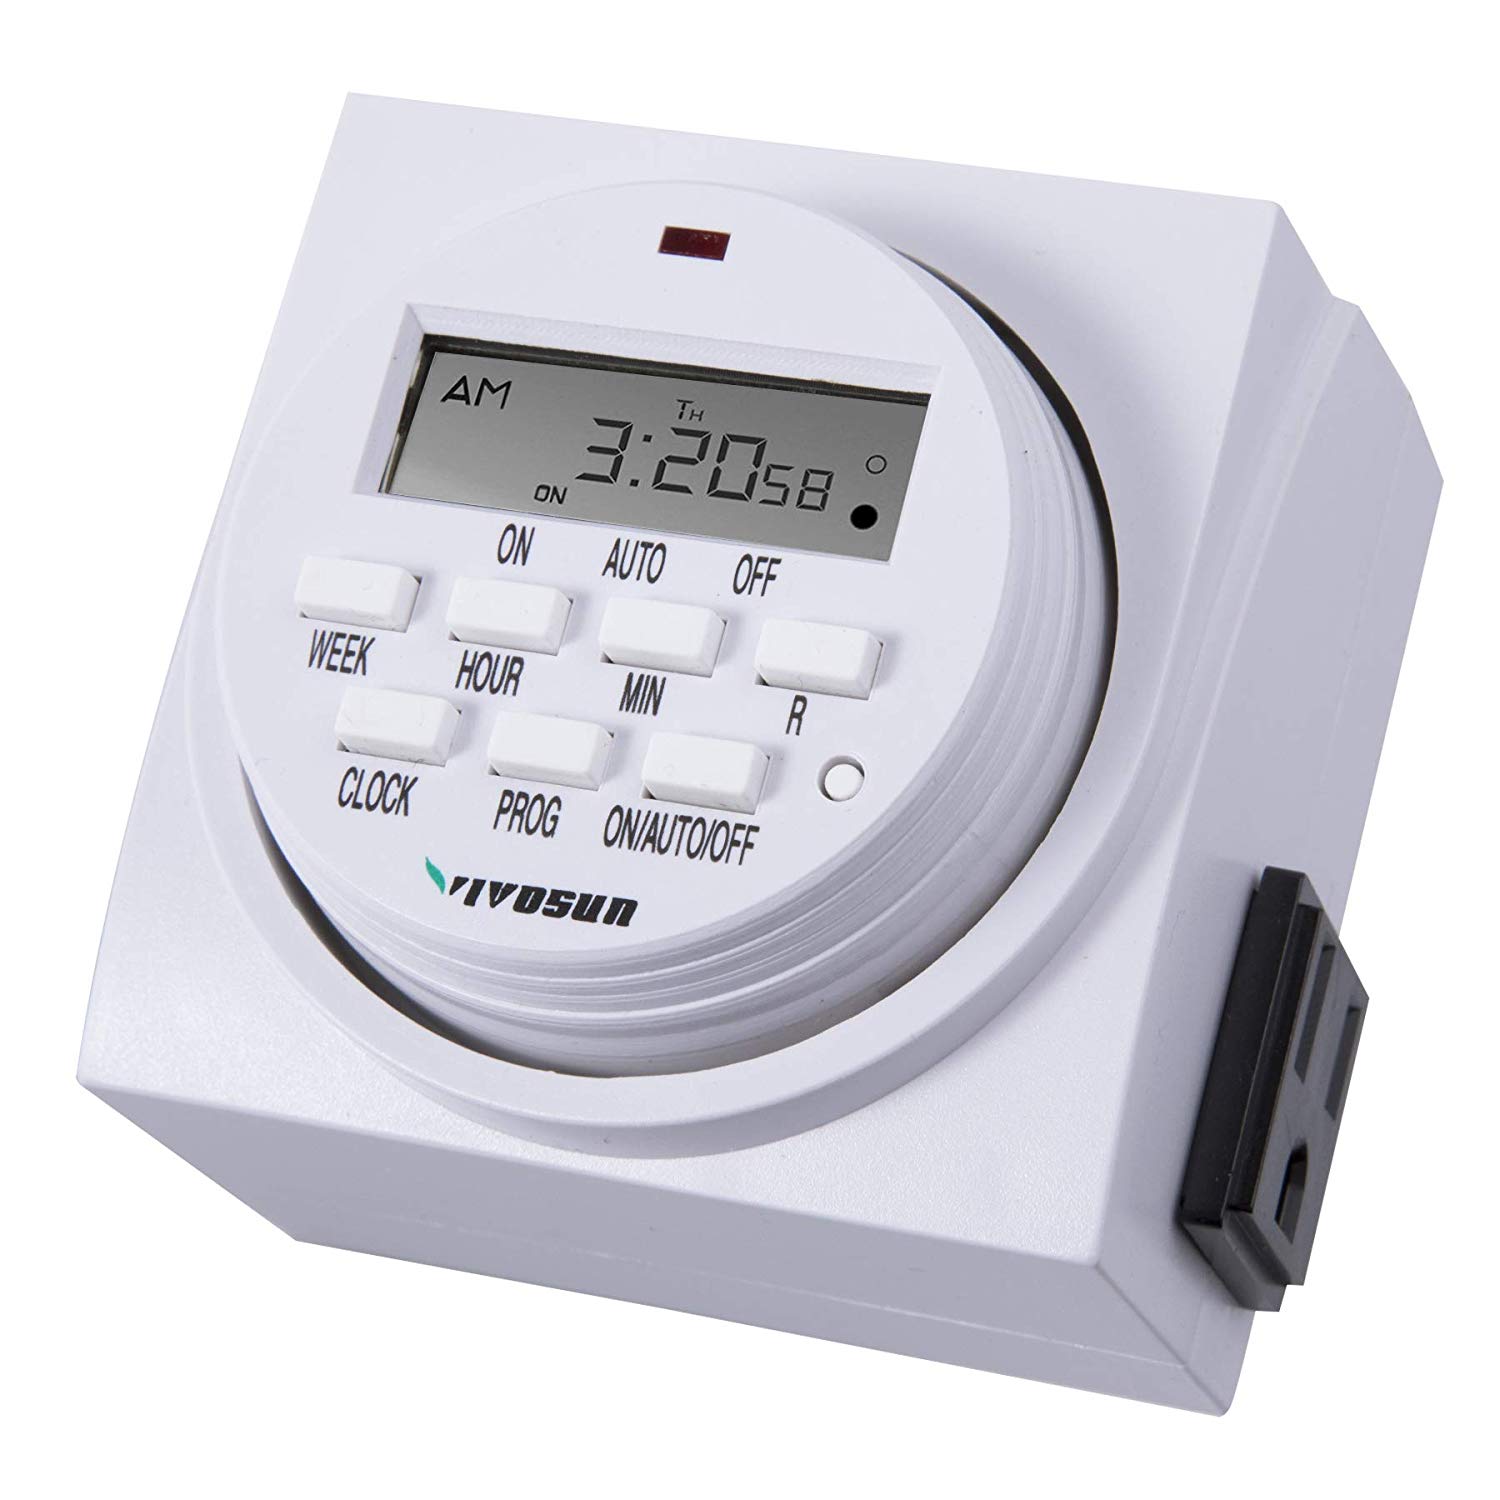
16. Light timer
VIVOSUN 7 Day Programmable Digital Timer Switch with 2 Outlets – Accurate & Stable, UL Listed 1-Pack
- Programmable grow light timer for day & night schedules
- Set timers to control light schedules automatically
- “Set & forget”
High Performance $3500 Grow Setup
Top quality for max yields:
- Grow Tent: Gorilla Grow Tent LTGGT48 Tent, 4′ x 8′ x 6’7″3″)
- LED Grow Light: Optic 8+ COB LED Grow Light 500W (UV/IR) 3500k Cobs
- LED Grow Light: HLG 550 V2 (Version 2, 3000K, 120V Plug) Horticulture Lighting Group | ETL Certified, Full-Spectrum, High-Efficiency, Veg/Flower Bloom 510W Samsung LM301B Quantum Board Dimmable
- Exhaust Kit: VIVOSUN 6 Inch 440 CFM Inline Duct Fan with 6″ x 18″ Carbon Filter Odor Control with Australia Virgin Charcoal
- PH Pen: Inkbird Temperature and Humidity Controller ITC-608T Pre-Wired AC Dual Stage Outlet Thermostat with 12 Period Time Stage, 1800w, ETL Listed (with Temperature and Humidity Sensor)
- Humidity controller: Apera AI209-T PH20 Value pH Tester Combo Kit with 8oz Calibration buffers (4,7,10), 4oz 3M KCL Storage Solution, Probe Cleaning Brush & CalBox
- Heater: Lasko Heating Space Heater 8.5″L x 7.25″W x 23″H 755320
- Dehumidifier: Inofia 30 Pints Dehumidifier Mid-Size Portable For Basements and Large Rooms, Intelligent Humidity Control For Space Up To 1056 Sq Ft, Continuous Drain Hose
- Humidifier: TaoTronics TT-AH001 Humidifiers for Bedroom Home Baby, Cool Mist, Quiet Operation, LED Display, 360° Nozzle, Waterless Auto Shut-Off, White-(4L/1.06 Gallon)
- Air Conditioner: Hisense CAP-12CR1SEJS Portable Air Conditioner with Remote, 12,000 BTU
- AC Temp controller: bayite Temperature Controller BTC201 Pre-Wired Digital Outlet Thermostat, 2 Stage Heating and Cooling Mode, 110V – 240V 10A
- 16″ Fan: Hurricane 736503 Classic 16 Inch Wall Fan, Oscillating
- Oscillating tower fan: Lasko 4924 Space-Saving HVB Oscillating High Velocity Blower Tower Fan Features Louvered Air Flow Control and Built-in Handle 1-Pack Silvery Adjustable Head, Two Quiet Speeds – Ideal For The Home, Office, Dorm, & More
- SCROG net: VIVOSUN 2 Pack Elastic Trellis Netting for Grow Tents of Any Dimensions 4’x4′ 4’x2′ 5’x5′ 3×3′
- Clip rope hangers: 2-Pairs Zazzy 1/8 inch Adjustable Grow Light Hangers Rope Clip Hanger Ratchet for Growing Tent
- Light timer: VIVOSUN 7 Day Programmable Digital Timer Switch with 2 Outlets – Accurate & Stable, UL Listed 1-Pack
4. How To Assemble A Grow Setup: Step-By-Step Instructions For Building A Grow Room
How to setup a grow room
Once you have purchased your grow setup of choice, the setup process is generally straightforward. Depending on the complexity of the system you bought, it may take as little as an hour or as long as a full day to build your grow setup. Most of the time, if you know how to use a screw driver and some other basic tools, it will not take longer than an afternoon to setup a grow room.
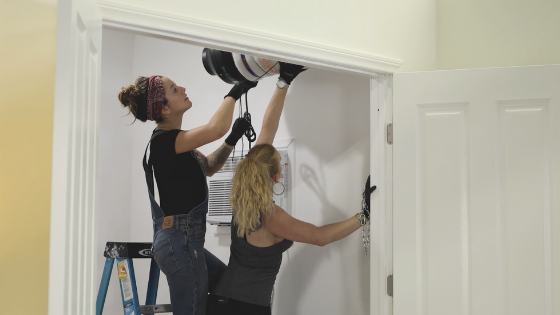
Pro-tip: grab a friend to help you! Not only is it more fun to build a cannabis grow setup with a friend, but there are several steps that are just easier with someone to help. For instance, when it is time to drape the mylar tent over the frame, this can be done much more easily with two people than one person alone.
The step-by-step instructions for assembling a grow tent below assume that you have an advanced grow setup. If you are using a less complex grow setup, such as the $300 grow setup described above, simply skip the steps that do not apply to you. Let’s start building!
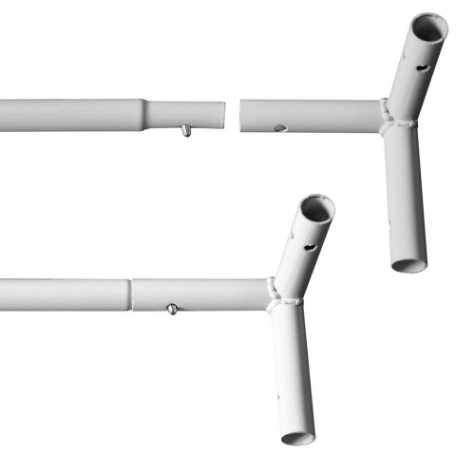
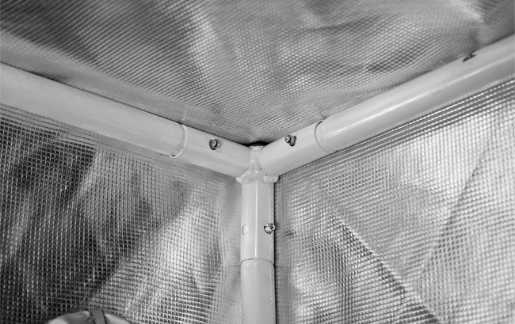
1. Build the grow tent frame
- Begin by laying out all of the pieces of the frame on the floor of your grow space.
- Insert the poles into the corner brackets. Push and twist until they snap into place.
2. Drape the mylar tent over the frame
- Using a chair or a ladder, lift the mylar tent over the frame and adjust it until the corners and edges sit comfortably on top of the frame.
- Then zip up the door to make sure it closes properly.
- Mylar can be heavy and unwieldy, so grab a friend to help you if possible.
3. Connect the exhaust fan and carbon filter
- The connection is usually metal on metal, so it can be a tight fit.
- Gently tap the fan onto the filter with a mallet or hammer if necessary.
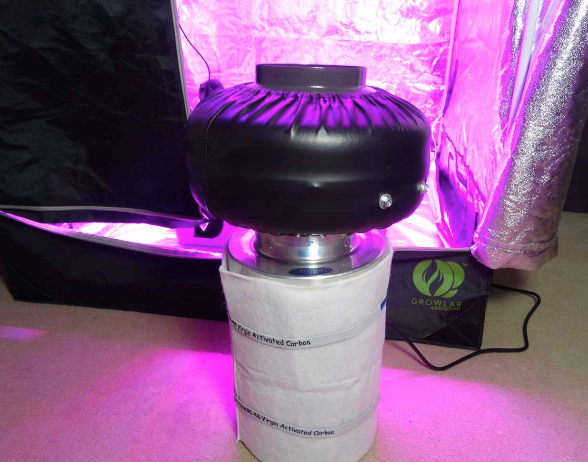
4. Hang the fan & filter
- Use the included straps to hang the fan and filter from the frame of the grow tent.
- Make sure to place it close enough to the exhaust port.
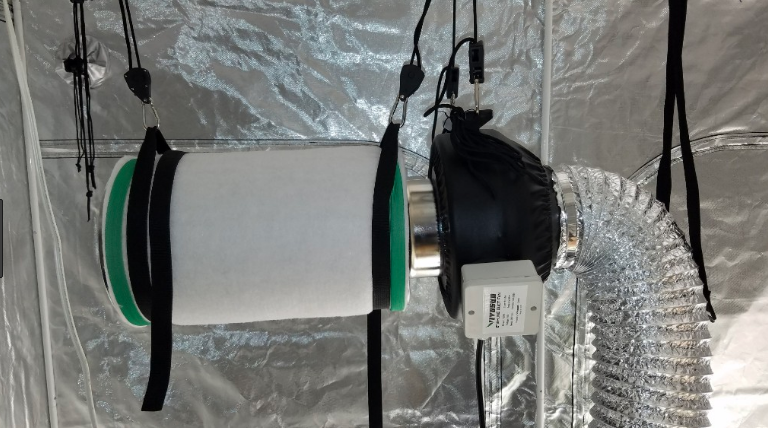
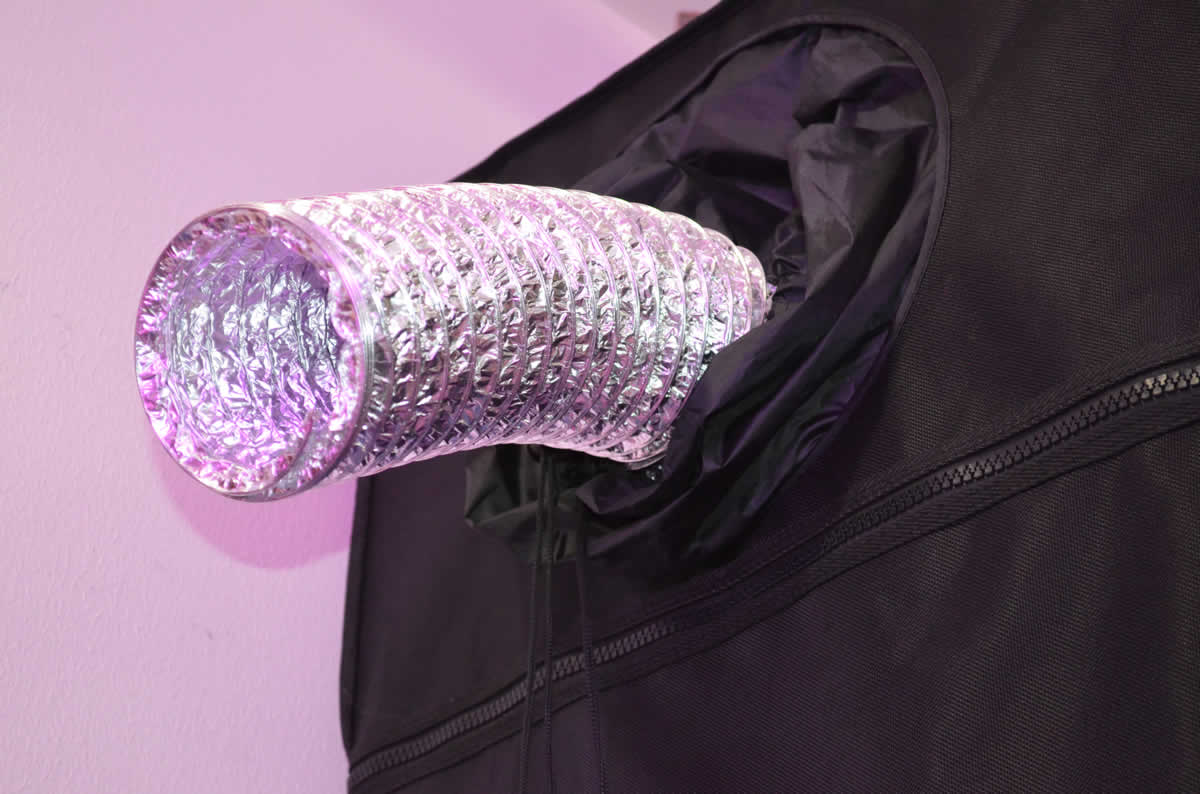
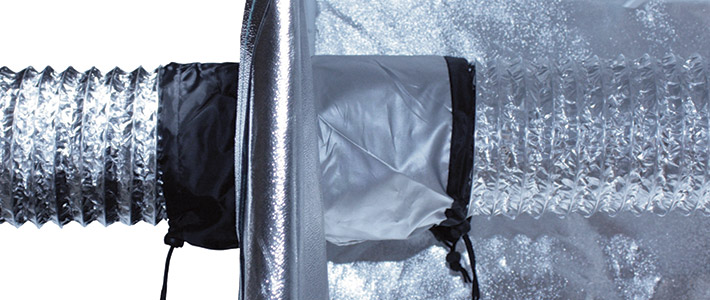
5. Attach exhaust ducting
- Pass the ducting through the exhaust port.
- Attach the end of the ducting to the fan using a hose clamp.
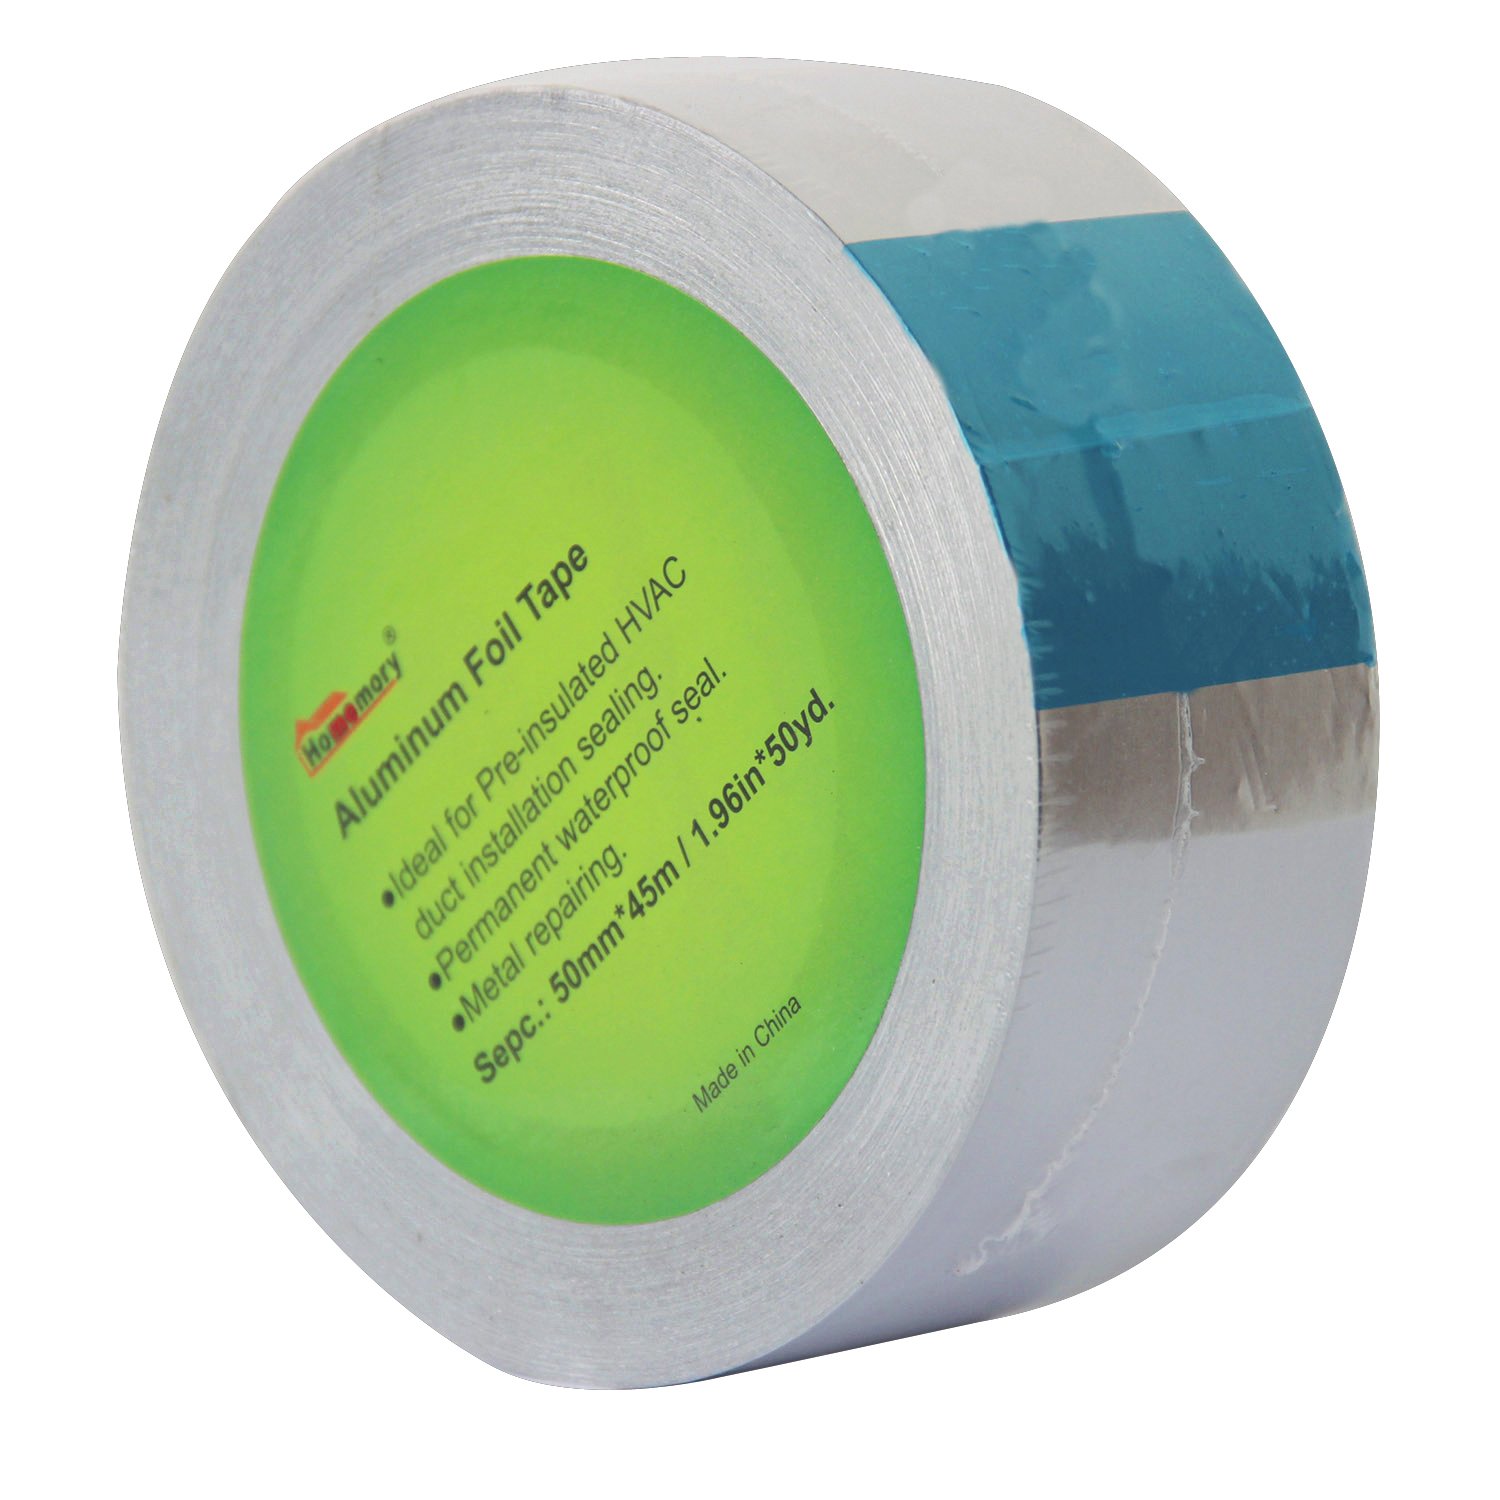
- Wrap the seal in aluminum duct tape.
- Attach the other end of the ducting to the exhaust vent to the outside of the building.
6. Assemble air intake
- You can use the passive vents on the grow tent but if you have an intake fan, that helps maintain negative pressure in the tent.
- Attach the intake fan to ducting using duct tape.
- Pass the ducting through the bottom air intake vent.
7. Run power lines into the grow tent
- Run extension chords into the tent via available ports.
- Plug in surge protector power strips and place strategically throughout the grow tent.
8. Mount wall fans
- If you have a wall mounted fan, attach it to a plywood board or scrap wood
- Wrap the board in reflective aluminum foil.
- Hang the board from the frame of the grow tent using rope clip hangers. (Tip: place the fan at the opposite end of the tent from the exhaust vent at the same height as the lights, that way it blows the heat from the lights toward the exhaust fan)
- Attache other clip on fans as needed
9. Attach temp and humidity controllers
- Run meter probes from the outside controllers into the grow tent using available ports.
- Tape the meters to the wall of the grow tent at canopy height (height of eventual plant growth).

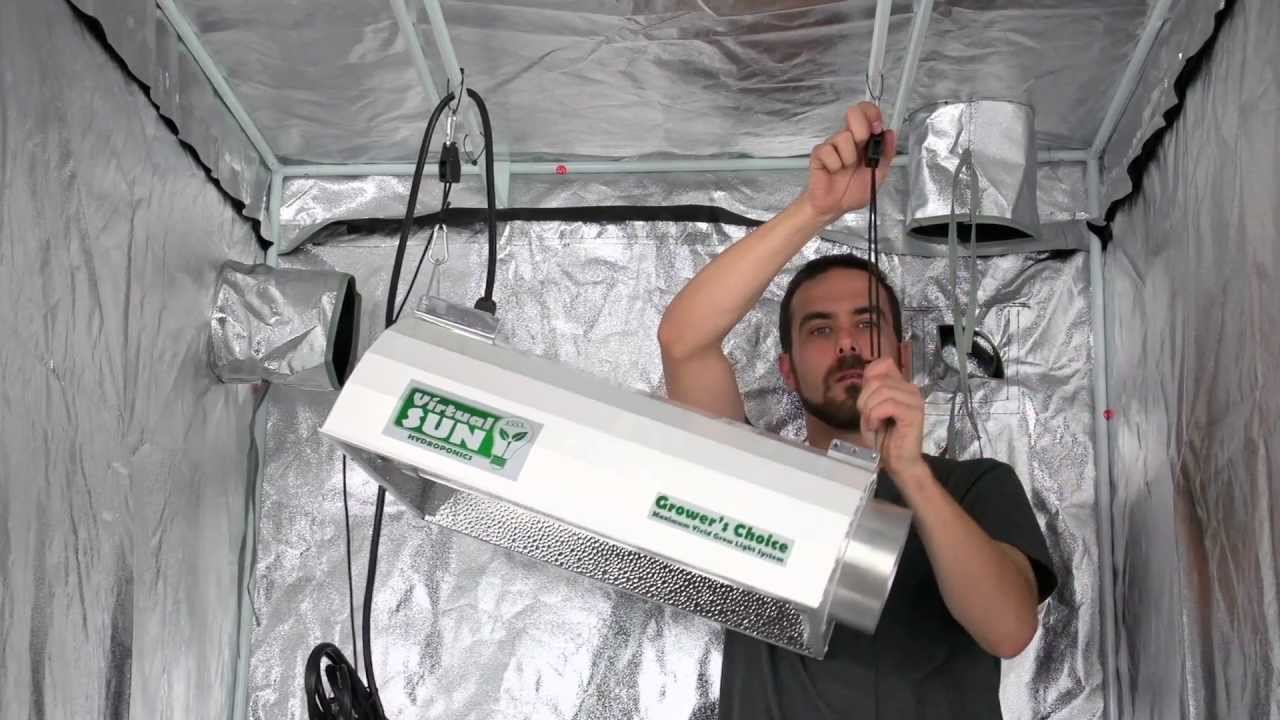
10. Install the grow lights
- Hang the lights from the grow tent frame using rope clip hangers.
- Plug lights into light timers if you are using timers.
11. Install climate control equipment
- Strategically place heater, humidifier, dehumidifier, and air conditioner in the grow tent. (Tip: place the oscillating tower fan next to the air intake vent so that it blows fresh air around the tent)
- Plug all equipment into their respective controllers and route drainage hose from dehumidifier as needed.
12. Turn everything on and test levels
- Turn everything on and set the levels on the different controllers.
- Let the grow tent run through a few day/night cycles to make sure everything is running and to prepare the climate for germination
Done! Your Complete Grow Tent Build Will Look Something Like This
Step-by-step instructions for building a grow tent
1. Build the grow tent frame
2. Drape the mylar tent over the frame
3. Connect the exhaust fan and carbon filter
4. Hang the fan & filter
5. Attach exhaust ducting
6. Assemble air intake
7. Run power lines into the grow tent
8. Mount wall fans
9. Attach temp and humidity controllers
10. Install the grow lights
11. Install climate control equipment
12. Turn everything on and test levels
Free How-To Guide For Growing Marijuana
Subscribe to our newsletter to receive a free downloadable e-book version of our complete how-to guide for growing marijuana. Don't worry! We won't spam you or send you useless emails.
Connect with us on social media: