Welcome the Pot Prof’s complete guide to growing weed!
Stage 1, Part 3: What are the best nutrients for growing weed? (Nutrients & Supplies)
One of the most common questions that beginners have when they first start learning to grow cannabis is about nutrients and feeding schedules. You might be wondering when to introduce nutrients to seedlings, or “how often should I give my cannabis nutrients?”
The answer to these questions will depend on a lot of things that are individual and specific to each grow setup and each grower’s preferences. For instance, what type of nutrients you use will depend on whether you prefer using organic or industrial nutrients. Similarly, the way you feed your plants will also be impacted by the type of growing medium you use in your cannabis grow setup.
In this guide we are going to cover all of these considerations and more. By the end of this guide to cannabis growing nutrients, you will have a good idea of what kinds of nutrients you need to get started as well as an example grow schedule to build out from when creating your own feeding schedules for your grow setup.
Links to check out other stages of this guide:
WHAT DO I NEED TO KNOW?
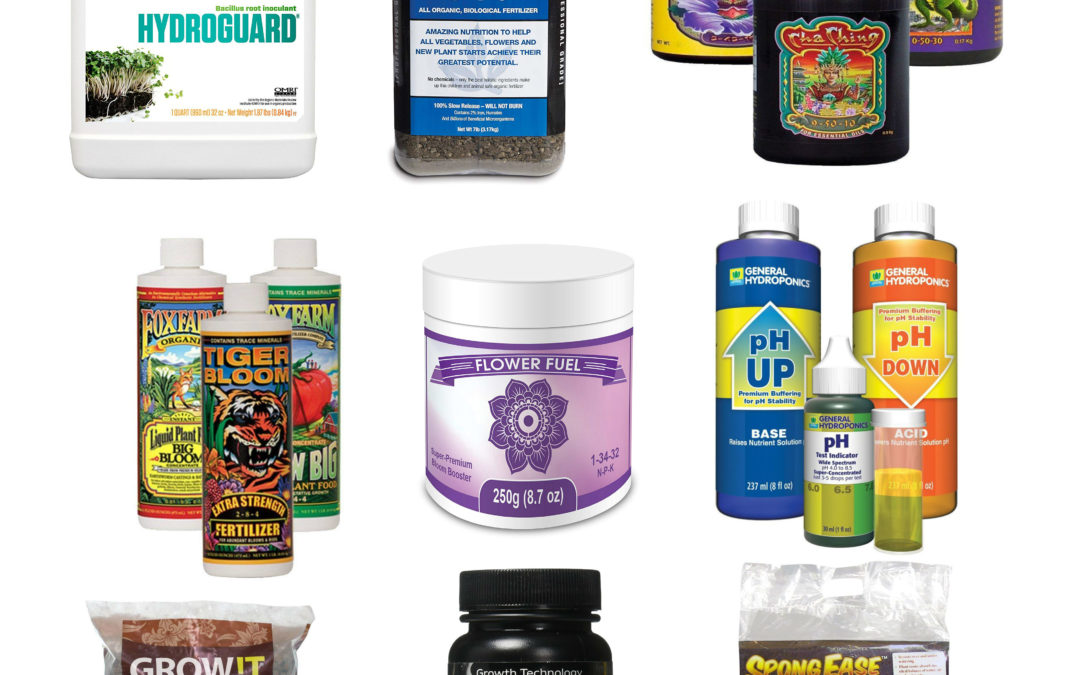
The world of nutrients and supplies for growing marijuana is vast and ever expanding. The nutrients and supplements growers use are often tied to their personal philosophy of growing. We will discuss these philosophical differences and then get into specific supplies you need.
- Growth media: soils, clay pebbles, coir, and other growth media
- Three types of nutrients
- Basic necessities for growing plants in general and cannabis specifically
- Organic nutrients: how to buy organic supplies or create your own at home
- Yield boosters: specific supplements that can help increase the productivity of your plants
- Specific nutrients and supplements
- Fertilizers, PH up/down, CAL-MAG, Pest Control Spray, PH Calibration Liquid
- Extras: microbes, hormones, fungi, and teasThis section will cover the following topics:

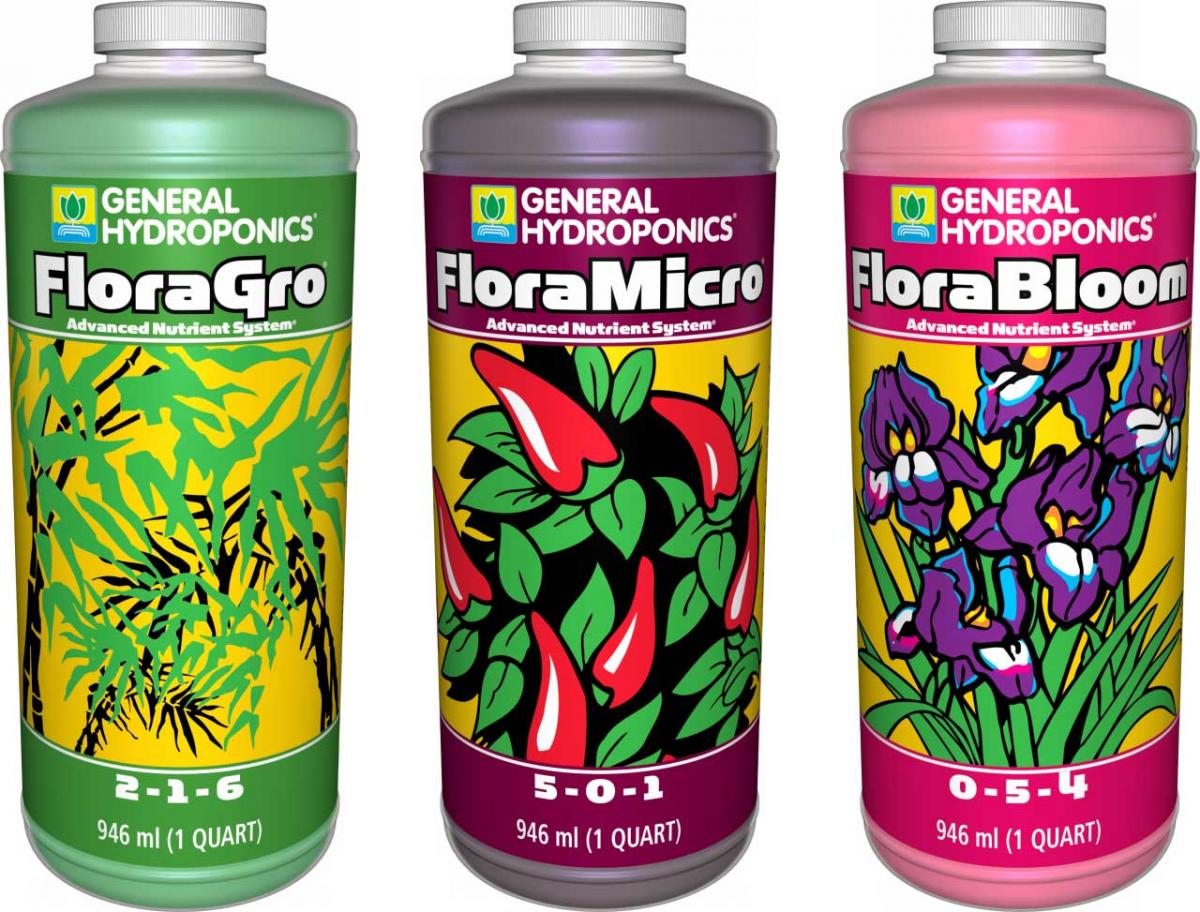
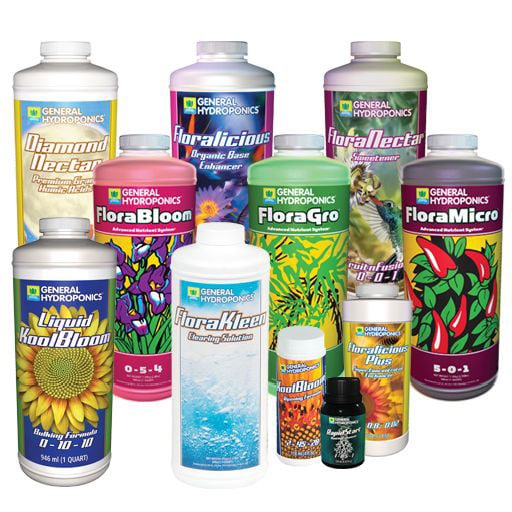
FloraGrow Nutrients
Before getting into a wider discussion of nutrients and how to use them, I recommend starting off with a simply nutrient brand like FloraGrow. FloraGrow has everything your plants need in it and will help you get started quickly and simply.
For the sake of simplicity, the rest of this guide assumes you are using FloraGrow. Just follow the instructions and this guide, and you will have a very good chance of being successful.
Instructions
What Are The Best Nutrients For Growing Weed?
1. The Basic Nutrients For Growing Weed
What nutrients do cannabis plants need?
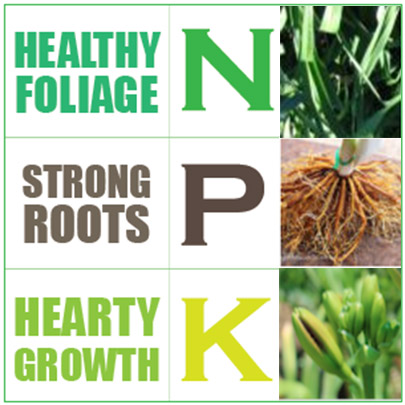
Cannabis plants require three major nutrients to grow: nitrogen, potassium, and phosphorous. Some secondary nutrients, such as calcium, magnesium, and sulfur, are also needed for optimal growth. The plants will also need trace nutrients that are commonly found in unfiltered water. As long as you are not filtering your water for trace nutrients, then you do not have to worry about adding trace nutrients.
Primary nutrients
Cannabis plants need many nutrients but three are more important than the rest. These three most important nutrients are nitrogen potassium and phosphorus, or NKP. The amount of each of these elements that the plants need will depend on which stage of growth the plants are in. For instance, during the vegetative growth stage plants will require high levels of nitrogen, whereas during the Flowering stage plants will require no nitrogen whatsoever.
- N = Nitrogen
- K = Potassium
- P = Phosphorus
We are going to go through each of the different levels of nkp that the plants will need during each stage in just a moment. First keep in mind that if you are beginner, it’s okay to start your first grow by using regular soil since doing so will help provide more a balanced nutrient supply while also insulating your plants from any mistakes that you might make as you get used to new feeding schedules.
Many potting soils have a good mix the general amounts of nutrients that are good for many plants. Using soil will give you some basic control but also prevent extreme swings in nutrient balances if you accidentally give too much or too little nutrients during any particular feeding session. The main downside to using soil is that it drains very differently than coco coir, so you will have to adjust your feeding style to match the way your soil drains.
Secondary Nutrients
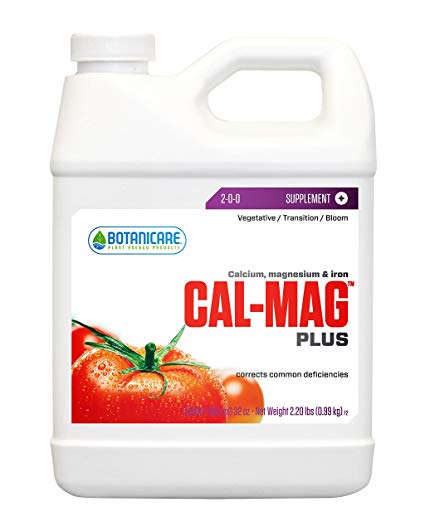
There are three main secondary micronutrients that you will need to grow cannabis properly. These are calcium, magnesium, and sulfur. Of these three secondary macronutrients, the most important are calcium and magnesium. Together they are often called cal-mag.
- Calcium
- Magnesium
- Sulfer
Cal Mag deficiency is one of the most common problems that cannabis growers face. Even experts will often see some amount of Cal Mag deficiency in their plants if they aren’t careful. As a result it is important to have Cal Mag on hand and include some amount of cal-mag regularly in feedings.
Sulfur deficiency is less common. Still, it’s good to have some epsom salts on hand in case your plants do experience sulfur deficiency. Just mix a teaspoon per gallon of epsom salts into a feeding if you suspect a sulfur deficiency is affecting your plants.
Trace Micronutrients
Finally marijuana plants require many other trace micronutrients. These include iron, boron zinc copper, and manganese. However, you probably will not need to buy these micronutrients or supplement your plants with them because most of these micronutrients are found in trace amounts in water. If you are using regular water, then you most likely will not need to worry about adding these trace micronutrients to your feeding schedule.
The only time when you might want to pay attention to these trace micronutrients is when you are using water filtered water or a water filtration system that is powerful enough to remove all of these trace micronutrients. You may wish to filter your water if the source of your water is not clean or if you suspect that there are contaminants in the water that would not be pleasurable to smoke. In that case, if you do filter your water, you should consider buying supplements of trace micronutrients and keeping them on hand in case your cannabis plants display any of the signs of micronutrient deficiencies.
Other Nutrient Supplements
There are a lot of new supplements coming to market everyday. The cannabis growing market is hot right now. That means people are spending a lot of time figuring out exactly which types of chemicals and nutrients are useful for growing the most marijuana in the smallest amount of space. There have never been more options available when it comes to growing supplements for cannabis growers than there are today.
Of course, that also means that some of these supplements are likely to be not as useful as their manufacturers and sellers would have you believe. At the end of the day, it is best to keep things simple and stick with traditional growing supplements. But that doesn’t mean you can’t experiment. Just make sure that if you do try a new supplement, be careful with it and test it slowly on just one or two plants to see what results you get before scaling it up to your entire grow.
The following are a few supplements that I have read about and seen some promise in. Check them out if they seem promising to you and always make sure to test them for yourself before taking my advice.
Manures
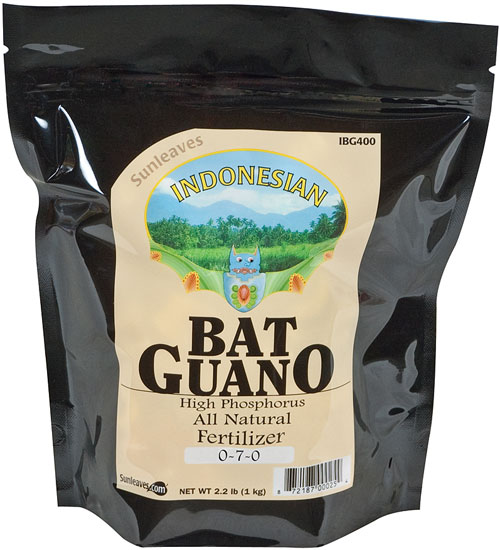
Manures offer one of the most natural ways to fertilize your plants so that you can use to keep your plants healthy but also chemically clean. Many growers prefer to rely solely on natural manures to deliver the nitrogen, potassium, and phosphorus that cannabis plants need.
Some popular manures include bat guano, which has a good reputation among cannabis growers, and chicken manure, which is economical and has feathers that are full of nitrogen. If you grow your own chickens then you can source your manure from your backyard so you know exactly how it is produced.
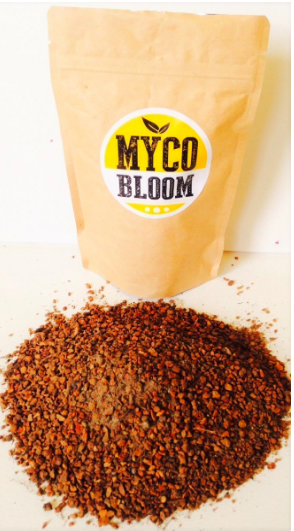
Bacteria and Fungi
Farther afield are supplements that maintain a healthy microbiome around the root system as your marijuana plants grow. Adding helpful bacteria and microryza to your soil mix can boost your plants’ ability to taken nutrients and also strengthen your plants’ immune system to prevent pathogens from infecting your grow.
Microryza fungi especially aid in nutrient uptake by forming a symbiotic relationship with the plants’ root system. That can boost the growth of your plants. Bacteria and microryza are definitely not necessary nutrients for a beginner marijuana grower, but they can help you to provide your plants with an organic root boosting solution.
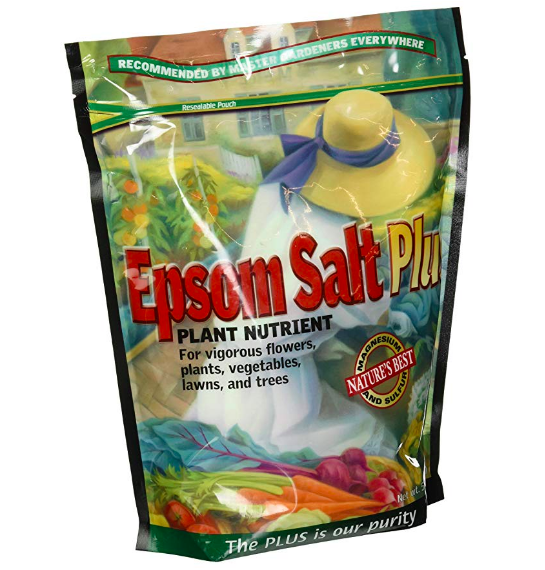
Epsom salts
If your plants are experiencing sulfur or magnesium deficiency and you do not want to use Cal Mag for environmental reasons, an alternative supplement would be Epsom salts. Epsom salt is the colloquial name for Magnesium sulfate, a naturally occuring mineral. Since Epsom salt is literally just magnesium and sulfur, adding a teaspoon or less per gallon to feeding water will give your plants enough sulfur and magnesium to recover from any deficiency.
Molasses
Another interesting supplement that you could consider is un-sulphured molasses. I would trying this out for yourself in small quantities but molasses supposedly increases THC production during flowering.
So adding a little bit of this supplement to your feeding water may be able to increase the potency of your yield. Again, run a small test on one plant to see whether this works for you.

Beyond Nutrient Supplements
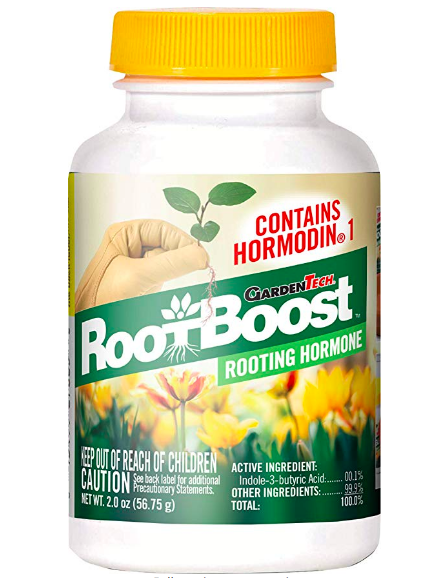
Hormones
Root booster hormones can help your plants develop strong root systems. Strong root systems are important for many reasons. A strong root system will help your plants develop more surface area in their roots, which will allow them to take up more nutrients and water and therefore grow larger and stronger plants. A strong root system will also help stabilize the plant and give it the strength it needs to hold up large colas as they form during the flowering stage.
However, root boosting hormones may not be worth it in the long run since similar results can be achieved using proper rooting techniques when propagating marijuana plants. If you would like to boost root contraction start by production, you could start by practicing your germination and rooting technique. If proper technique does not provide the results you are looking for, hormones could help.
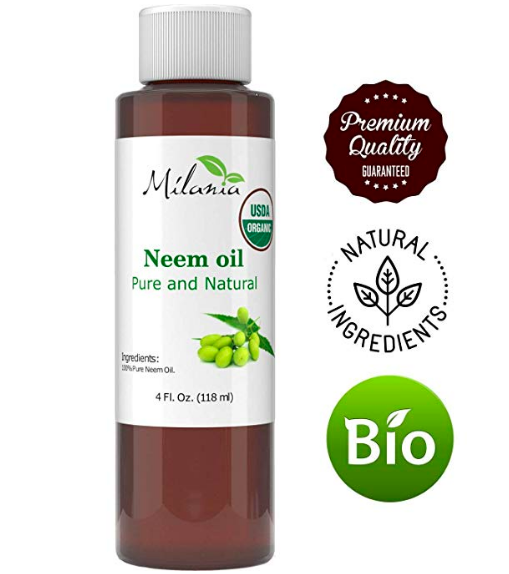
Neem Oil
Neem oil is a fantastic all natural pest control option. Neem oil comes for the neem plant and is toxic to many insects that might affect your plants, but it is not toxic to the plant itself or to humans. Instead of using chemical pesticides, you can use neem oil to protect your plants from pests.
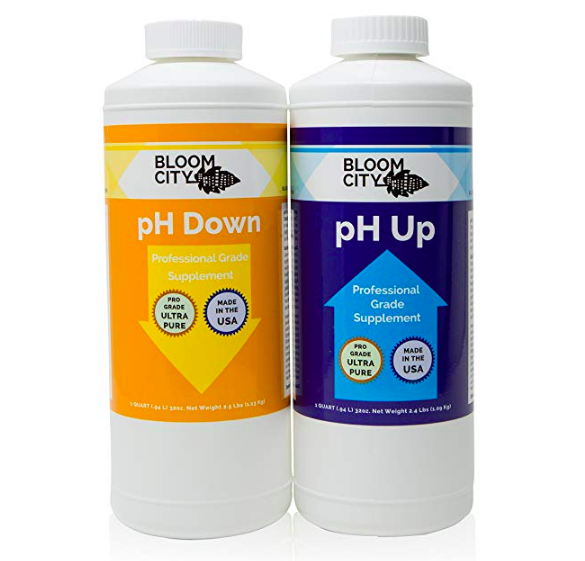
pH Balancers
While not a nutrient supplement, pH balancers are important for maintaining the proper pH level of water and nutrient solutions that you provide to your plants as they grow. Marijuana plants absorb different nutrients depending on the pH level of the soil and water they are in, so it’s important to make sure that the pH level of the water you feed them is within a specific range.
The best range for growing cannabis plants is between 55.5 and 6.5 pH. In order to control and adjust pH levels, you will need pH Up / pH Down. If the pH level is too high, mix in some pH Down, and if the pH is too low, mix in some pH Up in order to bring the pH level of the water to the necessary level.
2. Personal Growing Philosophy: How To Select A Range Of Nutrients To Grow Weed

How many nutrients do you want to use?
One of the first things that you might notice when you begin researching nutrients and feeding schedules is that every grower has a different philosophy about what nutrients are best and how to use them. There are three basic styles of growing: minimalist, maximalist, and flexible.
Minimalist feeding style
Many growers prefer a more hands-off approach and let the plant grow in regular soil with minimal feeding and pH balancing. These growers us a minimal amount of fertilizer or none at all and always use organic fertilizer when possible. The idea is to get out of nature’s way and let the soil and plant do their work with as little human intervention as possible.
Also, minimalist growers often choose this route because a hands-off organic approach supposedly leads to a better tasting and smelling buds. After all, extra nutrients in the bud will make for a harsher smoke. But there are ways to avoid a harsh nutrient smoke, such as the final flush technique, which we cover later on in Phase 2 of this guide.
One of the downsides to the minimalist approach is that growers who do not use many nutrients will sacrifice some amount of control over the way their cannabis plants grow. Because they have not been regulating the nutrient absorption of their plants, it is harder to diagnose nutrient imbalances. These grows will also tend to produce smaller-to-medium sized yields because the plants will not have enough supercharged nutrients to grow huge colas. It is possible to produce massive yields, but it just takes a little bit more effort and luck, especially if you are a beginner.
Maximalist feeding style
Some growers go to the other extreme. Maximalist growers will use a wide range of manures, growing solutions, mycorrhiza, rooting solutions, pest control solutions, bloom boosters, etc. The goal is to give the plant everything it needs to grow to its full potential.
The main danger here is that maximalist growers might oversupply their plants with nutrients. As you might imagine with a maximalist feeding style, it is easier to make the mistake of overfeeding your plants when attempting to support their growth. After all the more complex your feeding schedule is, the more likely you are to make a mistake and the harder it will be to diagnose any problems that may appear during the grow.
For a maximalist growing style, flushing the plants periodically becomes much more important. Flushing simply means feeding the plant pure water for one or two feeding sessions in order to wash out any excess nutrients. Also, from a horticultural perspective, cannabis plants simply do not need a ton of nutrients to grow optimally. So oversupplying nutrients could simply be a waste of money.
Flexible feeding style
At the end of the day, the best way to approach nutrients in feeding schedules is somewhere in between these two extremes. It is good to have some fertilizers and a solid feeding schedule but it is also important not to overdo it. And always make sure to tailor the feeding and water of the plants to each specific grow.
Many beginner growers should only use a few basic nutrients like vegetative growing nutrients, flowering growing nutrients, and Cal Mag with ph balancers. Beginners can also consider adding one or two other supplements to this grocery list, such as a pest control solution and a mycorrhiza. But otherwise, these are the basic nutrients that your plants will need in order to grow happily and healthily.
Additionally, schedules are very useful, but make sure to learn what your plants need individually. They will each show different signs of stress throughout the grow depending on their phenotypes, and sticking to a schedule too strictly will sometimes make it harder to help each plant reach its potential. Also, when things go wrong, a schedule will not help you learn how to diagnose nutrient imbalances or humidity issues from overwatering. Schedules are guidelines, not hard rules.
3. Buying Nutrients: Organic Vs. Inorganic Nutrients
Organic nutrients for growing cannabis
Organic nutrients are often the best choice for growers who are concerned about the potential health related consequences of ingesting marijuana grown with industrial chemicals and inorganic fertilizers.
Many people claim that using organic nutrients result and better tasting and better smelling buds. This is plausible since many similar products from food to alcohol and tobacco also vary in quality based on the amount of organic versus inorganic nutrients and chemicals that are used to grow them. More research would have to be done to determine exactly how much inorganic chemicals affect the taste and smell of the buds that are grown with them.
I personally cannot tell the difference, and most people wouldn’t be able to tell the difference either way. You would need to have a very keen sense of taste and smell to be able to detect such differences. But if this is a concern, then by all means, go with organic nutrients.
Another reason to consider organic nutrients is that natural soil creates a symbiotic relationship with plants. Especially when combined with each other, these microbial supplements and mycorrhizal supplements in organic nutrients and soils will give the plants and root system a more natural environment in which to absorb the nutrients you provide them with. This can boost the health of the plant and lead to a stronger plant overall.
Keep in mind that using natural soils might cause problems when feeding the plants, and you will have to adjust your feeding style to the type of soil you use. After all natural soils and organic materials will drain differently than Coco coir and liquid nutrients. You will have to take these differences into account when you are feeding her plants regularly because a poorly drained soil could lead to nutrient build up over time and eventually burn your plants.
Inorganic chemical nutrients
One of the main reasons that professional marijuana growers tend to rely on chemical nutrients is that they are versatile and created to grow bigger buds faster. Basically, because chemical nutrients can be tailored to meet the plants exact needs at every point in the growing process, you can be sure that by using chemical nutrients, your plants will get exactly the right types of each chemical in the right proportions to grow as big and strong as they possibly can.
The other benefit of chemical nutrients is that they tend to grow more potent buds than organic nutrients will. This has to do again with the fact that chemical nutrients push the plant to its maximum potential and give the plant everything it needs to perform like a world-class growing athlete. Basically, if you give it exactly what it wants it will grow as big and strong as it possibly can. Organic nutrients, while safer and closer to what plants get in nature, will not always be able to keep up with the results that heavily engineered chemical nutrients can produce when it comes to yield at harvest time.
Another reason to consider chemical nutrients is that they are suitable for many different types of grow setups, including hydroponics. In fact, if you use hydroponics, then pretty much you’re going to only be using chemical nutrients, unless you find a highly specialized organic nutrient producer who makes nutrients specifically for hydroponics and organic hydroponics. Otherwise, chemical nutrients are the best option for hydroponics, aeroponics, and aquaponics.
The main downside to chemical nutrients is that, because they are so heavily engineered and so far from what nature itself usually provides for plants, you have to watch pH balances much more closely. It is very easy to burn plants with chemical nutrients. And you don’t have that problem with organic nutrients. As a result, if you are used to using organic nutrients and you switch to chemical nutrients, definitely make sure to watch pH carefully and perform freshwater flushes regularly.
The other thing to keep in mind about chemical nutrients is that they can build up in the soil or growing medium that you were using overtime and burn your plants even when you are feeding them the right amount of nutrients on your growing schedule. Chemical nutrient build up is one of the most common problems in many beginner growers’ grow setups. It is such a sneaky problem because you can follow all of the instructions perfectly and still burn your plants if inorganic nutrients are building up in the soil.
That’s why I recommend treating each plant individually and using growing schedules as a guideline. By paying close attention to each plant by itself and performing regular flushes of pure freshwater, you can avoid nutrient build up or at least recognize the signs early on.
Pro tip: In general, if you are using chemical nutrients, make sure that you are flushing your plants often. Many professional growers even flush their plants before every feeding in order to make sure that their cannabis plants start with zero nutrients in the growing medium before absorbing the allotted amount of nutrients for each feeding session. That gives growers greater control over how much nutrients the plants are absorbing.
Health consequences of inorganic fertilizers
Probably the most compelling reason to use organic nutrients is related to the health consequences of using inorganic nutrients. Inorganic fertilizers and related chemicals can be toxic to humans when smoked or ingested.
Depending on how the buds you grow are consumed, you may ingest these toxins and experience negative health effects from them over time. Especially if you will be sharing the produce of your garden with others, it is safest to use organic nutrients supplements.
That being said, organic nutrients are chemicals too. Smoking any nutrients is not only unpleasant and tastes bad, but it can be bad for your health. Whether you are using organic or inorganic nutrients, I recommend performing a full flush for at least a week before harvest in order to clean out all of the nutrients from your buds.
4. What ratios of nutrients should you give them at each stage?
Seedling stage: when to introduce nutrients to seedlings
You don’t need to give seedlings any nutrients for at least the first week after germination. This is due to the fact that seeds are little packets of energy that contain everything a young plant needs to grow for about a week.
So during the seedling stage, avoid feeding them if possible. Also, seedlings are very delicate and too many nutrients can harm them in the early weeks. That harm will not be easily repaired and could kill them off immediately. Keeping in mind that seedlings are super easy to burn, if you do decide to feed them within the first week, make sure that you dilute your vegetative formula to around one-fifth the regular dosage.
After one week, you can begin to feed seedlings a small amount of nutrients once the first set of serrated leaves have emerged. One-fifth the normal feeding dosage is usually a good rule of thumb at first, and slowly ramp up the nutrient level over the course of weeks 2 and 3. Reference your feeding schedule, but make sure to watch each plant carefully to see how they respond to each feeding.
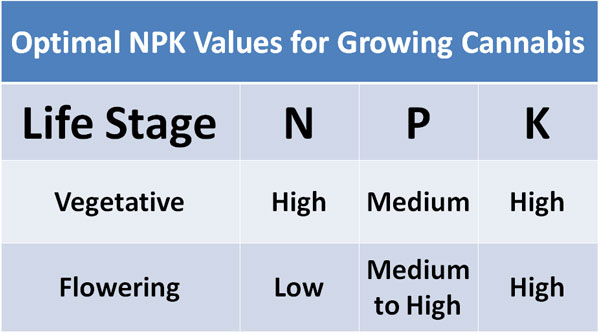
Vegetative stage: nutrients for the vegetative stage
The vegetative stage is the time when a plant puts on around two-thirds of its overall height and size. It generally spans from week 2 to week 10, or week 8 for autoflowers. Potassium should be about 1/2 to 1/3 part that of nitrogen, and phosphorus should be about half of nitrogen.
The way growers write this is N6, K3, P2. Begin feeding nutrients when the plant has opened its first set of serrated leaves. It’s a good idea to add some Cal Mag during the vegetative phase to prevent Cal Mag deficiency, a common problem in marijuana grows.
Flowering stage: nutrients for the flowering stage
N0, K5, P4. During the flowering stage, you want to force the plants to put all of their energy into producing larger flowers and prevent them from putting energy into growing the leaves and stalks taller or bigger. As a result you don’t want to give the plant too much nitrogen in order to force it to rely on its own stores of nitrogen.
Forcing the plant to rely on its own stores of nitrogen puts the plant into a starvation mode. That starvation mode triggers the plant to do its best to produce large flowers before it passes away. Nitrogen should be reduced to zero, but you went to give the plant more potassium and phosphorus in order to complement the elevated amount of nitrogen that will be coming from the plant’s own stores.
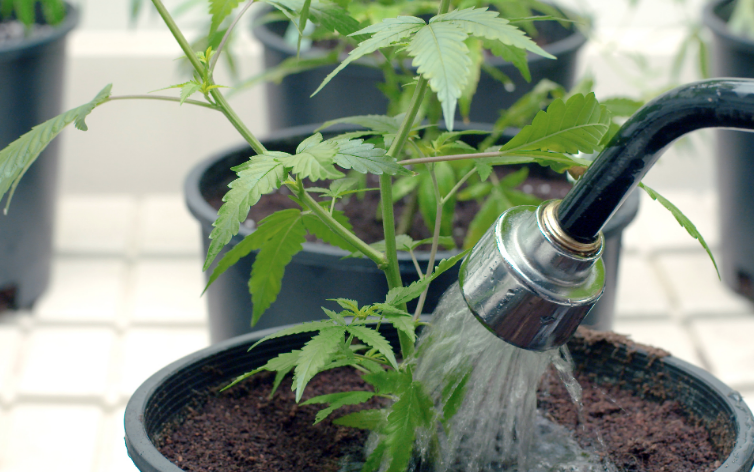
6. How to feed marijuana plants
What order to mix nutrients: How to mix nutrient solution
The first thing to know about marijuana feeding is that you need to give all of the nutrients in the plan at the same time. I do not recommend that you mix separate batches of each nutrient during one feeding because you want to make sure that the entire batch of nutrients is pH balanced properly. Also you want to make sure that the plants receive all of the nutrients from the entire batch at the same time in order to avoid unevenly distributing nutrients or washing away previously delivered nutrients, which is what would happen if they were applied sequentially.
So, when you are mixing a batch of nutrients for feeding, mix the nutrients in the following order: first Cal Mag, second micro, third grow, fourth Boomer. Again these are nutrients from Floragro Brand. That being said, this order of adding nutrients should be followed for all brands unless otherwise noted. The reason you need to follow the above order when mixing nutrients is that if you do not follow the order you could cause nutrient lockout.
When adding nutrients to the water, make sure to stir after adding each nutrient. This ensures that each nutrient mixes evenly into the water before the next one is added. The water should be at room temperature before mixing.
And whatever you do, do not premix you’re feeding solution, because doing so can cause the nutrients to interact with each other, change in unpredictable ways, and change the pH balance of the solution over time. It’s always best to mix each batch of solution fresh for every feeding.
Balancing pH of nutrient solution
Finally, when every nutrient has been added, test the pH of the water and add pH Up or pH Down depending on how you need to balance the pH of the solution. Always test the pH after adding all the nutrients. Do not test the pH of the water before the nutrients are added because this will not give you an accurate reading of the pH balance of your feeding solution. The nutrients themselves will change the pH of the water and you must account for this by testing the pH after adding all of them.
One thing to keep in mind about pH is that the pH should be slightly different for each feeding. It doesn’t really matter what the difference is exactly but just make sure that the pH is slightly different than the previous feeding so that the plant gets a chance to absorb different nutrients at different pH levels.
General, the pH the feeding solution should be no lower than 5.5 and no higher than 6.3. For the vegetative stage, you want to aim for a slightly higher pH level of between 6.0 and at most 6.5. For the flowering stage you want the pH to be a little bit on the lower end between 5.5 and 6.1.
Within those ranges, each feeding should vary slightly. If the previous feeding had a pH of 6.1, the next feeding can be 5.8. You get the idea. Just make sure to write down everything you do, including the pH of each feeding, so that you can change up the pH for each feeding.
One final note about pH balancing: always make sure that your pH pen is calibrated properly before use. If you have a cheap pH pen, then there is a good chance that it will wear out after two or three grow cycles. Always make sure to test the pH pen before using it to measure the pH of your solution. And if your pH pen and wears out it is well worth upgrading to a lab grade pH pen. That way you will never make the mistake of thinking that you have properly fed your cannabis plants when you haven’t.
Feeding differences for each growth medium
Soil:
Because soil tends to have it’s own pH levels balanced and nutrients already included, feeding plants that are growing in soil will require a little bit of a different technique then when using other crowing mediums.
First of all, you don’t need to worry about cal-mag as much with soil. That’s because soil will carry trace nutrients of cal mag and most of the time the amount of cal-mag in the soil will be enough for the plant to stay healthy. Old soil might need to be supplemented with Cal Mag, but if you use fresh soil, you probably won’t need to worry about it.
Second, you might not even need to feed your plants for the first month. That’s because seedlings tend to be very resilient and able to use the NKP already in the potting soil you get from the store. Only after about a month will those nutrients need to be supplemented with fertilizers.
Third, make sure to test the soil’s pH. And when feeding plants in soil, make sure your pH levels are between 6.0 and 6.8 in order to compensate for the soil’s natural pH levels. Also, you probably only need to feed the plants every two to three days. That is because soil will naturally retain nutrients and supply the plant with nutrients at a different rate than other growing mediums
Along the same lines, make sure that you break up each feed with at least one plain watering since soil drains differently than other types of growing mediums. Not every soil drains evenly and as a result nutrients can build up in different pockets within the soil. That can damage the plants if it causes nutrient build-up within those pockets. As a result it’s always best to take the safe option when using chemical nutrients and flush the plants out with at least one plain water feeding between each nutrient feeding.
Coco coir:
Coco coir is undoubtedly the most popular growing medium for marijuana growers. This has to do with the fact that it is perfect for plants to root out in. The roots are allowed to spread at an even rate across all parts of the soil. That has to do with the fact that Coco coir offers little resistance to roots and has great aeration qualities.
For similar reasons, coco coir drains very evenly compared to soil. That is another reason why growers love it. Coco coir drains evenly and completely so you know that when you flush Coco coir that all of the nutrients have come out. There will be no pockets of nutrients left in the Coco coir that could cause nutrient build up and nutrient lockout.
Just make sure that when you are using coco coir that you feed your plants every day. Again, because coco coir drains so well and roots grow so easily throughout the medium, your plants will probably absorb all of the nutrients that you give them daily and leave no nutrients behind. Therefore, when growing in coco coir, always try to feed your plants more often than you would if growing in soil.
5. First set of true leaves turning yellow? Signs of nutrient imbalances

First signs of supplement imbalances
It’s very easy to overfeed or under feed cannabis plants. Unfortunately, overfeeding in particular is very harmful to cannabis plants. It is easy to over feed cannabis plants and give them nutrient burn as a result.
Nutrient burn often manifests as a yellowing and dying the tips of the leaves or along the edges of the leaves. If you notice the signs of nutrient burn, immediately flush the soil of your plants with fresh water. That will remove all of the excess fertilizer from the soil and give your plants a chance to correct the balance of their nutrient intake to stop the burn. For at least one feeding after the flush, only feed the plants with either freshwater with no nutrients or a diluted amount of nutrients in order to give your plants a chance to recover from the nutrient burn.
There are a couple of signs to watch out for when looking for nutrient burn:
- As mentioned above nutrient burn often starts with a yellowing or browning of the tips of leaves.
- You may also notice that leaves begin to droop.
- The edges of the leaves might also no longer be straight and the edges may begin to yellow as well.
- In some cases the tips of the leaves will also be upturned.
- You might also noticed brown spots and an irregular leaf shape or dimension.
Keep in mind that it is normal for leaves to turn yellow during the late flowering stage when you are no longer giving them nitrogen or nutrients at all. Also, remember to continually test the pH levels of the water you’re giving to your plants in order to avoid nutrient lockout.
What is Nutrient Lockout?
Nutrient lockout occurs when a plant is no longer able to ingest the nutrients in the soil. This can happen for several reasons. The most common reasons are overfeeding and imbalanced pH levels that prevent plants from absorbing nutrients.
Remember, plants require a certain pH level in order to be able to absorb nutrients. If the pH level is off, the plants will be unable to absorb nutrients through their roots. They will look weak and flimsy with stunted growth. If the plants appear flacid or droopy, check the pH balance before feeding them again.
Any yellowing or curling of the leaves could also indicate that the plant is experiencing nutrient lockout caused by nutrient burn. When a plant has absorbed too many nutrients, it will naturally stop absorbing further nutrients if it can. That means that while the plant is trying to get rid of the excess nutrients already in its system, it is no longer replacing those nutrients, which can cause the plant to take in too few nutrients after it avoids nutrient burn.
Just as with a nutrient burn, the best way to prevent or treat nutrient lockout is to flush with freshwater for one or two feeding cycles and then make sure to properly balance pH levels during your next feed. Check to make sure that your pH meter is properly calibrated.
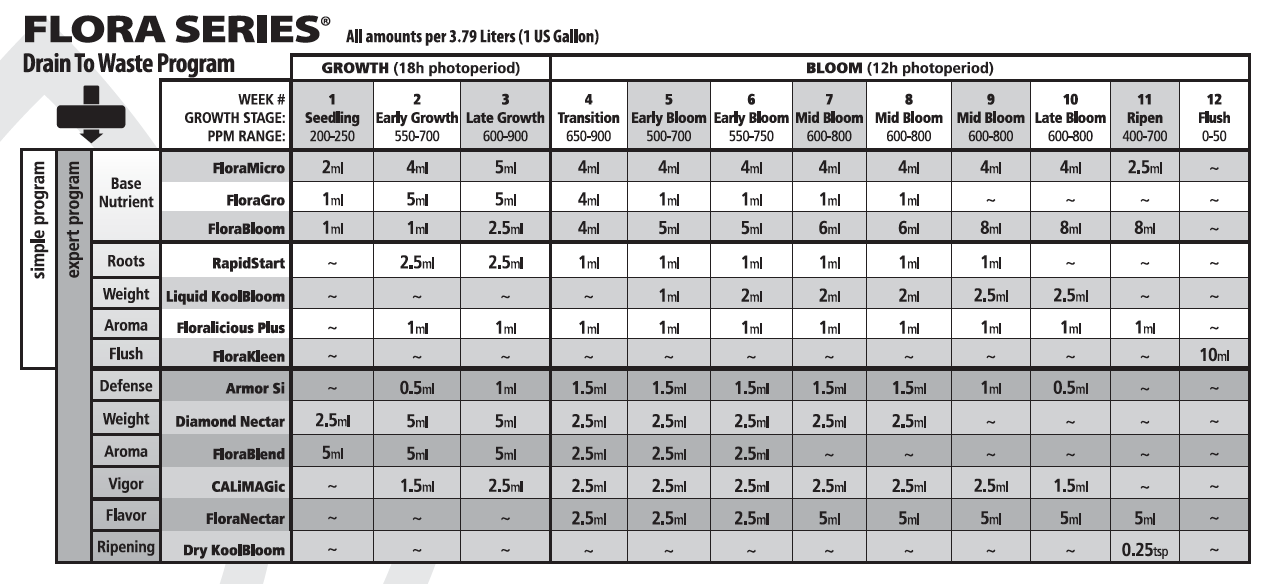
Simple Photoperiod Feeding Schedule
N0, K5, P4. During the flowering stage, you want to force the plants to put all of their energy into producing larger flowers and prevent them from putting energy into growing the leaves and stalks taller or bigger. As a result you don’t want to give the plant too much nitrogen in order to force it to rely on its own stores of nitrogen.
Forcing the plant to rely on its own stores of nitrogen puts the plant into a starvation mode. That starvation mode triggers the plant to do its best to produce large flowers before it passes away. Nitrogen should be reduced to zero, but you went to give the plant more potassium and phosphorus in order to complement the elevated amount of nitrogen that will be coming from the plant’s own stores.
Conclusion
When growing marijuana one of the most confusing parts of learning the growing process is figuring out a nutrient schedule that will work for you. The above nutrient schedule is specifically for autoflowers and uses a specific brand of growing medium and growing nutrients. But it should be enough to get you started.
It’s a good idea to pay attention to each plant specifically and learn to notice the signs of nutrient burn and other nutrient deficiencies. Each plant will grow slightly differently depending on where in your grow tent you position it and according to differences in feeding or aeration. Therefore, while schedules are helpful it’s very important to not be dependent on a schedule to know how to take care of your plants.
Once you have found a basic nutrient solution and feeding schedule that works for you, feel free to branch out and try different types of nutrients as well as organic and chemical nutrients. Also, many growers find that plants grow differently depending on the environment they are in. As a result some plants can often benefit from having a boost in mycorrhizae and bacteria or a little bit of extra help with rooting from hormones. It all depends on your style and growing environment.
Hopefully the above guide to growing marijuana gave you everything you need to get started and cleared up any mysteries or questions that you had. The world of marijuana nutrients is vast and always changing so make sure to keep learning and check back regularly for updates and more information.
Free How-To Guide For Growing Marijuana
Subscribe to our newsletter to receive a free downloadable e-book version of our complete how-to guide for growing marijuana. Don't worry! We won't spam you or send you useless emails.
Connect with us on social media: